


This guide will walk you through the configuration process for syncing summarized entries from your Shopify store to Xero using SyncTools. By the end of this guide, you’ll be able to easily set up summarized sync for your store’s financial data, ensuring automated accounting and easy reconciliation.
Step 1: Sign In to Your SyncTools Account #
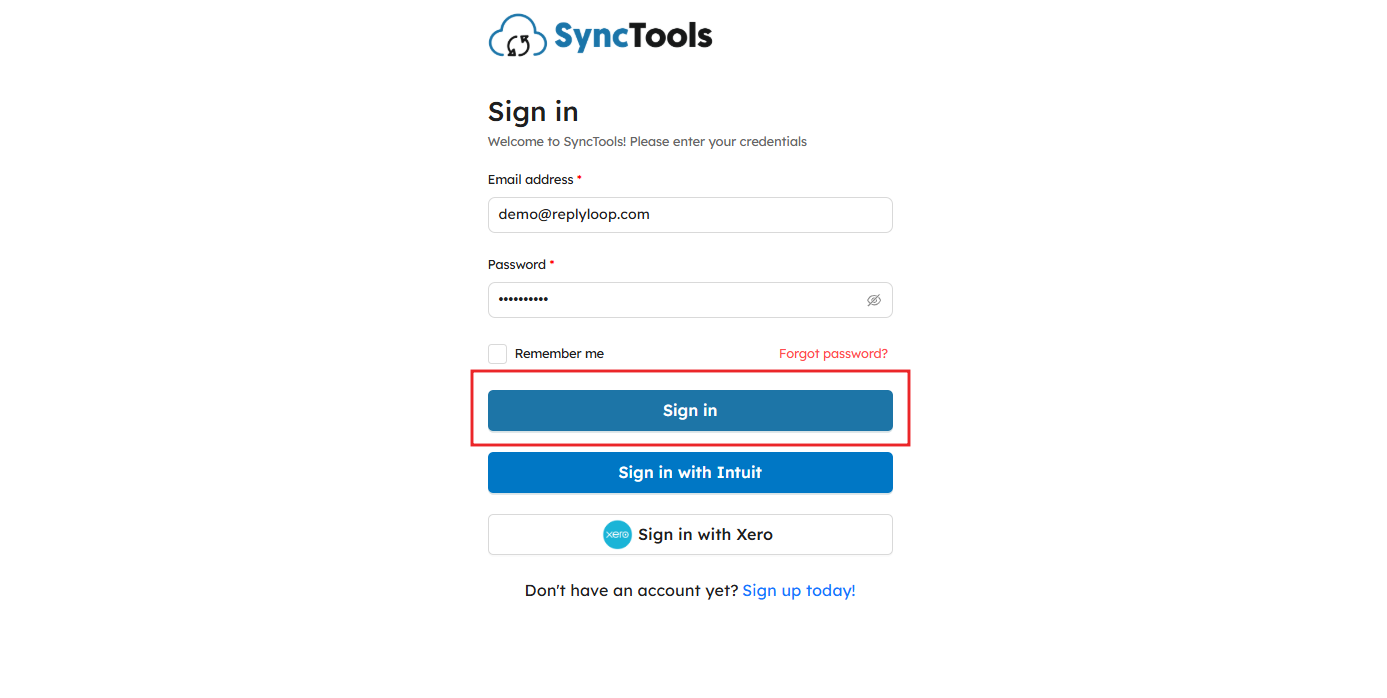
- Visit the SyncTools login page and enter your registered email and password to sign in.
- If you’re a new user, you can sign up for an account by clicking on Sign up today.
Step 2: Navigate to the SyncTools Dashboard #
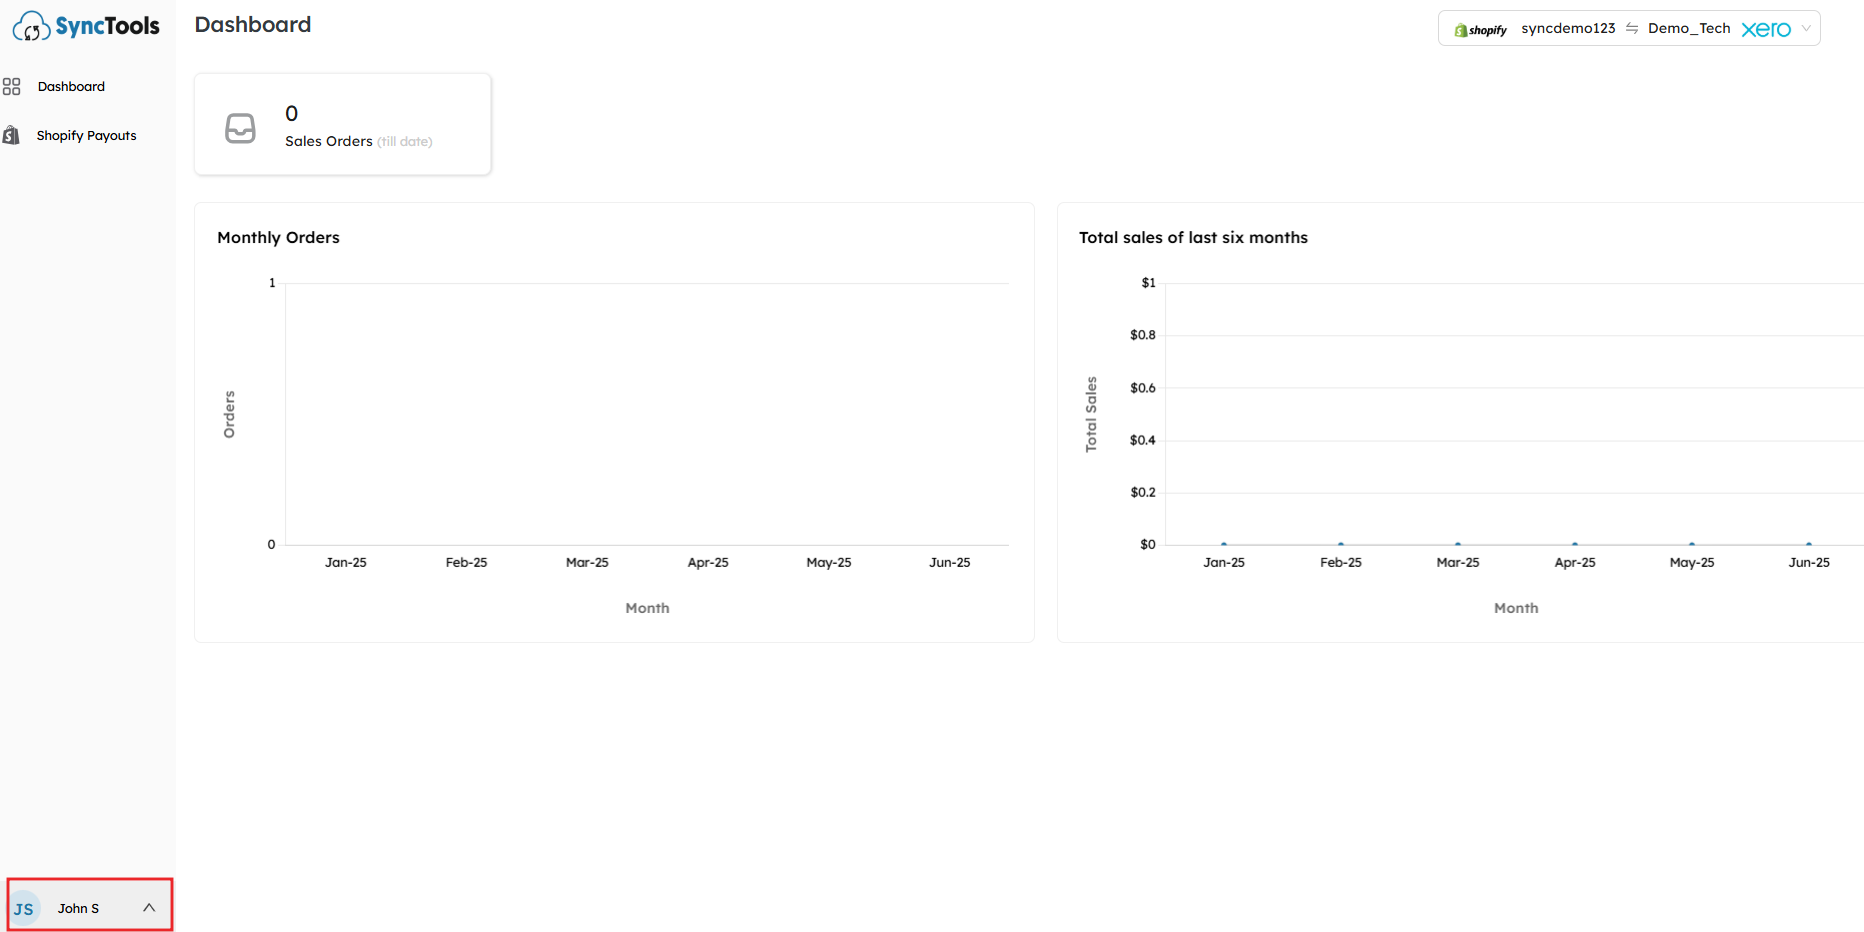
- Once logged in, you’ll be directed to your SyncTools Dashboard where you can view your Shopify store data and Xero account details.
- From here, you’ll see key metrics such as monthly orders and sales totals.
Step 3: Go To Settings #
- In the bottom left corner, click on your profile (e.g., John S) to open the user menu.
- From the dropdown, select Settings.
Step 4: Choose Synchronization Options #
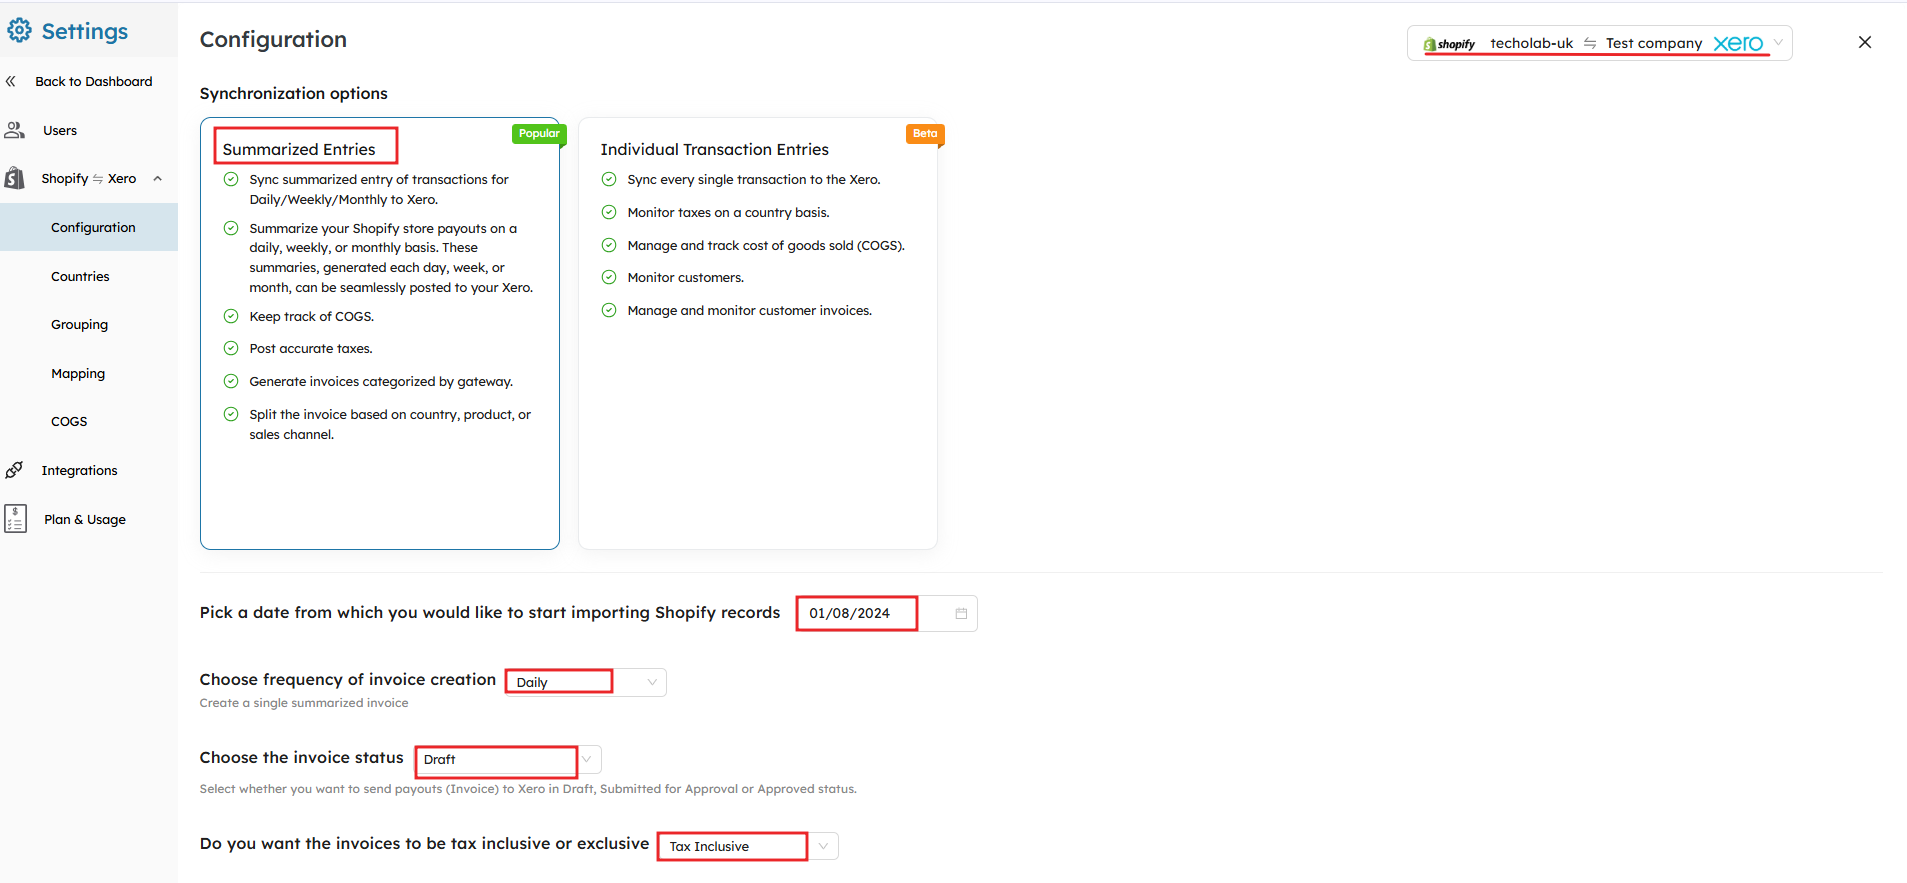
Select Summarized Entries #
- In the Configuration section, you will be prompted to choose between Summarized Entries and Individual Transaction Entries.
- Select Summarized Entries for the streamlined syncing of Shopify data on a daily, weekly, or monthly basis.
 #
#
Choose Invoice Creation Frequency #
- Under the Choose frequency of invoice creation section, select how often you want to create summarized invoices. Lets say, choose daily if you want your summarised entries to sync on a daily basis.
Pick the start date for sync #
- Choose the date from which you want to start importing Shopify records. This will define when SyncTools begins syncing your transactions to Xero.
Choose Invoice Status how you want it in Xero #
Select the Invoice Status that suits your accounting workflow:
- Draft: Draft invoices will be created in Xero.
- Submitted for Approval: The invoice will be submitted for approval in Xero.
- Approved: Automatically approve the invoice in Xero.
Select whether you want Tax inclusive or Exclusive invoices #
- Determine whether the invoices should be Tax Inclusive or Exclusive.
Step 5: Select Your Operating and Registered Countries #
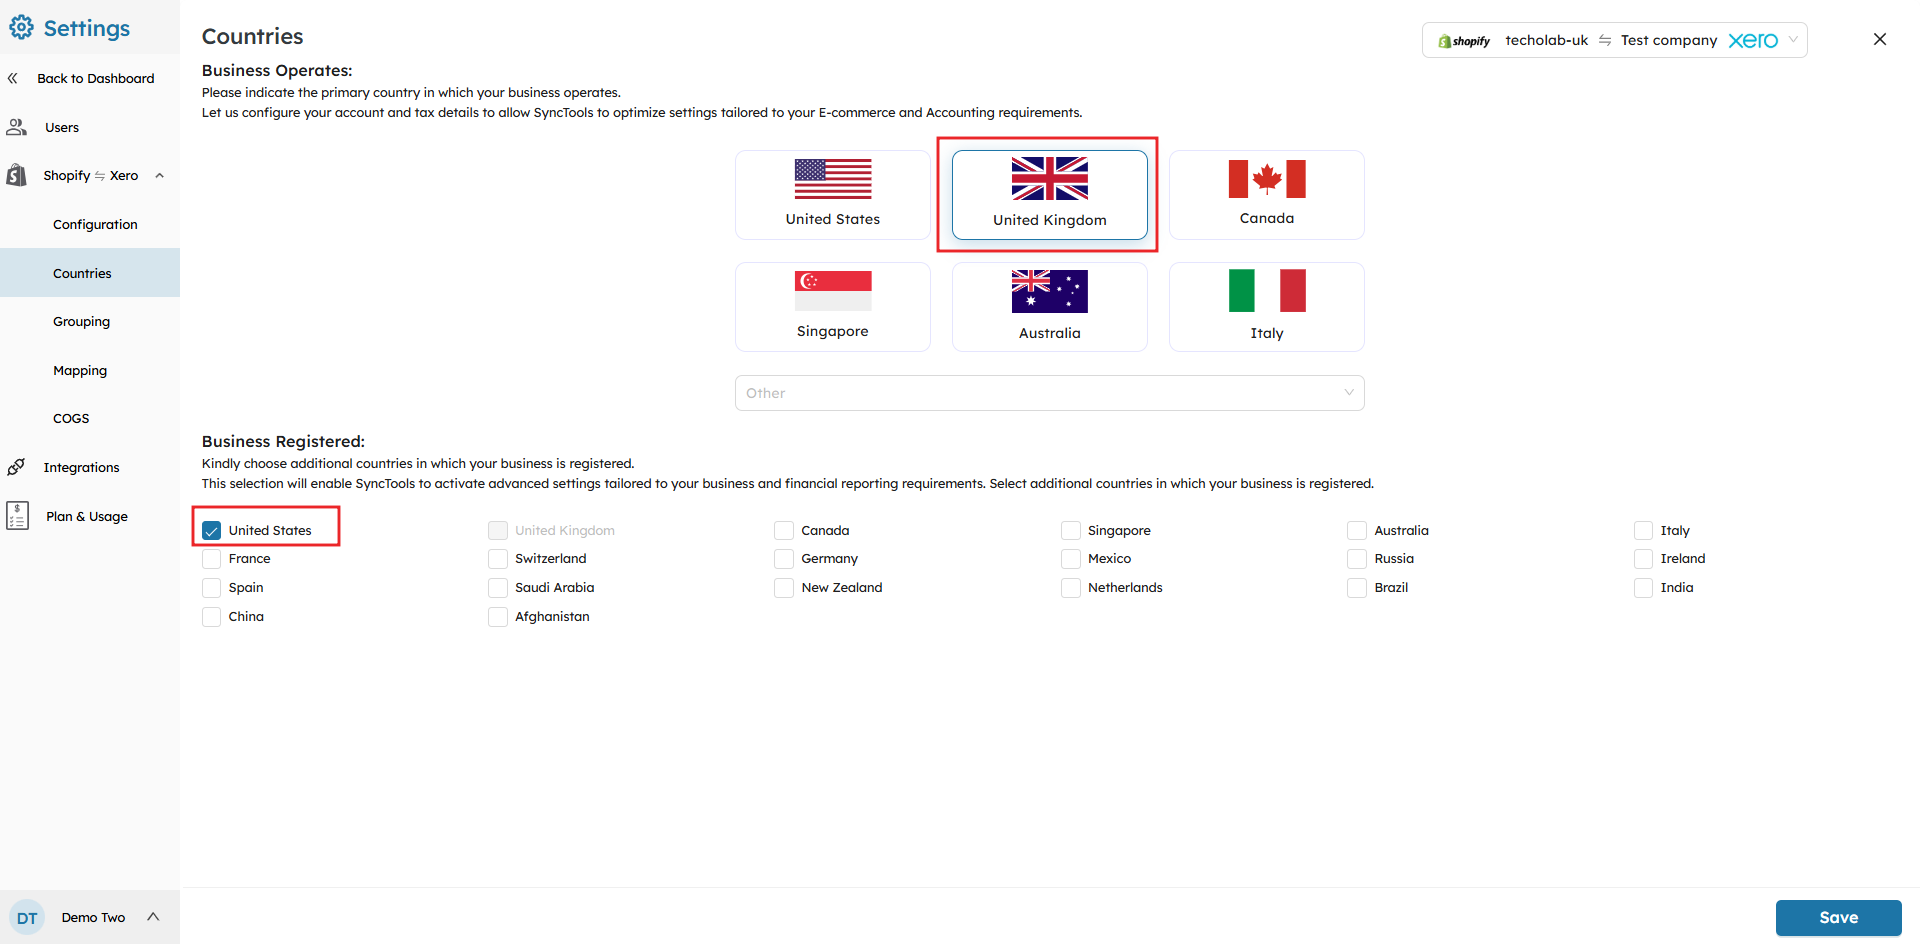
- Choose the operating country (where your business operates) and any additional countries where your business is registered.
Step 6: Set Up Grouping Preferences #
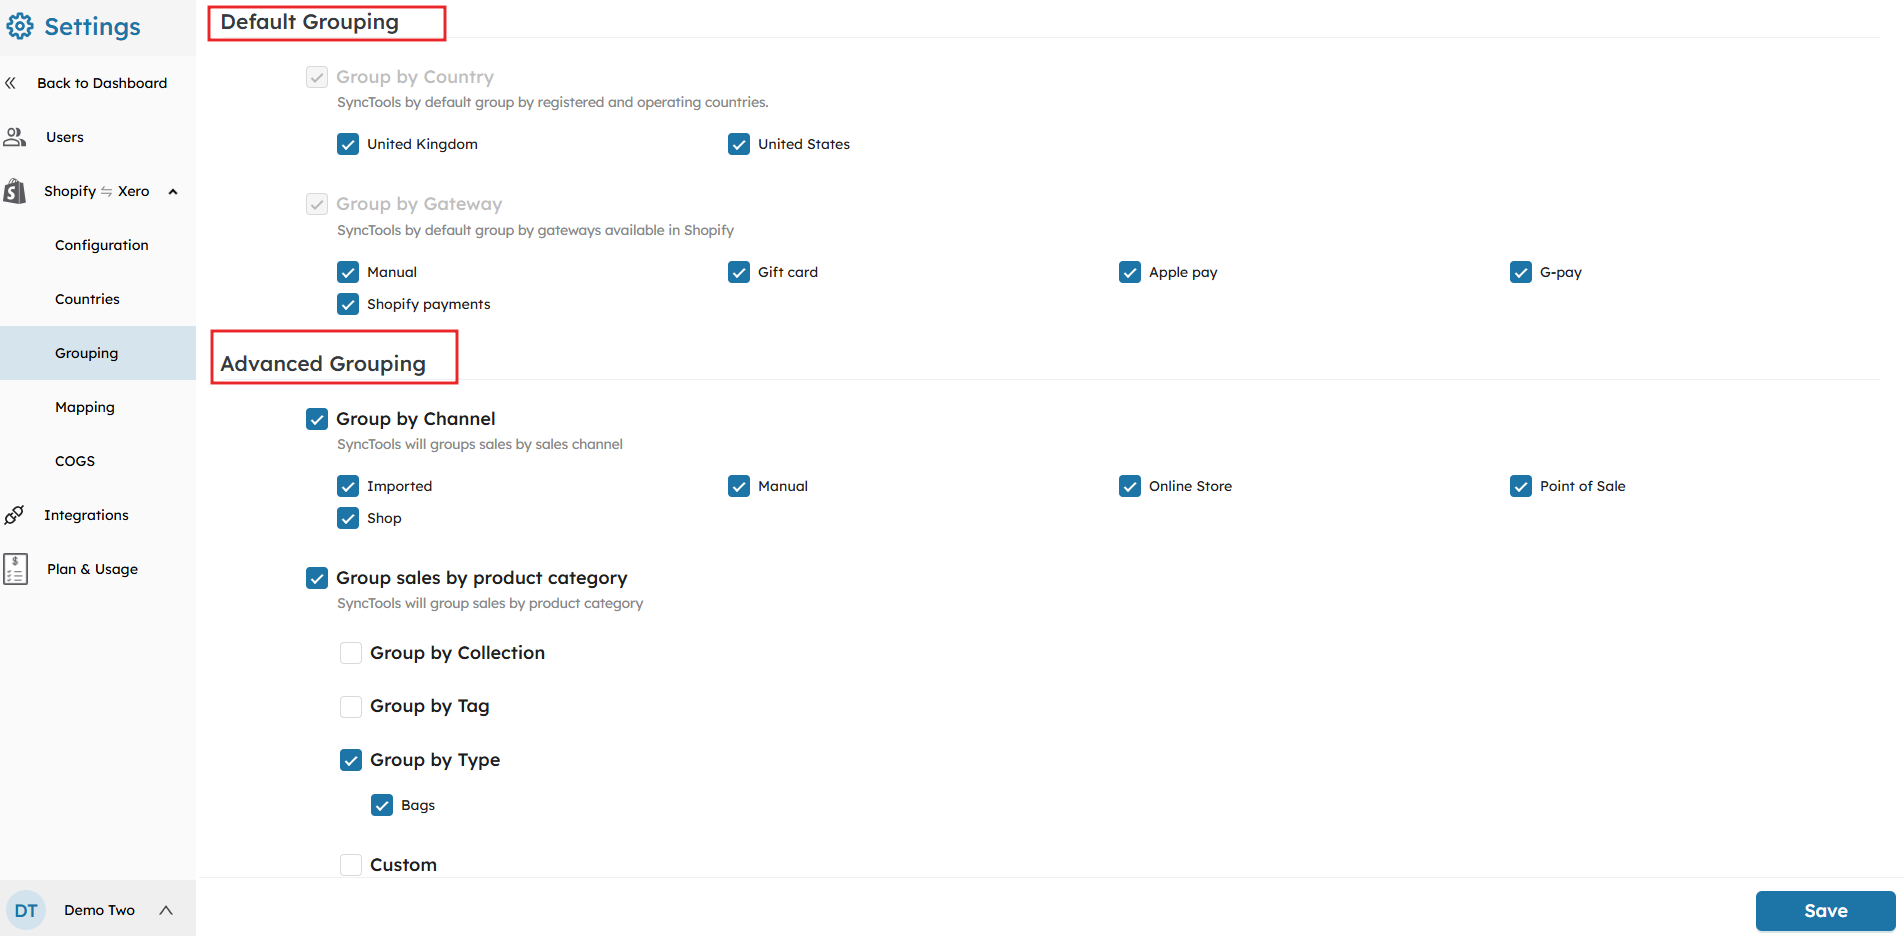
Default and Advanced Grouping #
- Choose the grouping options for transactions. SyncTools offers both Default Grouping (by country or gateway) and Advanced Grouping (by sales channel, product category, etc.).
- Default Grouping: Group by country or gateway.
- Advanced Grouping: Group by channel (online, imported, manual), product categories, etc.
Tip: Use Advanced Grouping for more granular financial reporting.
🔔 Note: For a detailed guide on how the Grouping Feature works, check out our documentation here.
Step 7: Map Your Shopify Data to Xero Accounts #
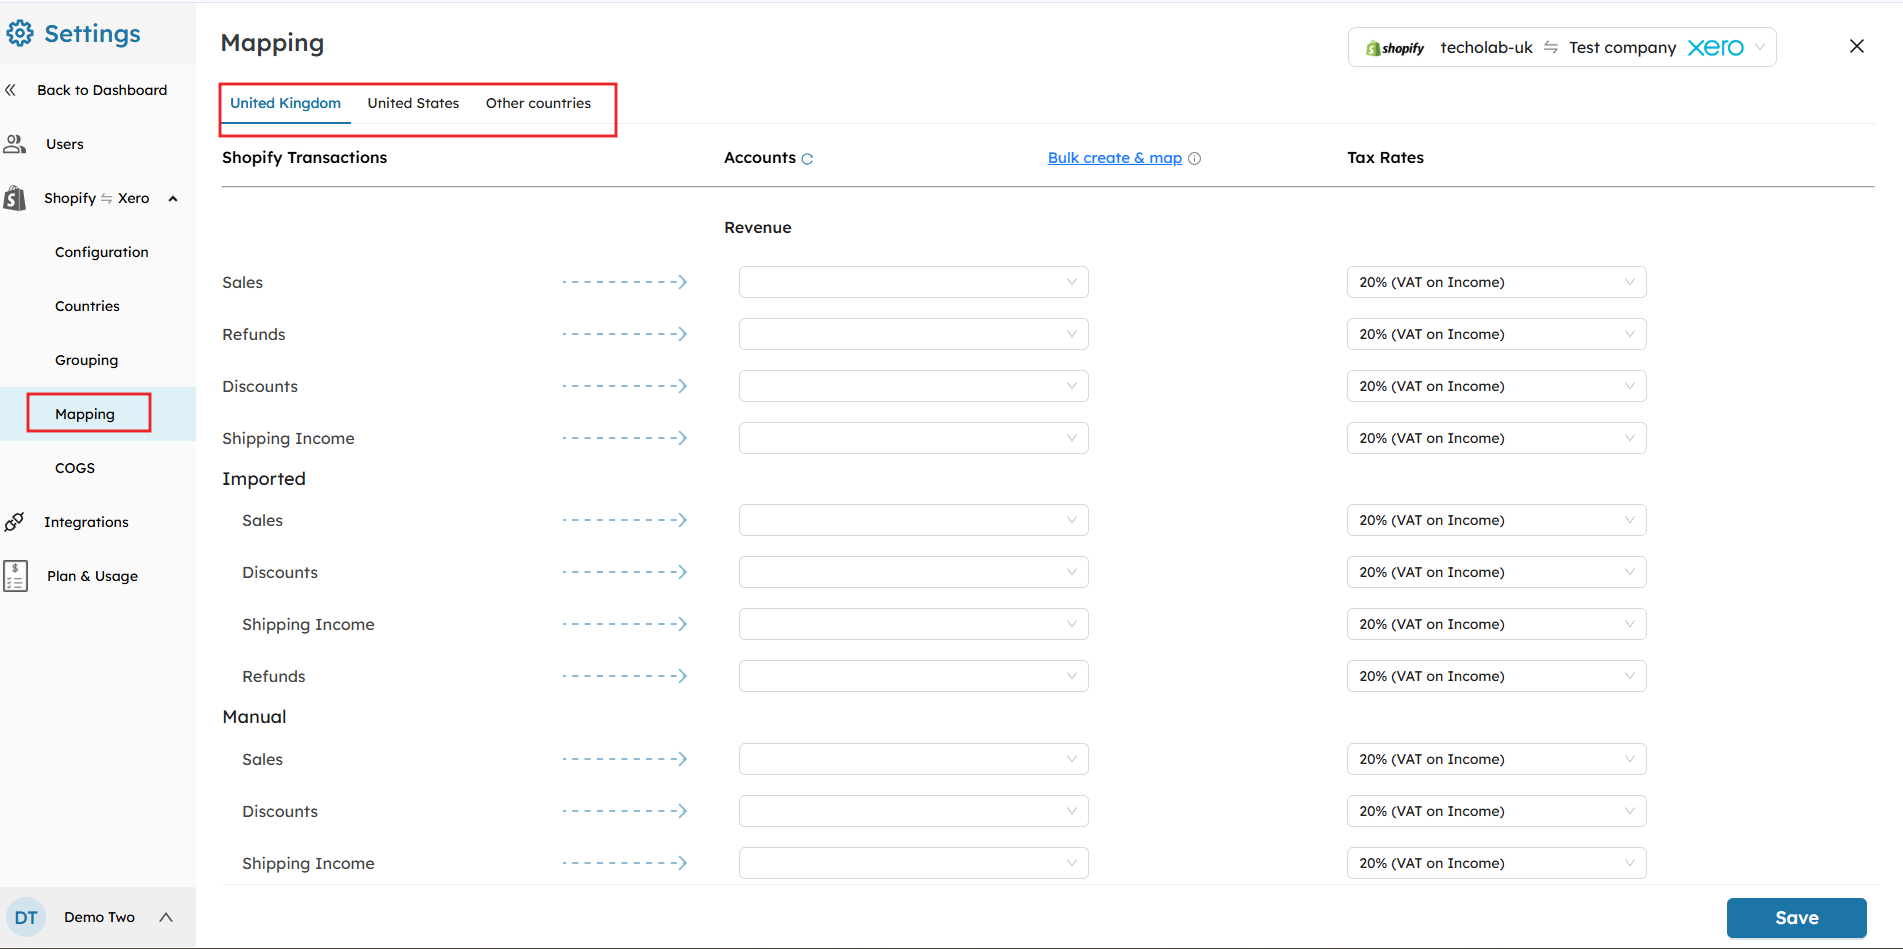
- In the Mapping section, you need to map your Shopify transactions (sales, refunds, shipping income, etc.) to the corresponding Xero accounts.
- For example, map Shopify Sales to the appropriate Xero Revenue account.
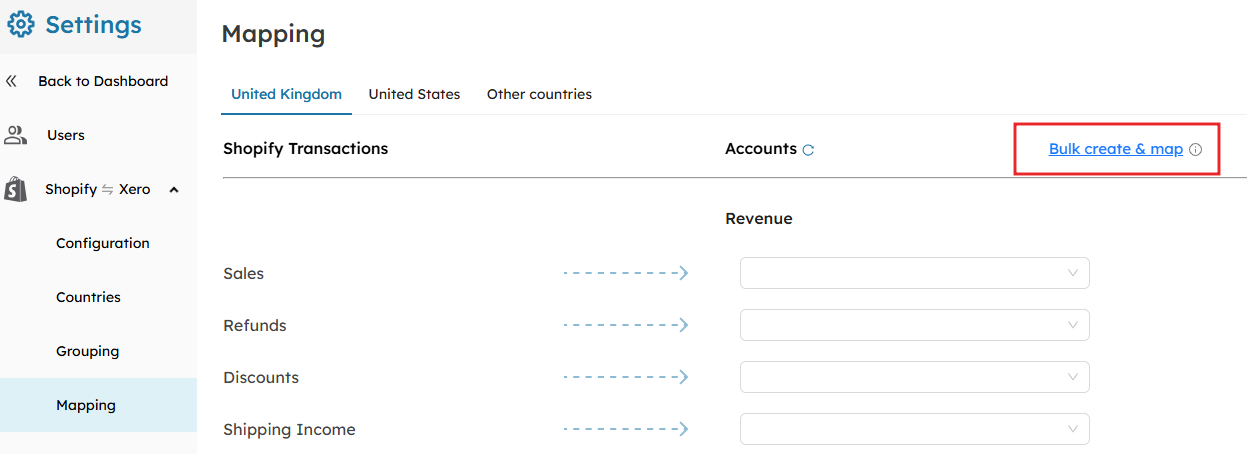
- You can use the Bulk Create & Map button to map multiple transactions at once.
Step 8: Review and Confirm Mappings #
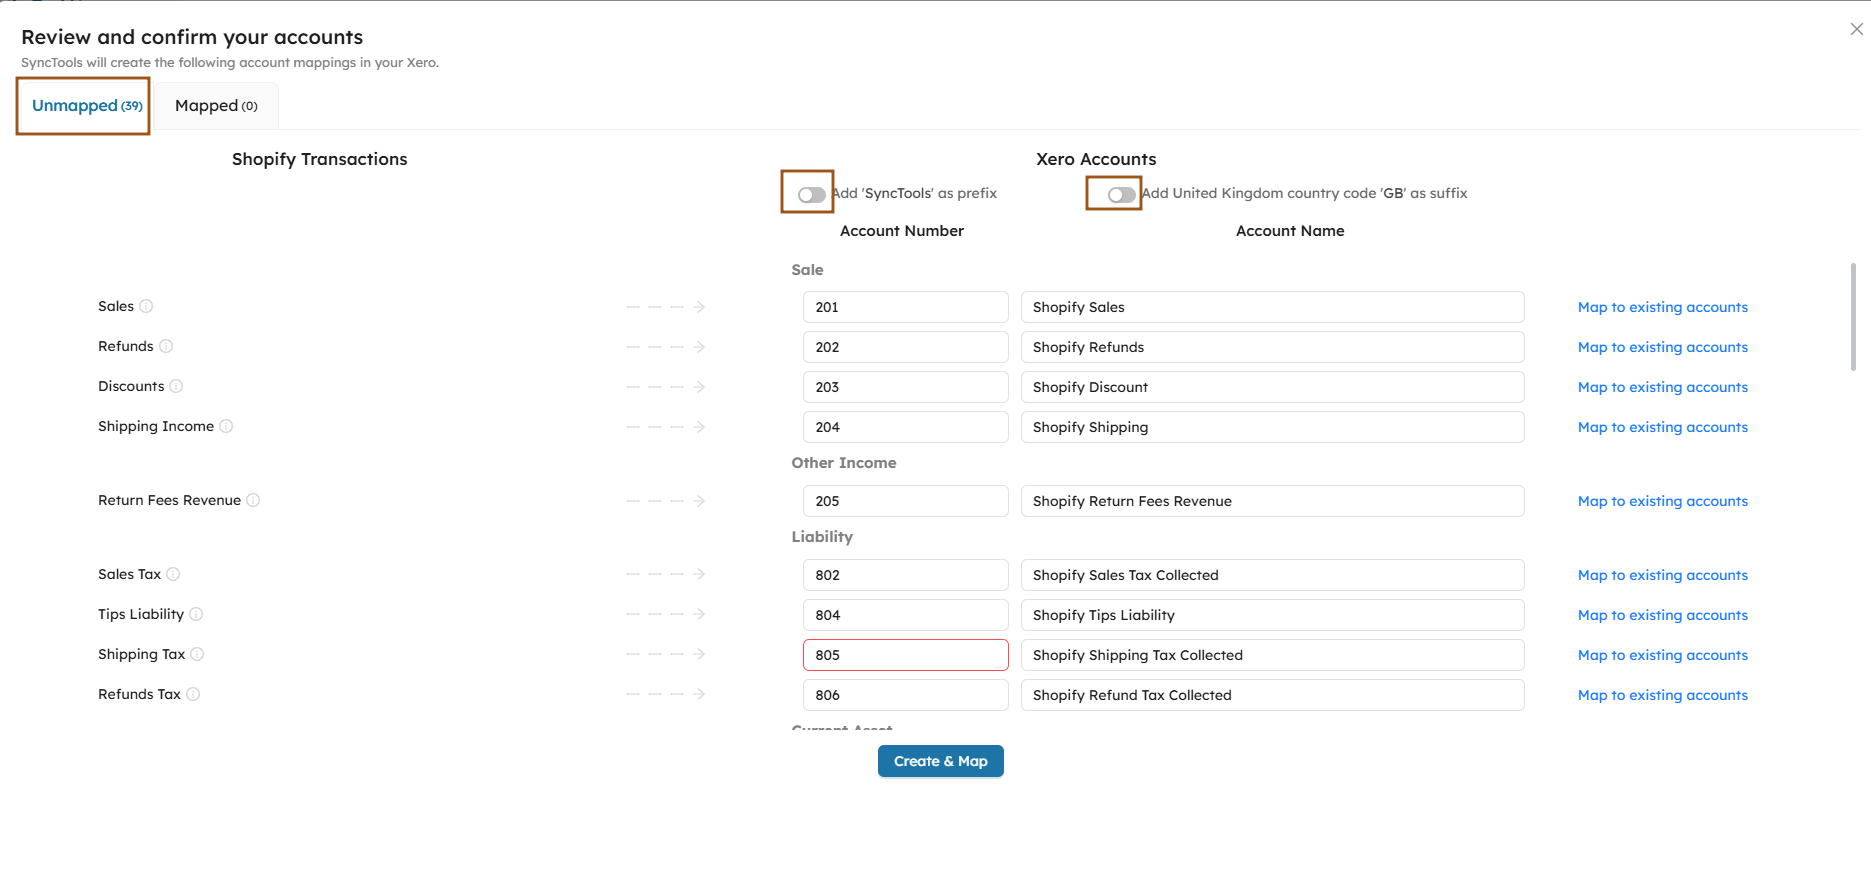
- Once you’ve completed the mappings, review and confirm your choices.
- Ensure that all Shopify transactions are mapped correctly to your Xero accounts.
Tip: Double-check for any unmapped transactions to avoid errors in your financial records. Additionally, ensure that this step is repeated for each country enabled in the previous step to guarantee a smooth sync.
Step 9: Enable and Configure Cost of Goods Sold (COGS) #
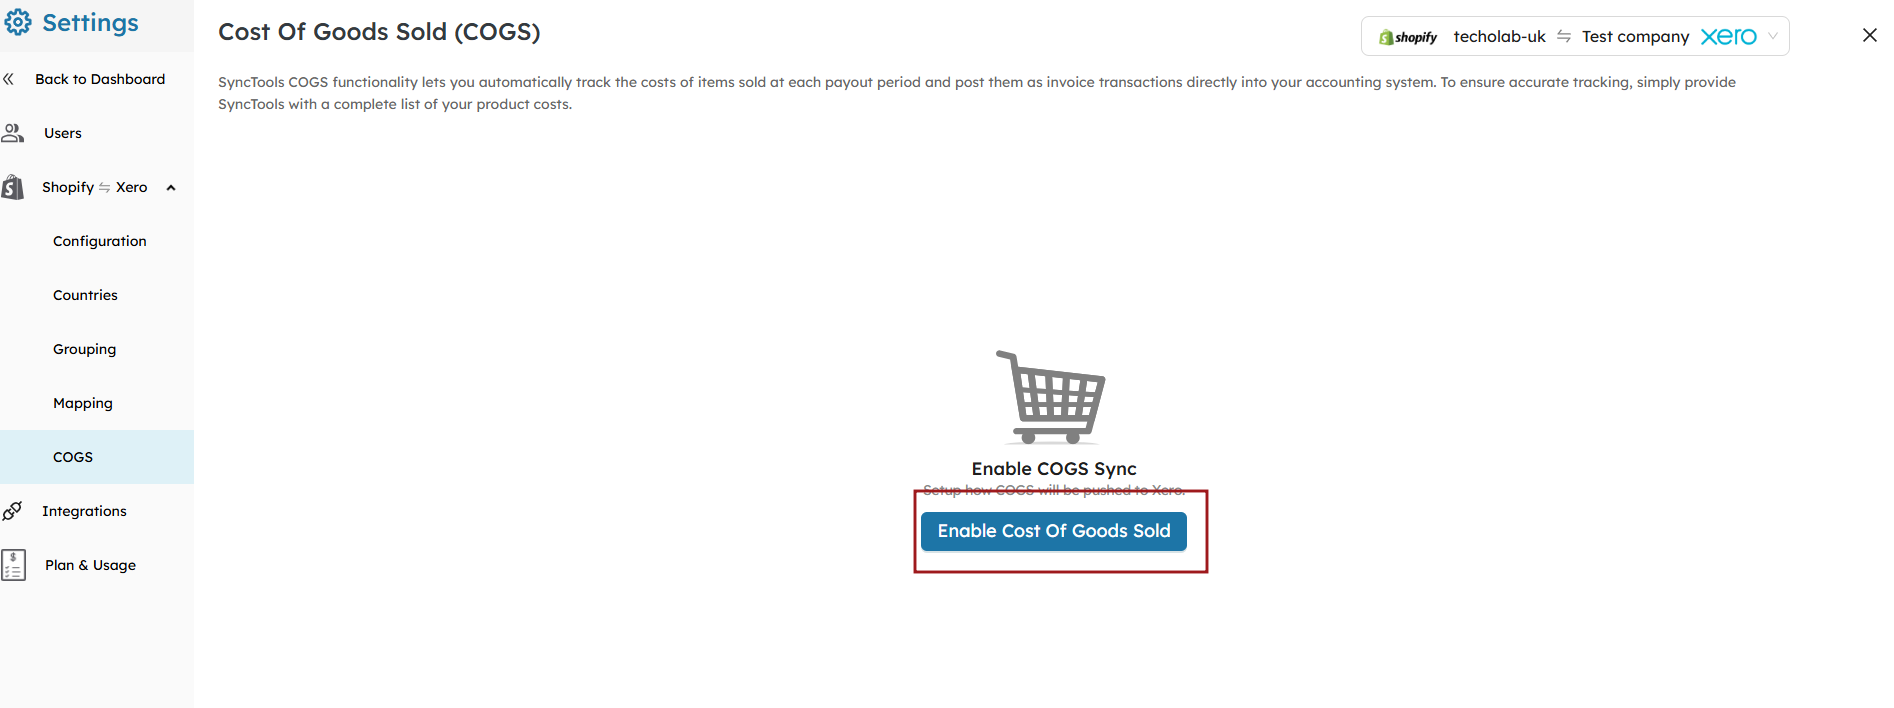
Enable COGS Sync #
To automatically track the cost of products sold at each payout period, enable COGS Sync. This feature will post itemized costs as invoice transactions into your accounting system.
- This ensures accurate tracking of inventory and profitability for each sale.
Click the Enable Cost of Goods Sold button to activate the COGS sync.
Choose Default Accounts for COGS #
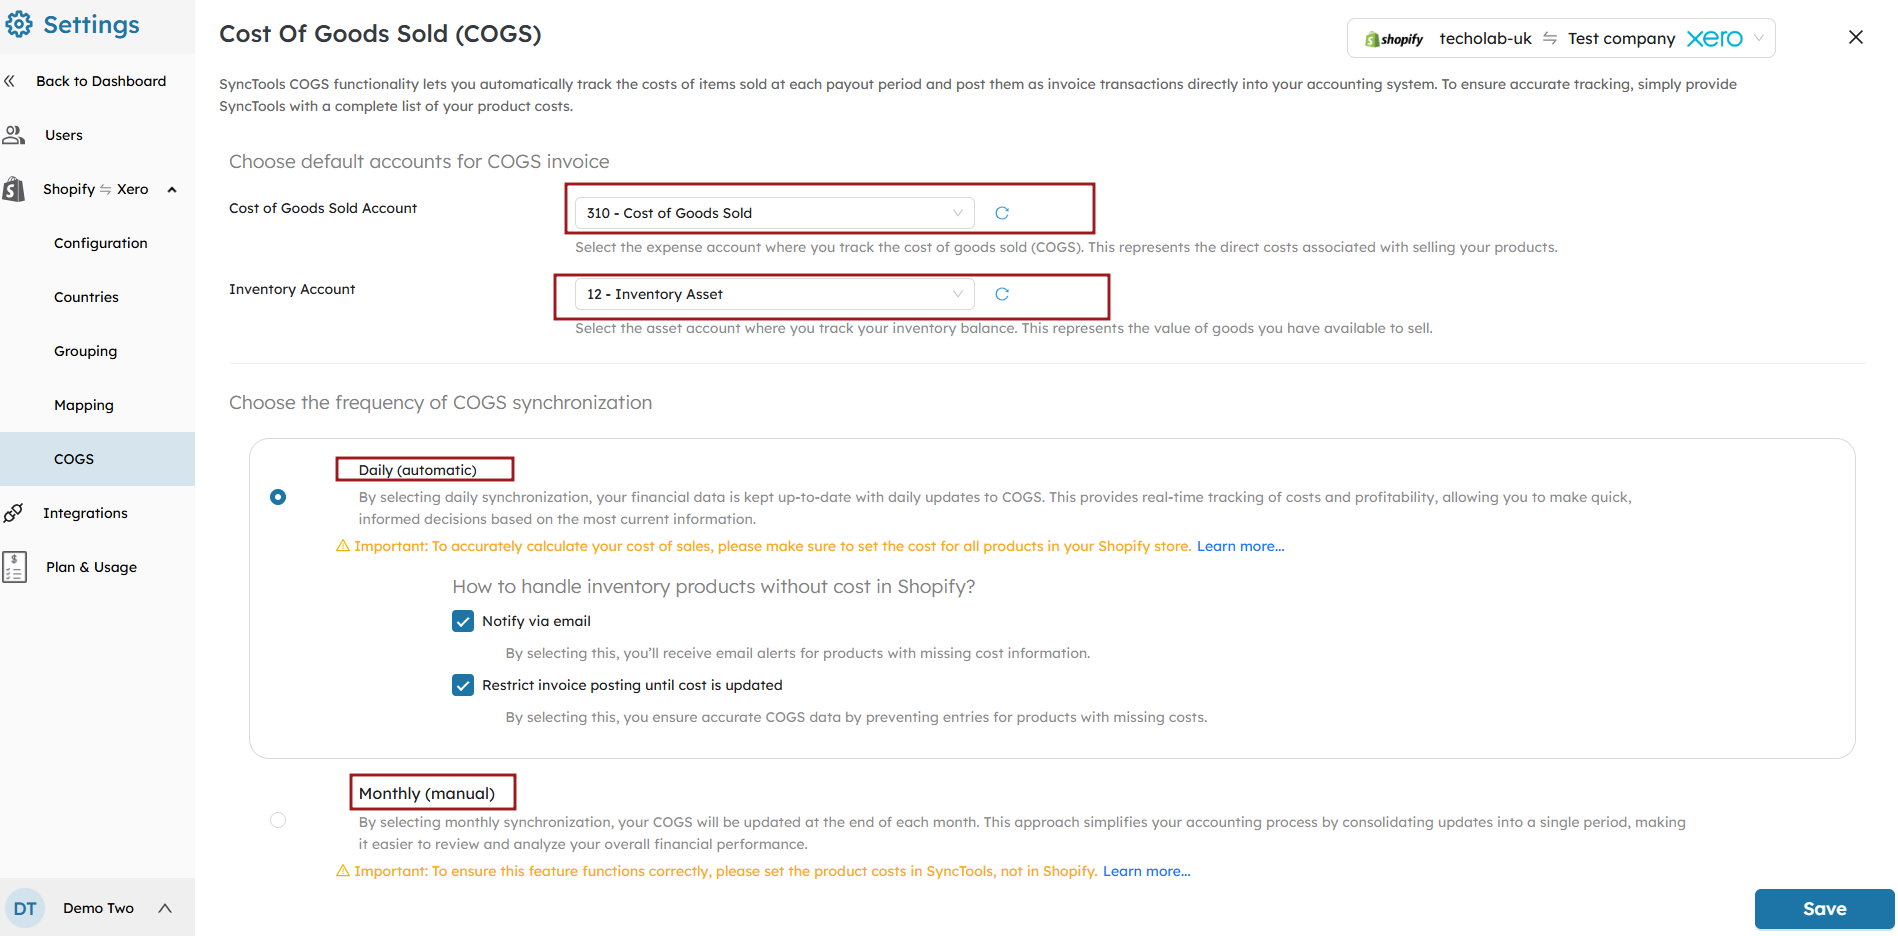
Select the Cost of Goods Sold account and the Inventory account that SyncTools will use to track and sync product costs to Xero.
- The Cost of Goods Sold account records the direct costs associated with products sold.
- The Inventory account keeps track of the value of goods available for sale.
Set Synchronization Frequency #
Choose the frequency for COGS synchronization. You can select either Daily (automatic) or Monthly (manual) synchronization. This determines how frequently your product costs will be updated in Xero.
- Daily synchronization: Keeps your financial data up-to-date with real-time updates.
- Monthly synchronization: Allows you to consolidate updates into a single period for easier financial review.

Step10 : Review the Shopify Payouts and sync in xero #
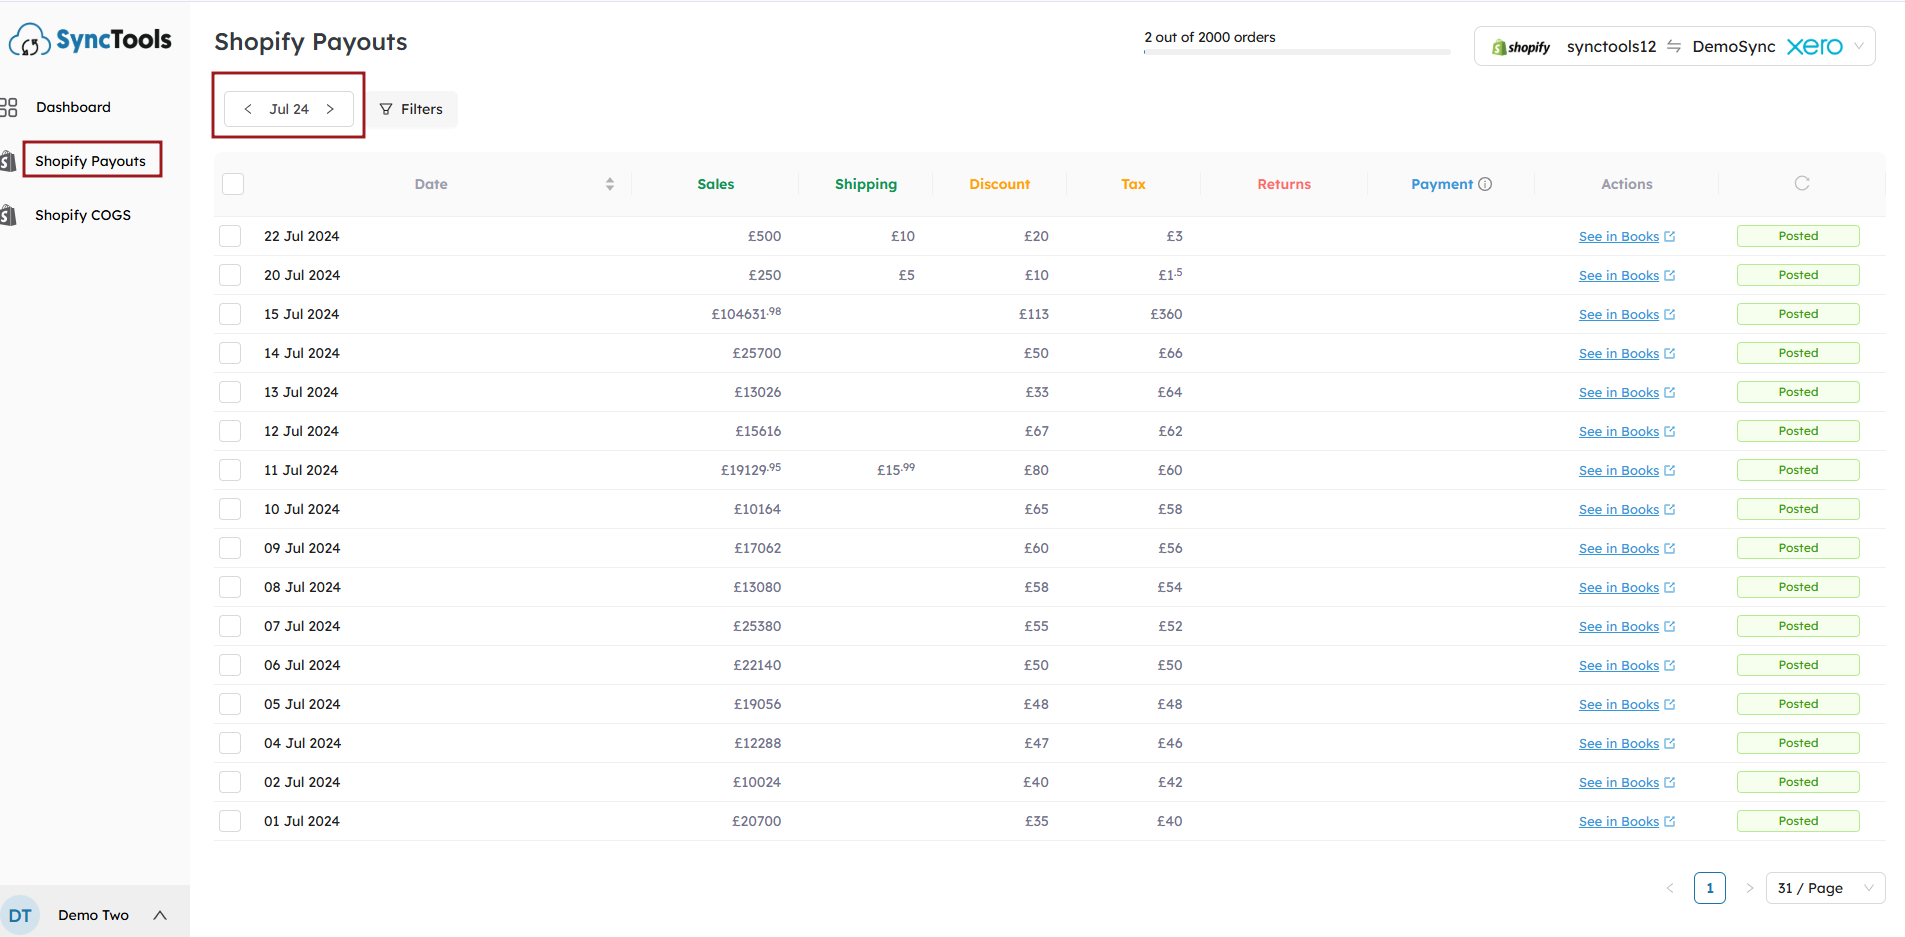
- You’ve now successfully set up your summarized sync between Shopify and Xero using SyncTools. This integration ensures that your Shopify payouts and cost of goods sold are synced seamlessly, saving you time and reducing the risk of manual errors in your accounting.
- Track the monthly breakdown of Shopify payouts. This will give you an overview of your sales, shipping, taxes, and payments made. Ensure that all transactions are being posted correctly to Xero. If not, you can select and post to xero.


