Create an Account for Shopify QuickBooks Integration: #
- Go to the SyncTools site: https://app.synctools.io/sign-in
- Click on “Sign up today!” if you’re a new user or click on “Sign-in” after filling up the details if you’re an existing user.
“Sign up today!” flow : #
-
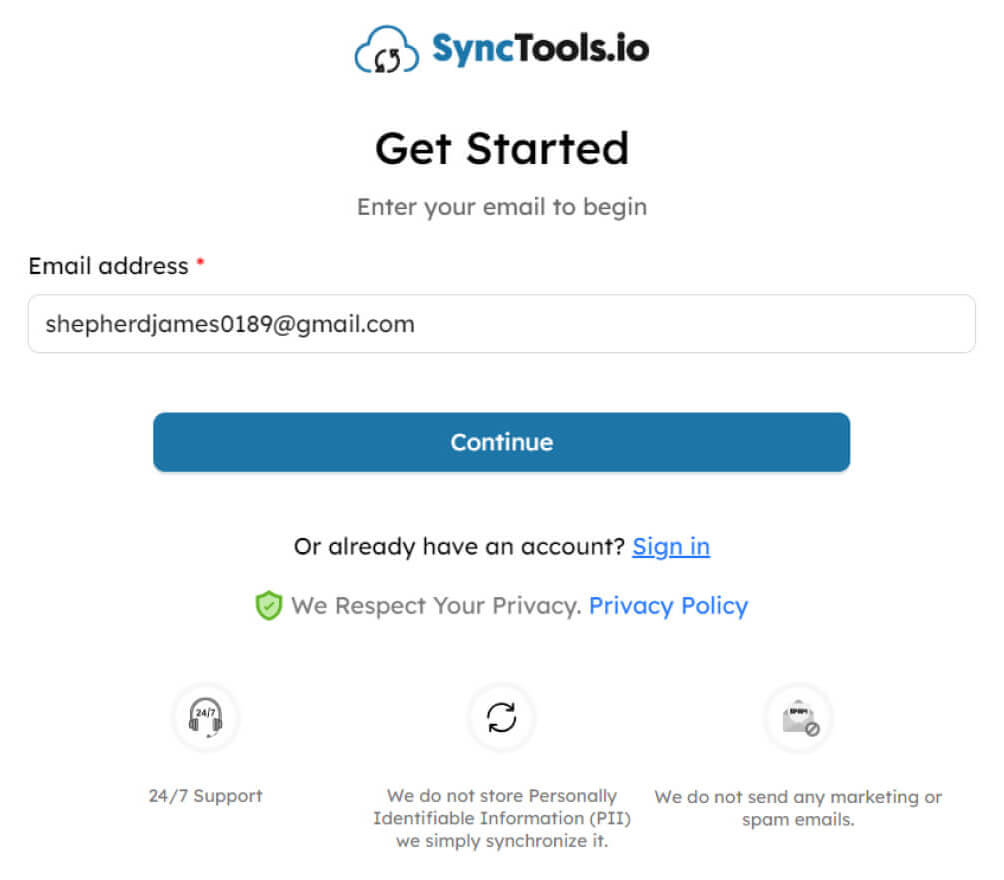
- You’ll be prompted to enter your email address. Type in your email address.
- After entering your email address, click on the “Continue” button.
- Upon completing the registration using your email, you’ll be prompted to input a six-digit code sent to the email address you provided.
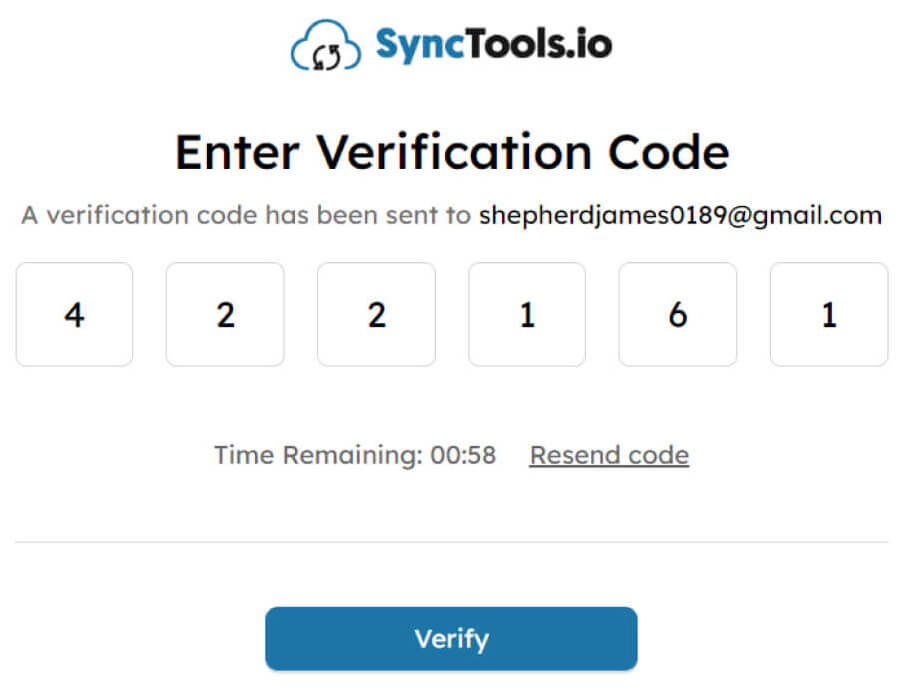
- After entering the code, click on “Verify”.
- You will be redirected to the “Register your Account” page where you will be able to enter all details and set up your password for your account. Remember to use a strong and unique password for your account to ensure its security.
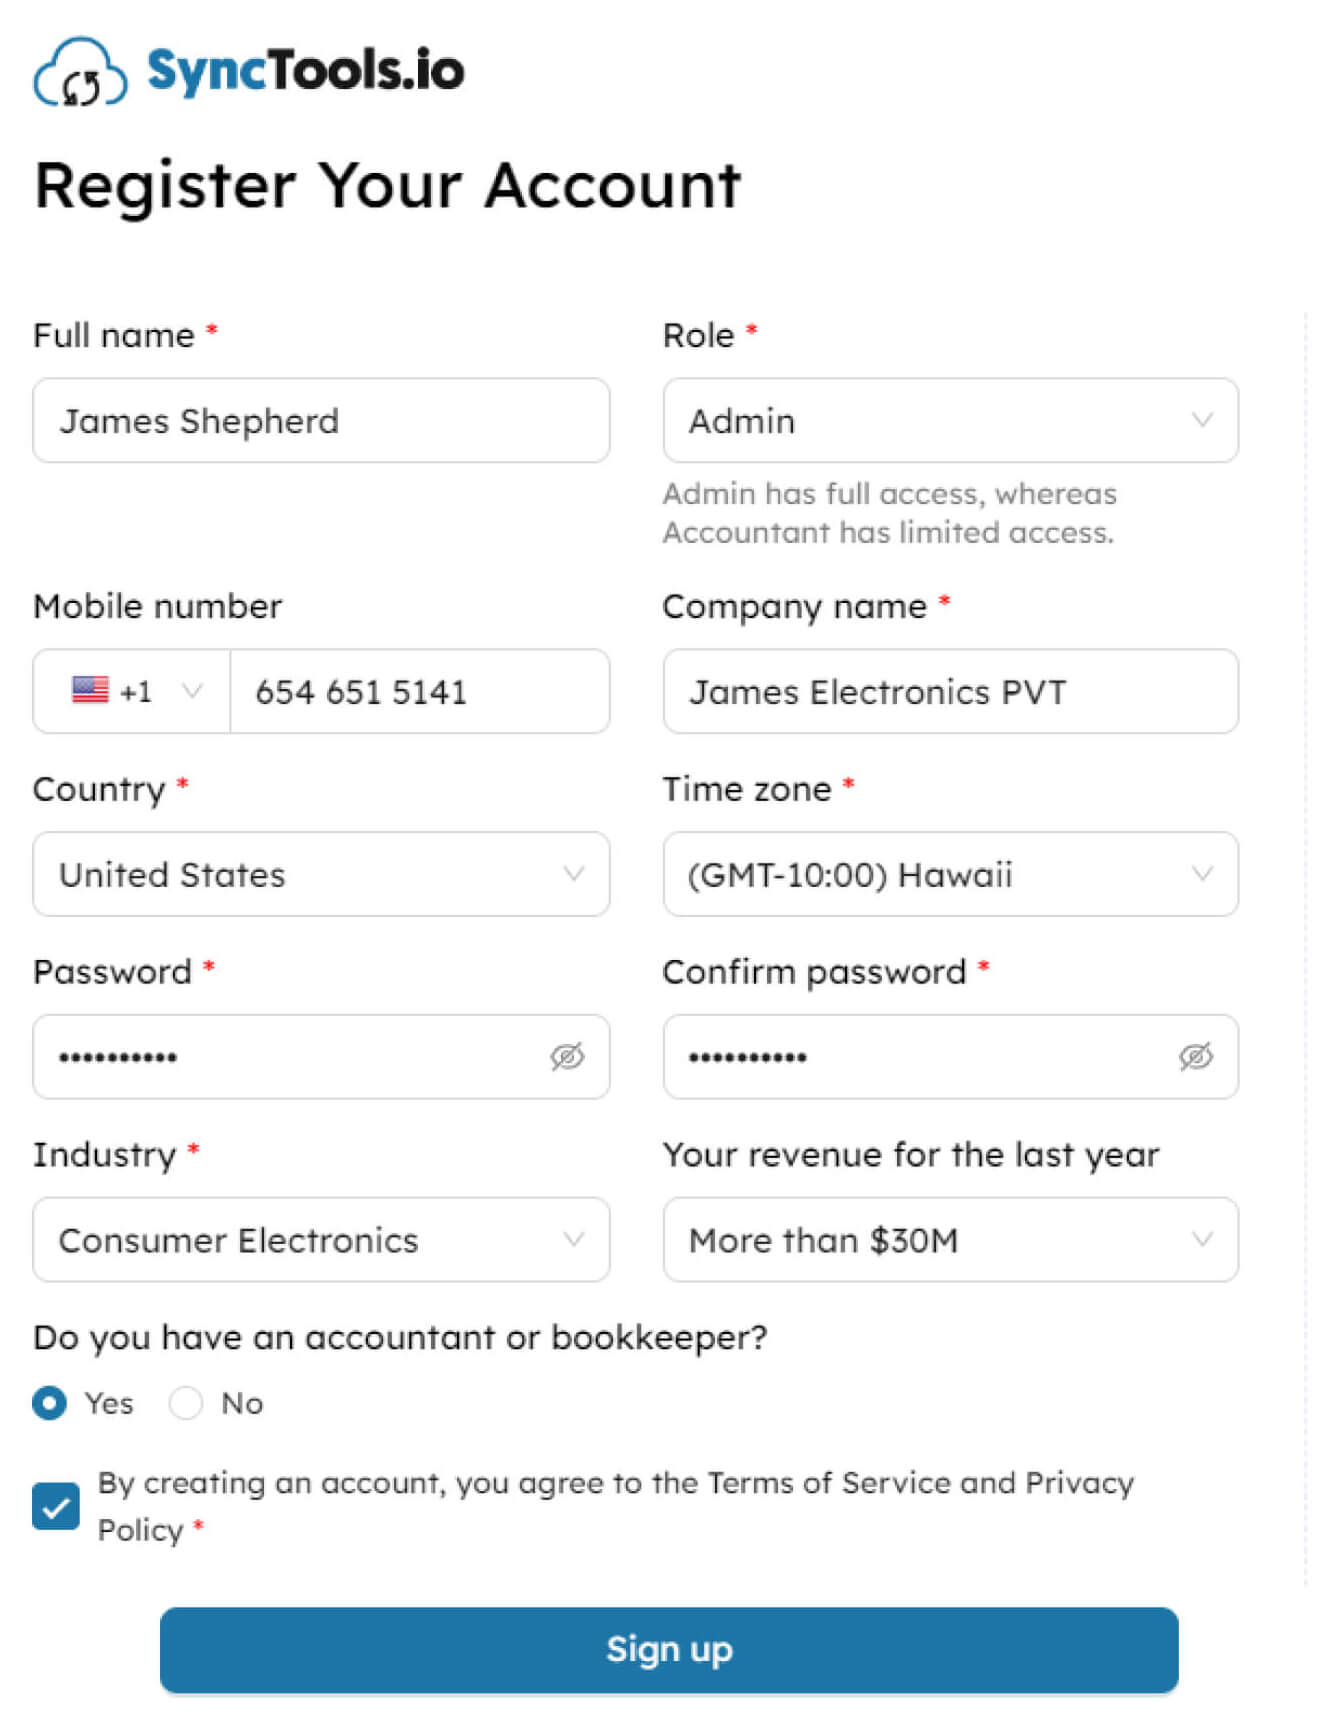
- Enable the “By creating an account, you agree to the Terms of Service and Privacy Policy” checkbox and click on Sign up button.
Invite an Accountant/Book-keeper to SyncTools #
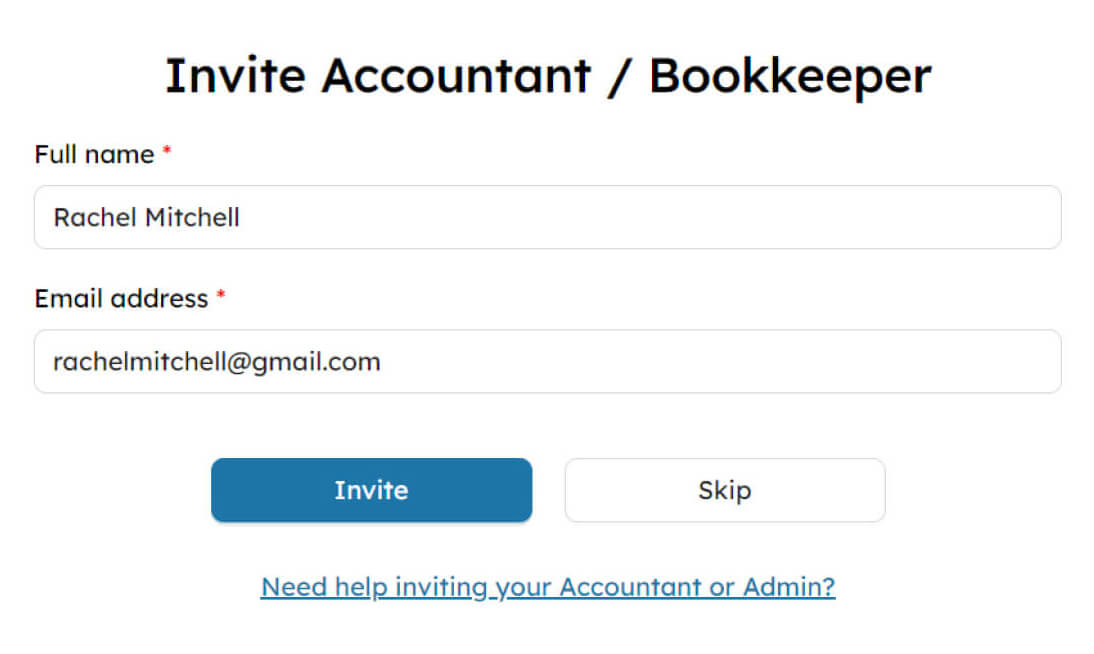
To invite an accountant or bookkeeper to your SyncTools account:
- You’ll be prompted to enter the email address of the accountant or bookkeeper you wish to invite.
- After entering their email address, click on “Invite”.
- Once the invitation is sent, the accountant or bookkeeper will receive an email with instructions on how to access your SyncTools account. Make sure you have their correct email address to ensure they receive the invitation.
- Or Skip this step if it is not required.
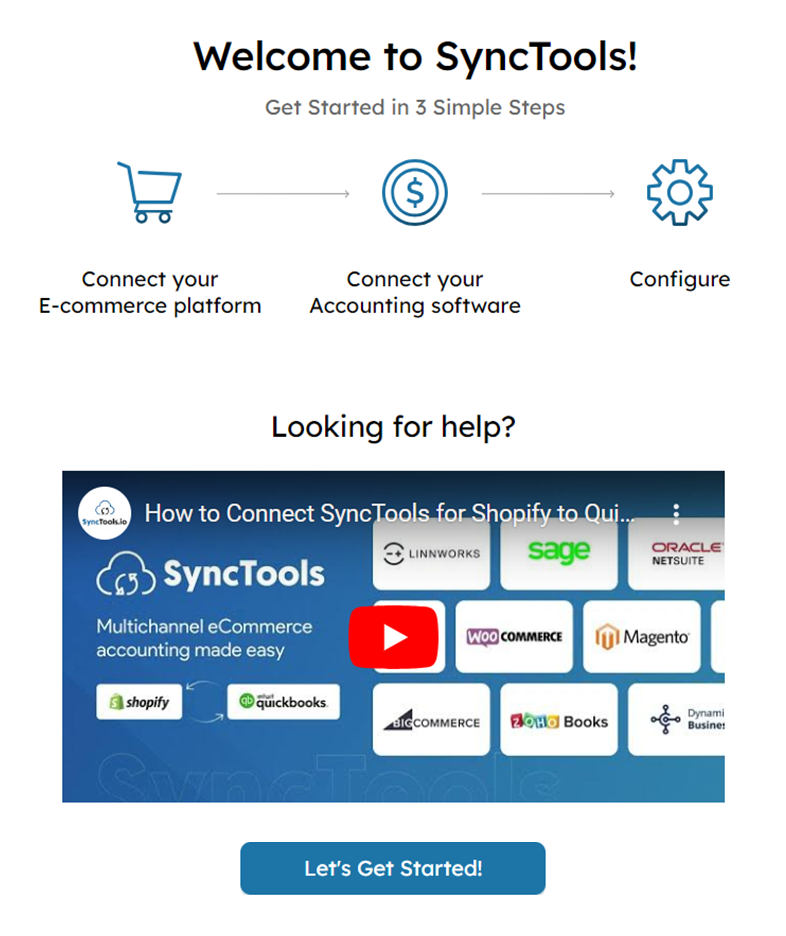
How do I Connect Shopify Store? #
- Navigate to Integrations. This is typically found in the settings section of your SyncTools account.
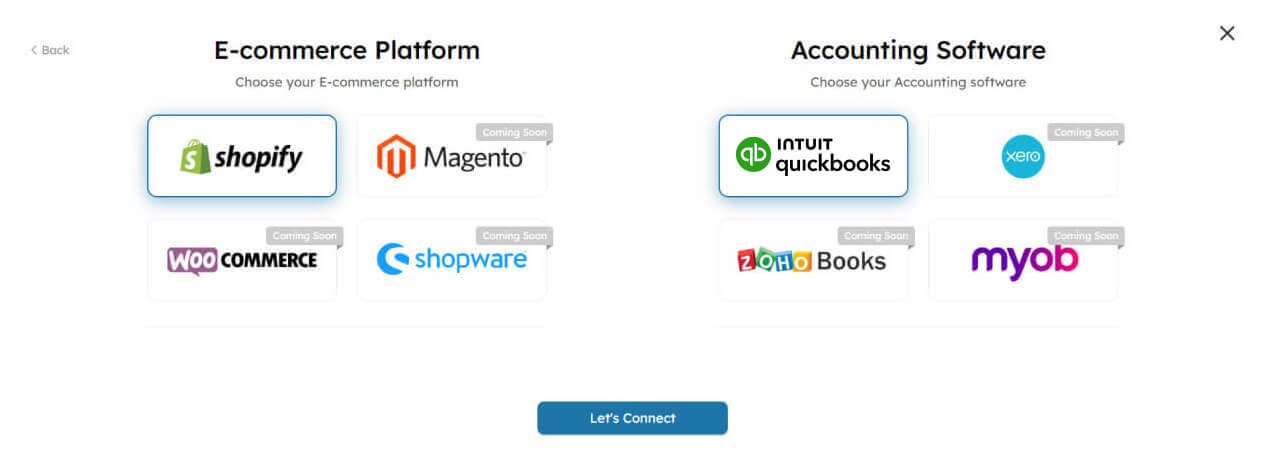
- Once you’re in the Integrations section, find and select Shopify & QuickBooks from the list of available E-commerce and accounting platforms.
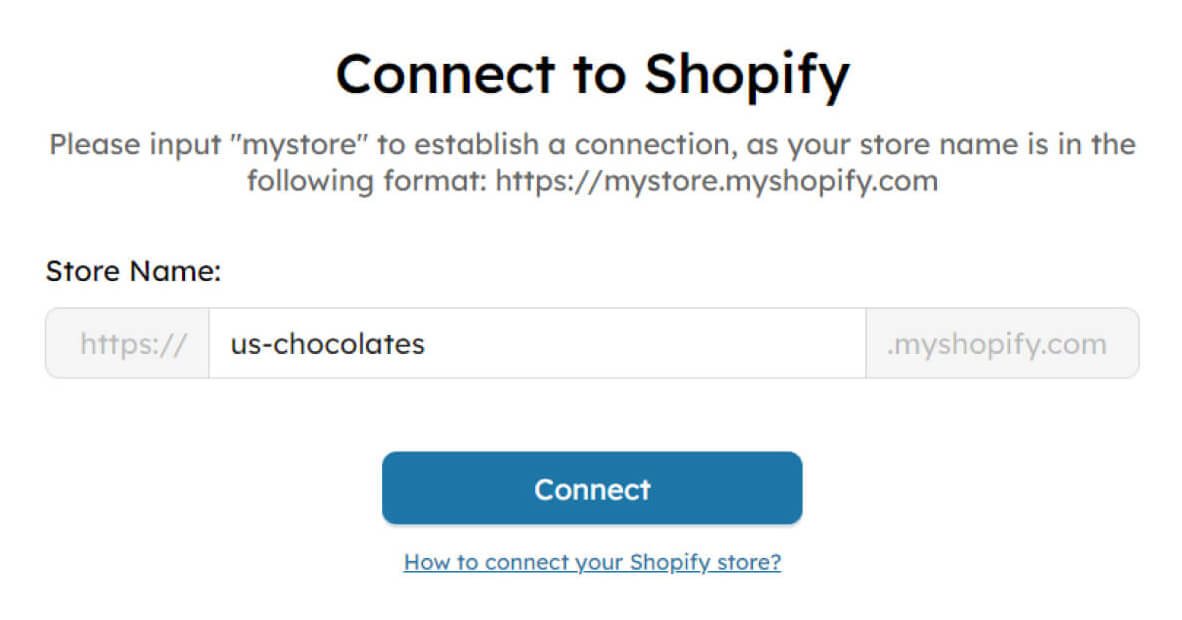
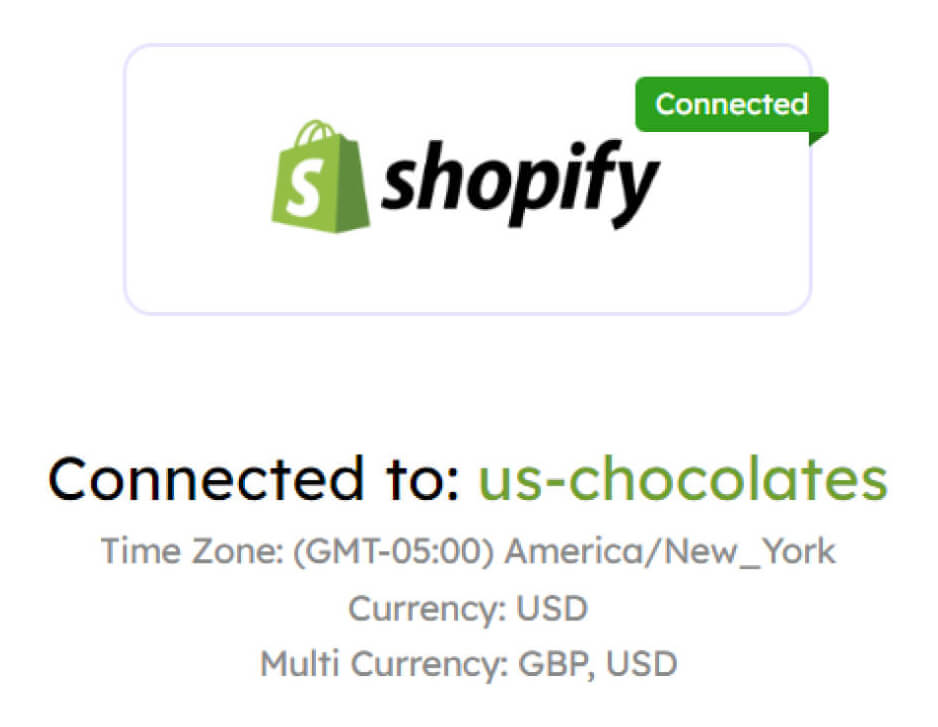
Enter Shopify Store Name in the requested field and click on “Connect”.
You’ll likely be prompted to authorize SyncTools to access your Shopify store data. Kindly follow the on-screen instructions to grant access.
- After clicking the Connect, a new window will pop up, typically displaying the Shopify login page.
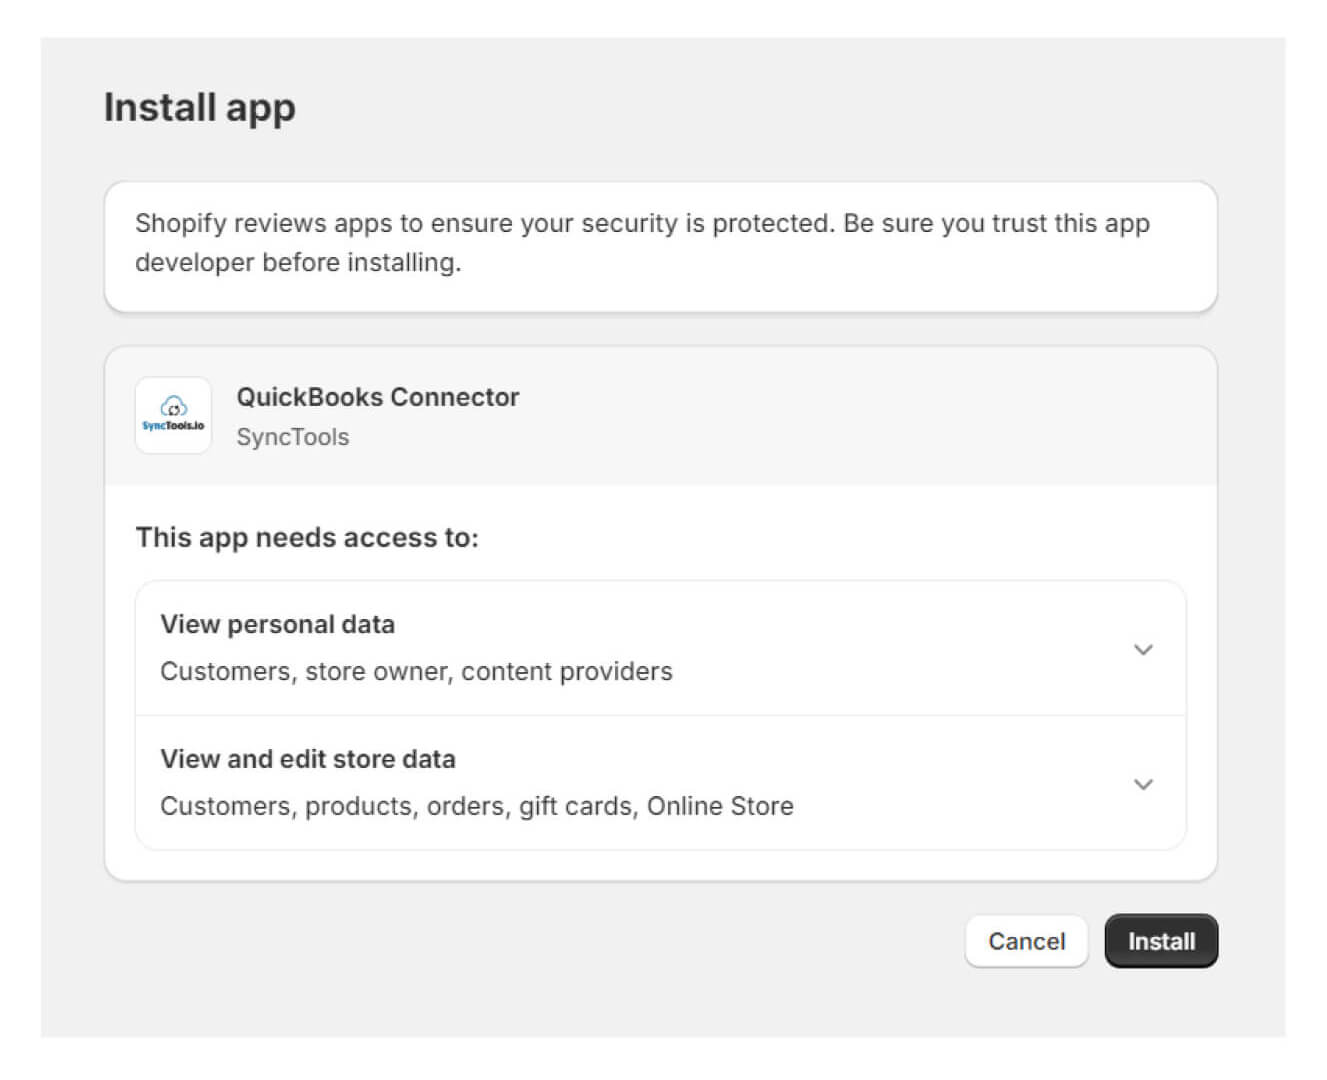
- Enter your Shopify login credentials (username and password) into the fields provided in the new window and install the application\
- After authorizing access and providing any necessary information, complete the connection process. SyncTools should now be connected to your Shopify store.
How do I Connect QuickBooks? #
To connect your QuickBooks Online with SyncTools, please follow the similar steps as done while connecting your Shopify and it should be connected successfully with SyncTools.
After clicking the “Connect to QuickBooks” button, a new window will indeed open, prompting you to log into your QuickBooks Online account. Here’s what you should do next:
- Navigate to the Integrations section in SyncTools and select QuickBooks App if not selected earlier. Once, QuickBooks is selected. connect to QuickBooks and click on the “Connect to QuickBooks” button.
Note: Kindly, ensure you have the Admin role and provide the necessary credentials for connection.
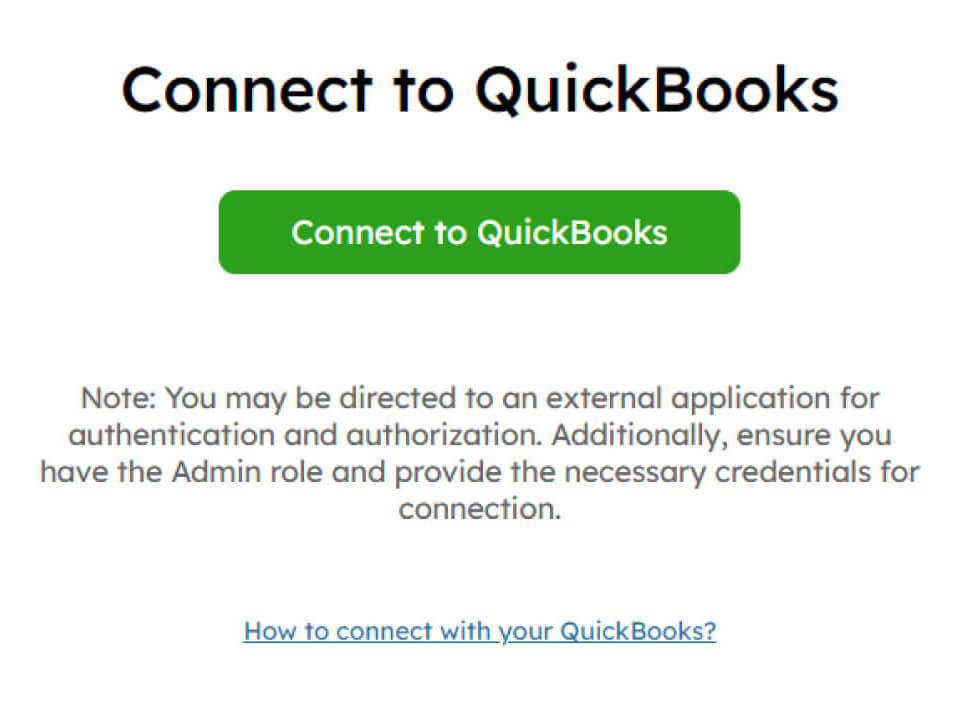
- After clicking the button, a new window will pop up, typically displaying the QuickBooks login page.
- Enter your QuickBooks Online login credentials (username and password) into the fields provided in this new window.
- Once logged in, QuickBooks will ask you to authorize SyncTools to access your QuickBooks Online account. Select the preferred QuickBooks Company and Review the permissions requested and click on the “Allow” button to grant SyncTools access.
- After authorizing access, the new window will likely close automatically, and you’ll be redirected back to SyncTools..
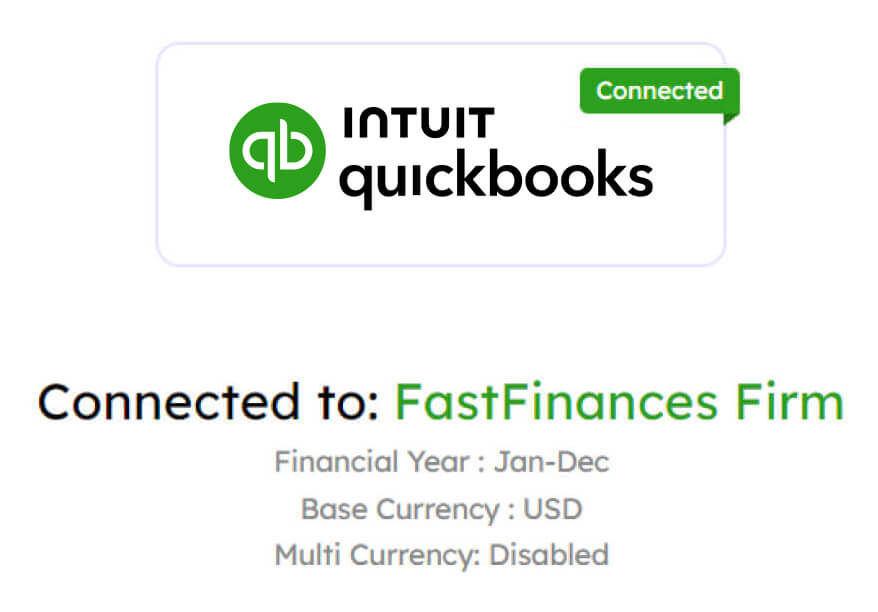
- You will receive a confirmation message within SyncTools indicating that the connection to QuickBooks was successful.
Once Shopify & QuickBooks is connected successfully with SyncTools, you’re good to go ahead with the configuration & setting up your system and to do so, click on “Next”.
Synchronization Options #
What are the synchronization options and which one is considered more advantageous? #
- SyncTools offers two synchronization options: Summarized Entries and Individual Transaction Entries. Users can configure their preferred synchronization method based on their business needs.
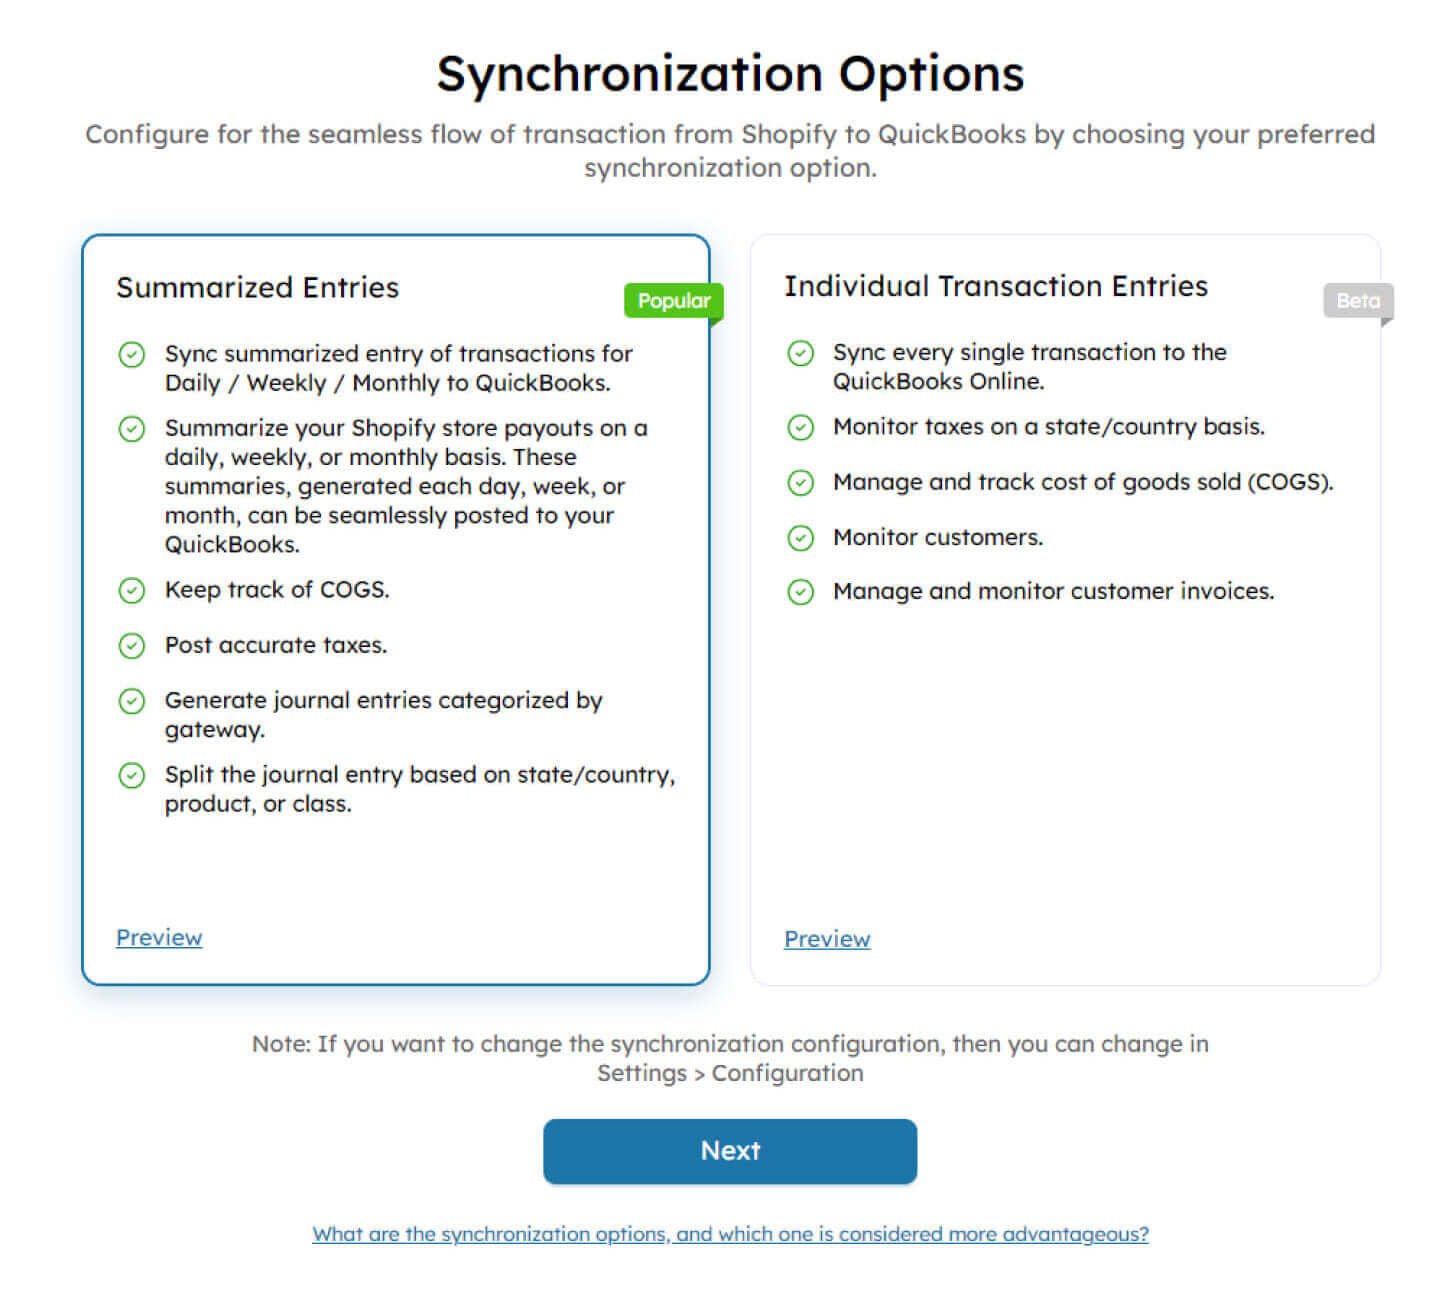
- SyncTools strongly recommends using Summarized Entries for synchronization.
Note: Selection of synchronization option solely depends on you specific to your business needs. SyncTools doesn’t mandate users to opt for Summarized entries.
- Summarized Entries consolidate multiple transactions into a single Journal Entry in QuickBooks.
- The consolidation process is based on the selected time period frequency and configuration mapping within SyncTools.
- Summarized Entries simplify financial records, making reporting more concise and easier to understand.
- This approach saves time and effort during reconciliation and analysis processes.
- SyncTools also provides early access to the Individual Transaction Entries feature for beta users.
- Users interested in exploring this functionality before its official release can request access from the Sales team at sales@synctools.io
How to choose frequency of Journal Entry creation in Shopify to QuickBooks? #
Choosing Frequency of Journal Entry Creation in SyncTools for Shopify QuickBooks Integration:
SyncTools offers flexibility in determining the frequency of Journal Entry creation, allowing you to tailor the synchronization process according to your business needs. You can select from three options: Daily, Weekly, or Monthly.
Follow these steps to choose your preferred frequency:
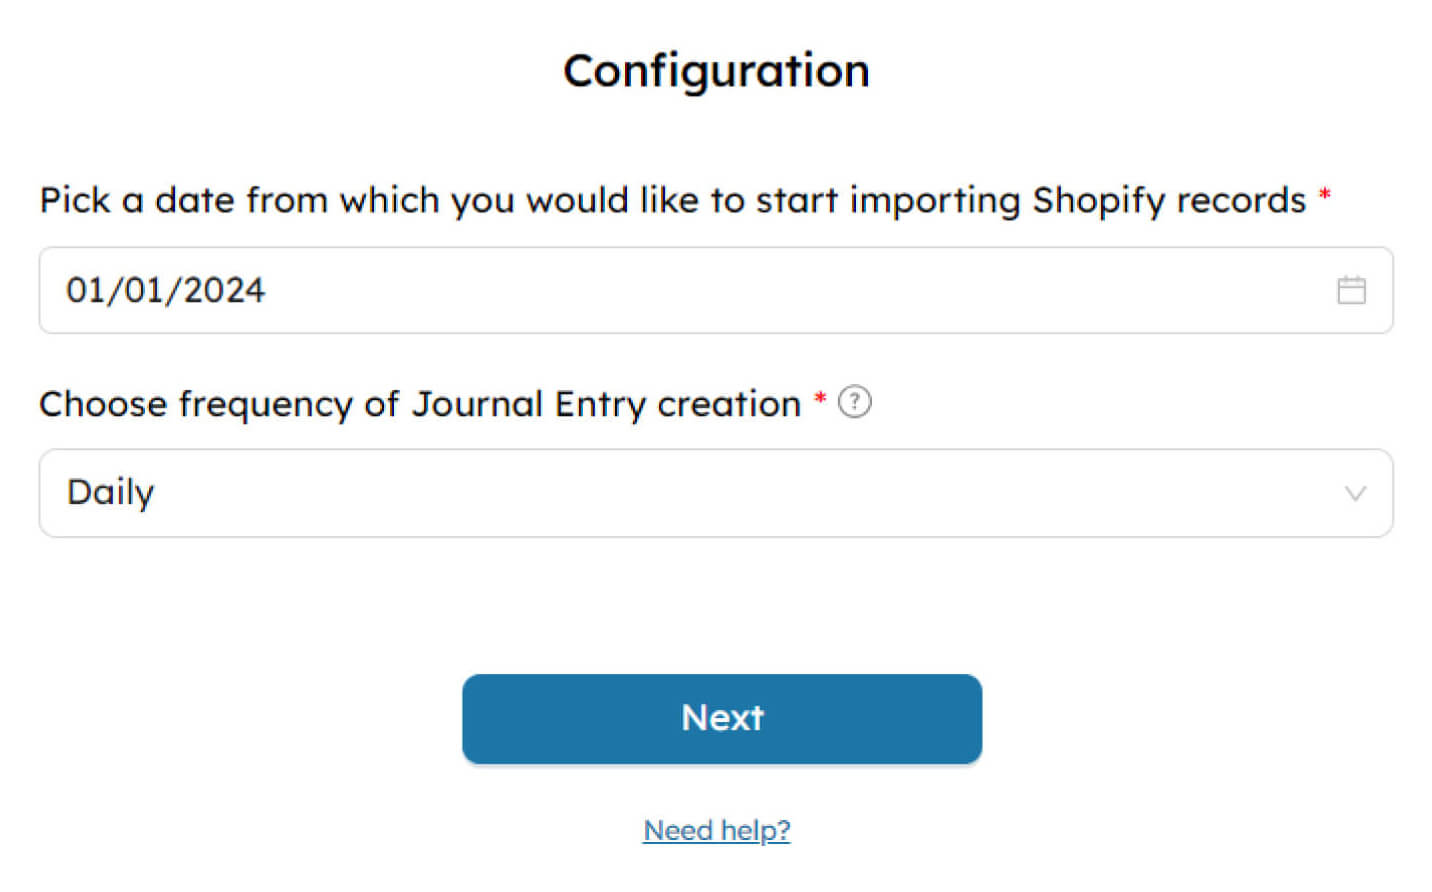
After selecting Shopify order data importing date and sync frequency, click on “Next” and you would be required to select countries in which your business operates.
Why to choose countries? #
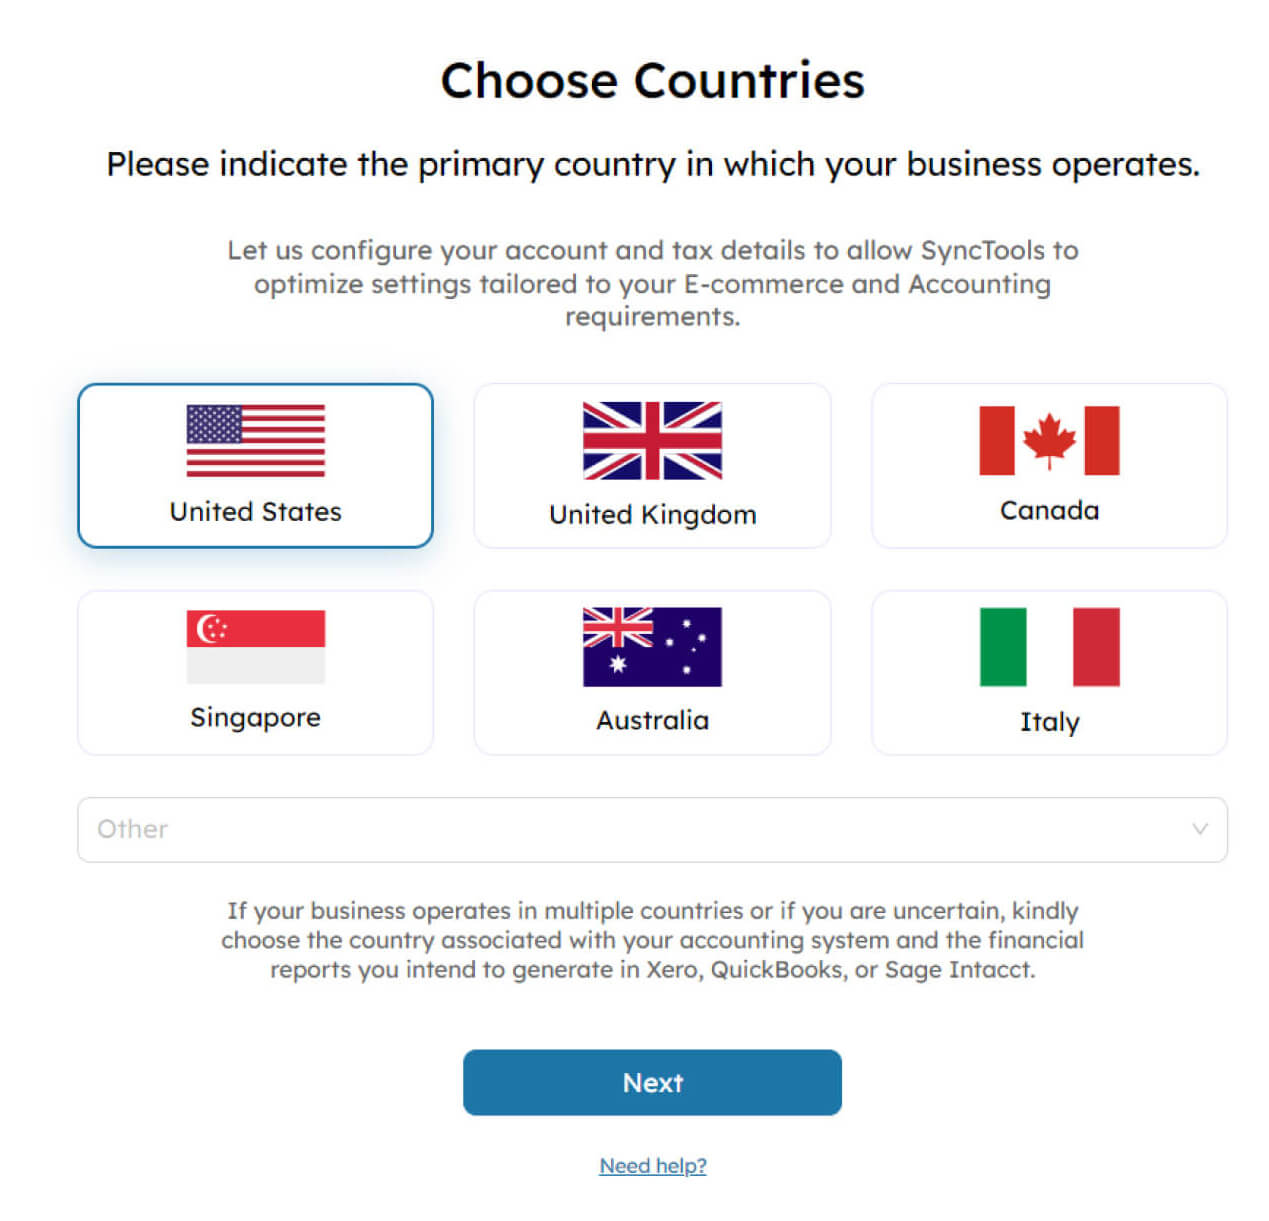
Click on “Next” once the countries are selected and you will be redirected to Tax Preferences
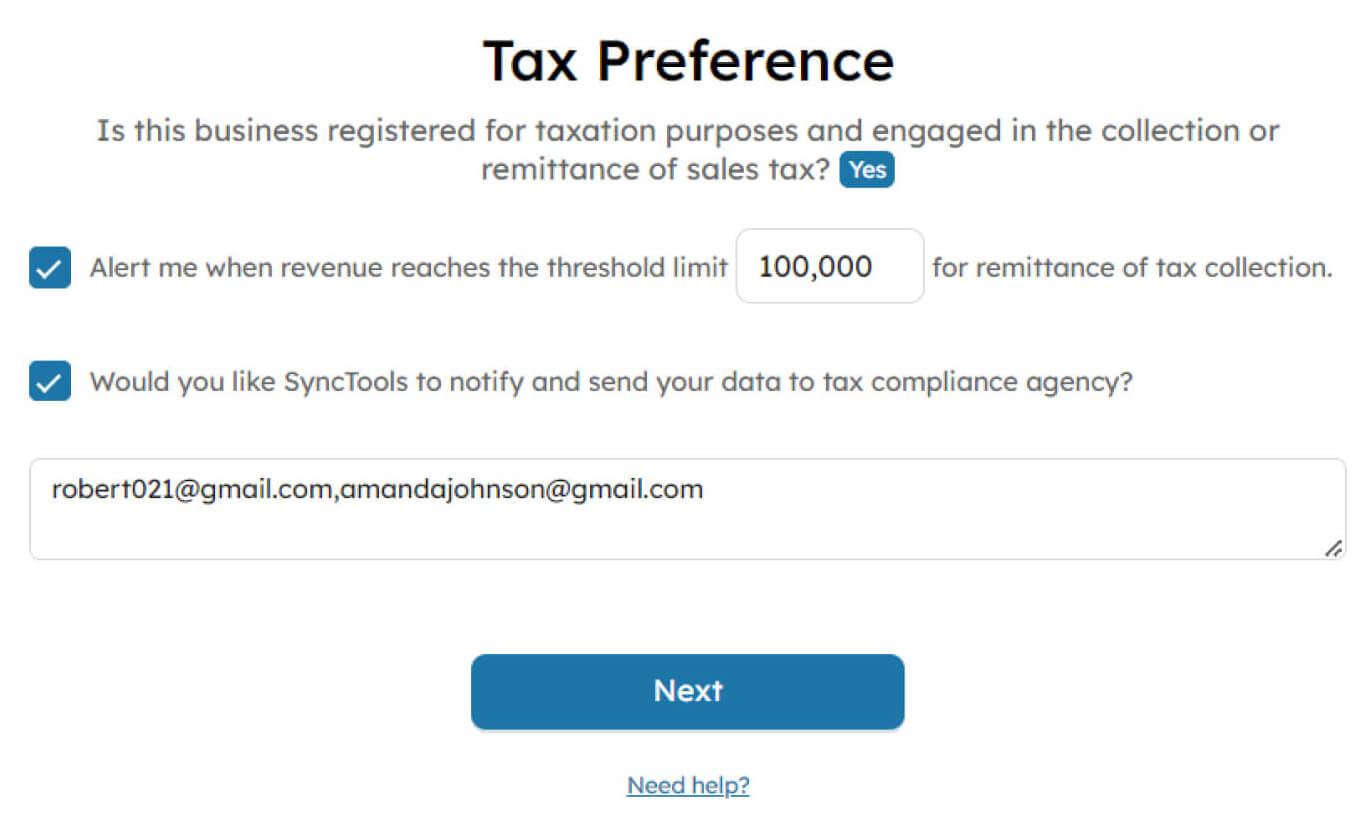
You can either opt for tax preferences if your business is already registered for taxation purpose and engaged in the collection or remittance of sales tax or hit “No” if this doesn’t doesn’t sound relevant to you.
Why configure tax preferences? #

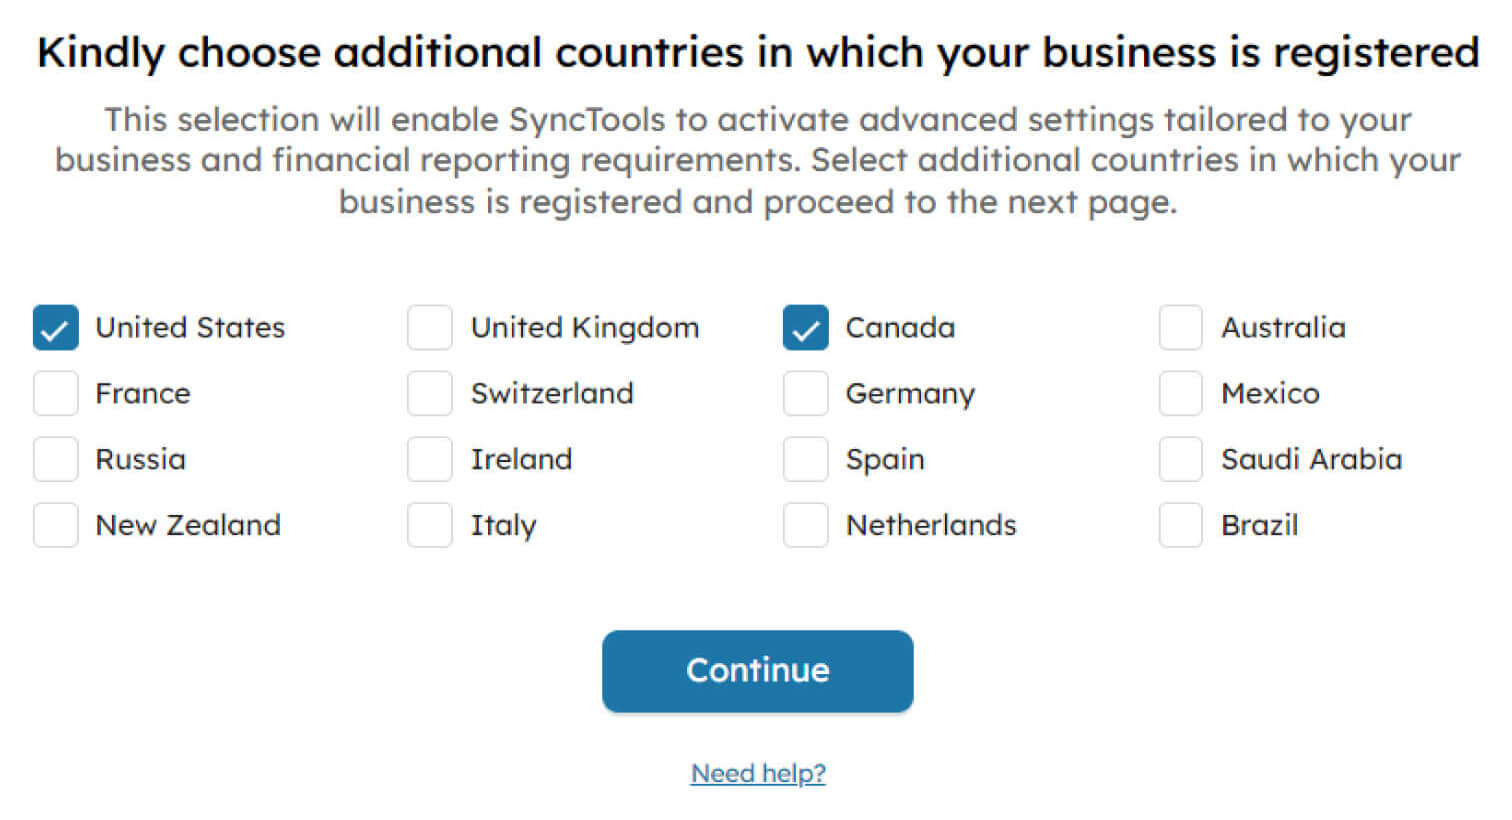
After selecting Tax Preferences, you would be required to choose the countries where your business is registered.
Country and Payment Gateways #
In SyncTools, there is a feature that allows you to synchronize Shopify payouts by grouping them according to Country and Payment Gateways.
These registered countries will be considered for the grouping.
Account mapping #
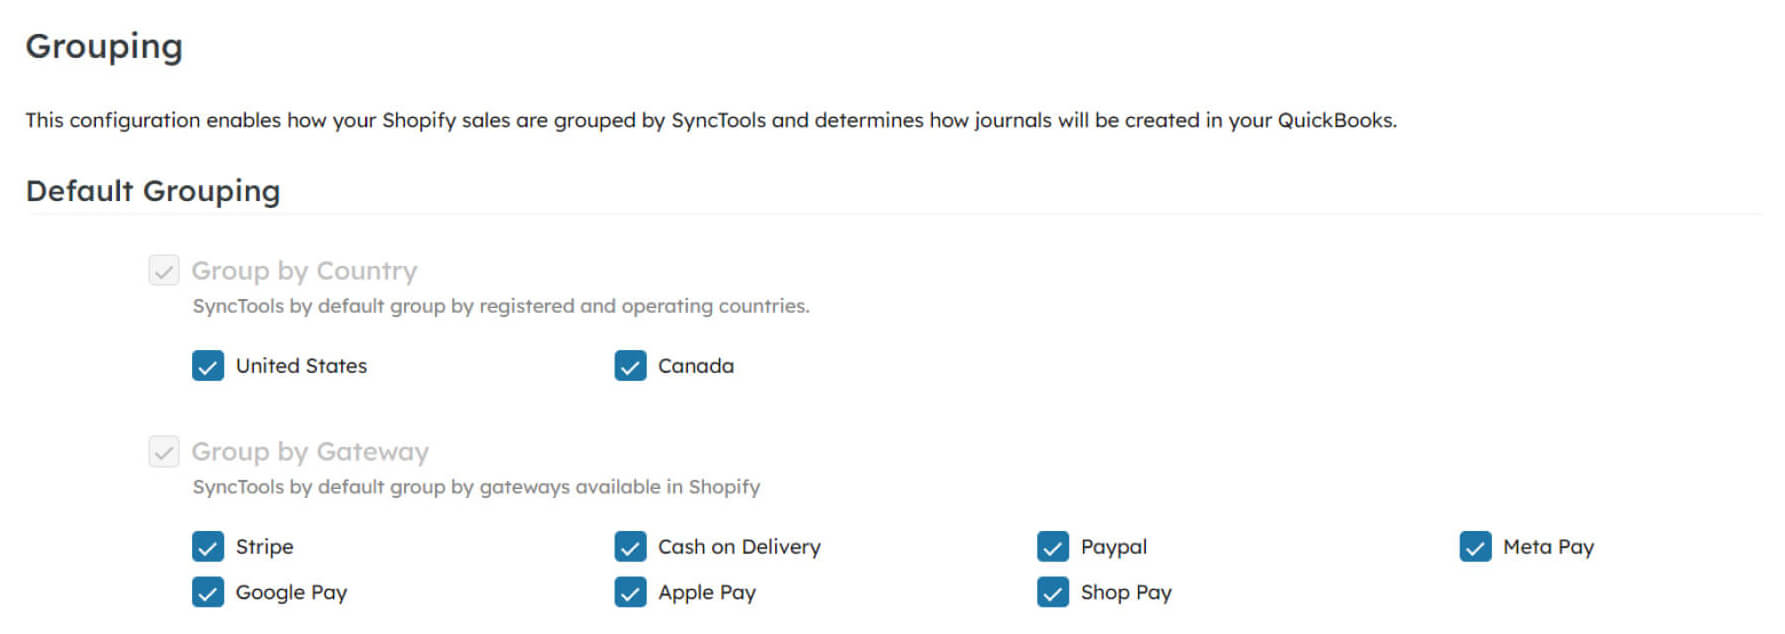
After setup of grouping, you can also enable QuickBooks’ class and location mapping with Shopify payouts.

Once all the grouping settings are configured, you can proceed to map the QuickBooks chart of accounts with Shopify transaction types under “Mapping” in the left navigation pane.
This mapping process ensures that transactions from Shopify are correctly categorized and recorded in QuickBooks according to your desired account structure.
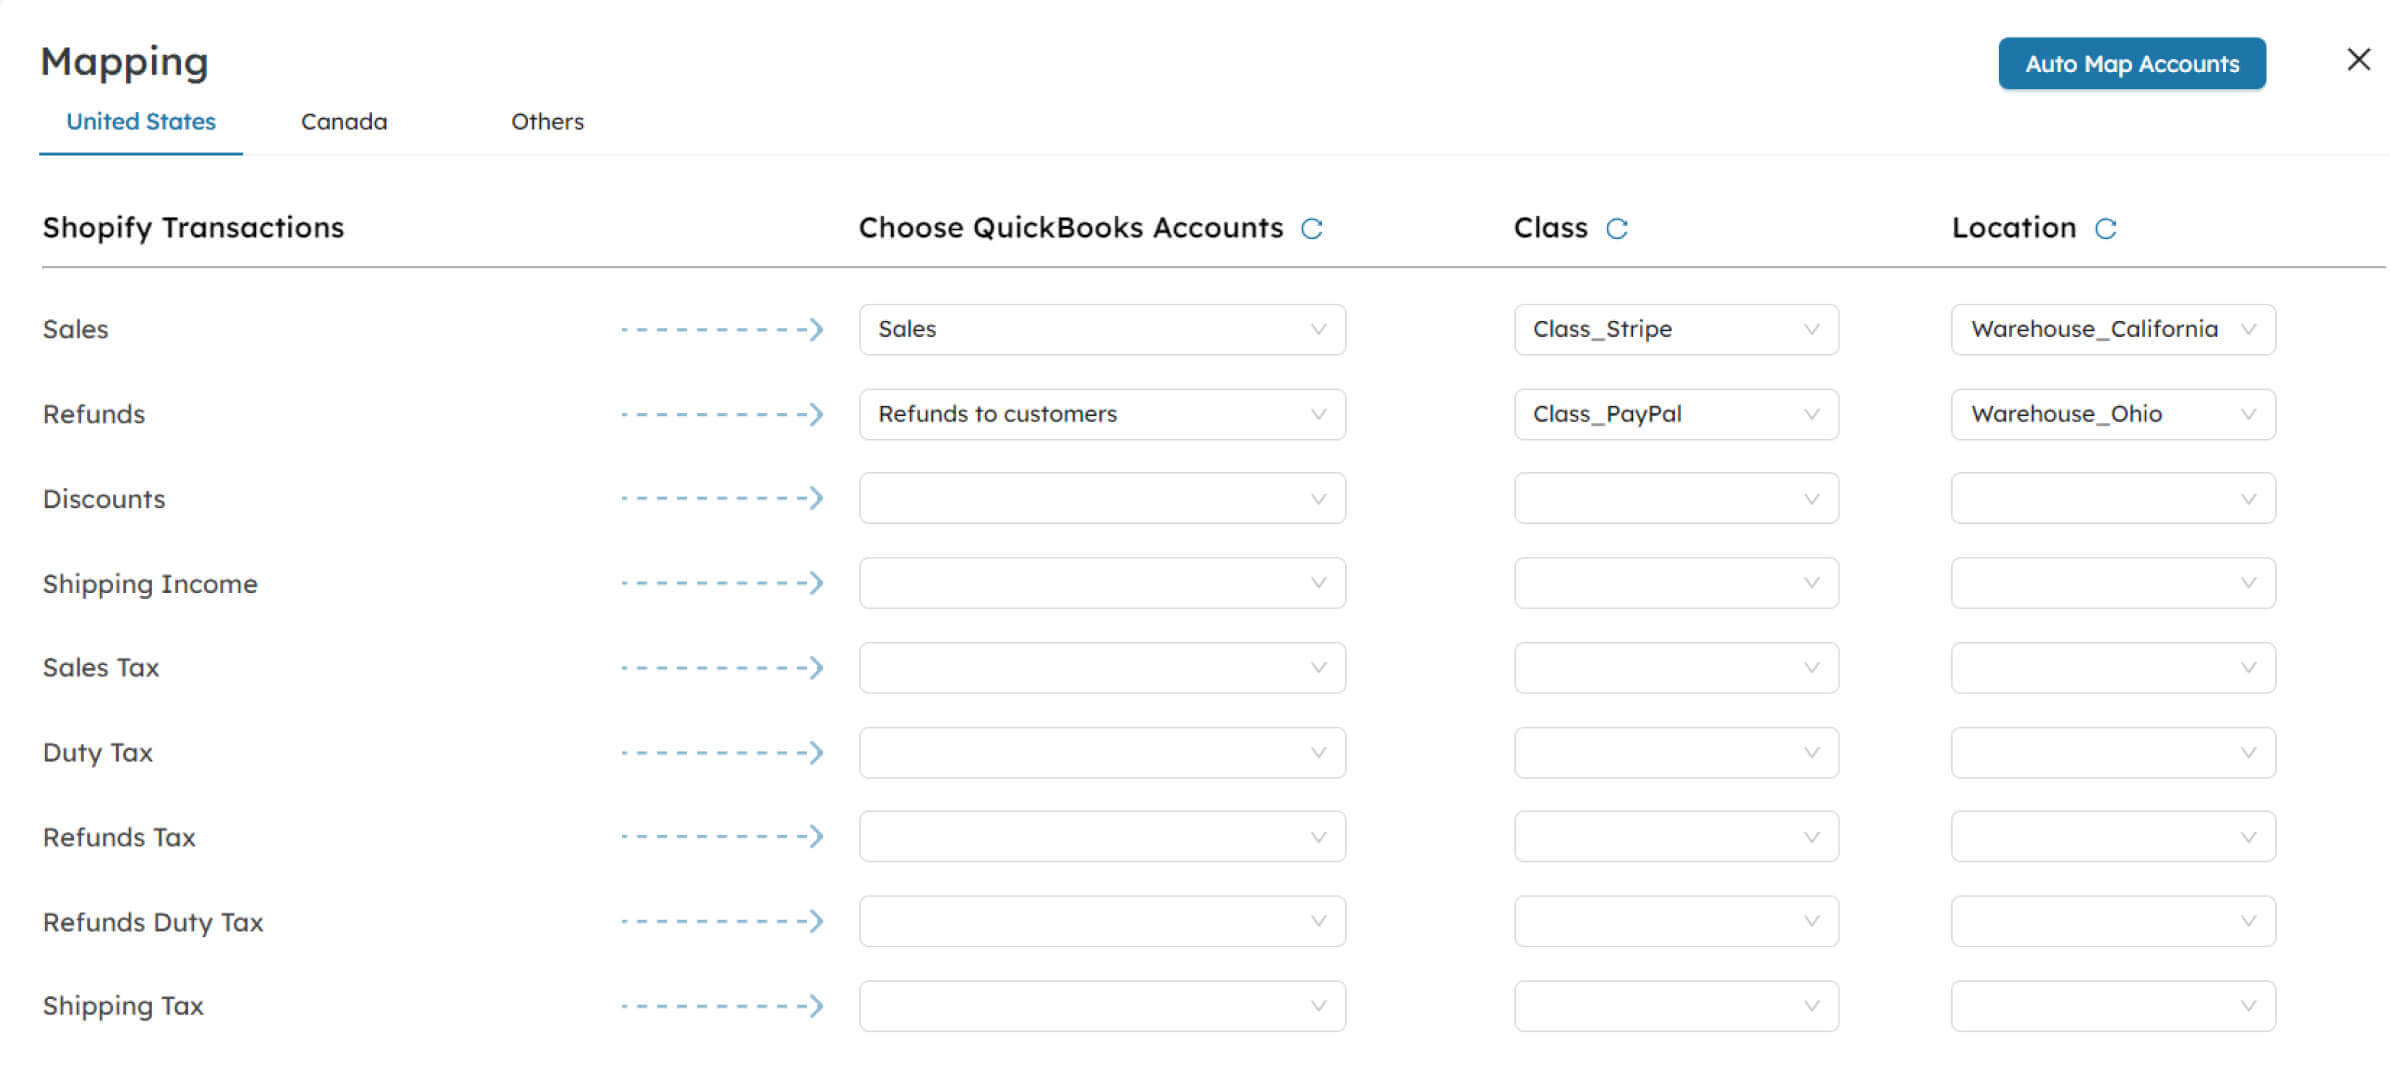
- Additionally, SyncTools offers an “Auto Map Accounts” to enable Shopify users to auto create and map charts of accounts automatically for Shopify transactions in QuickBooks Online.
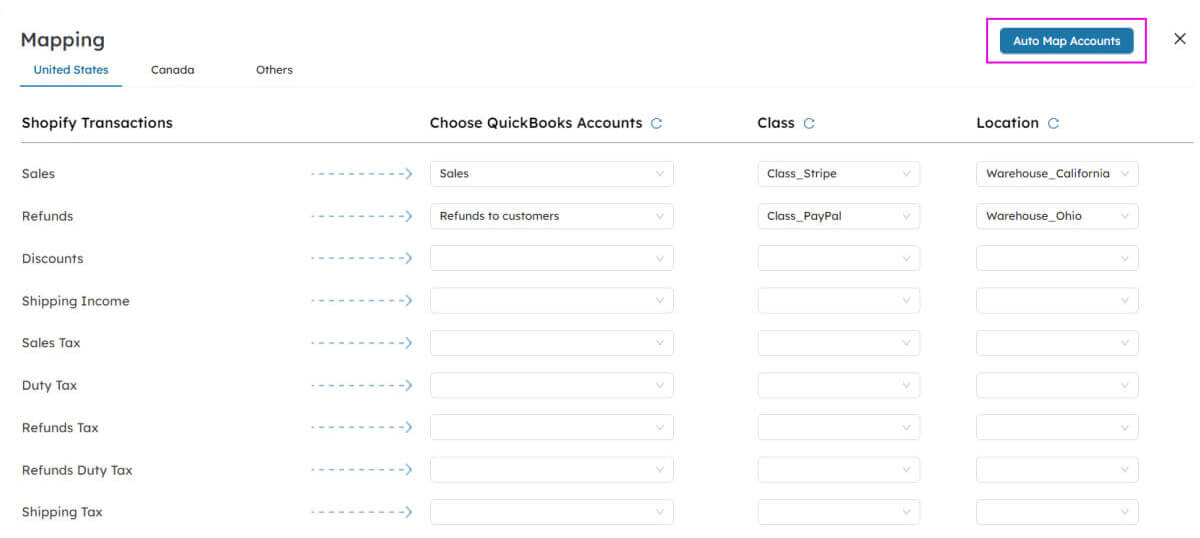
- This functionality automates the mapping process between QuickBooks charts of accounts and Shopify transaction types.
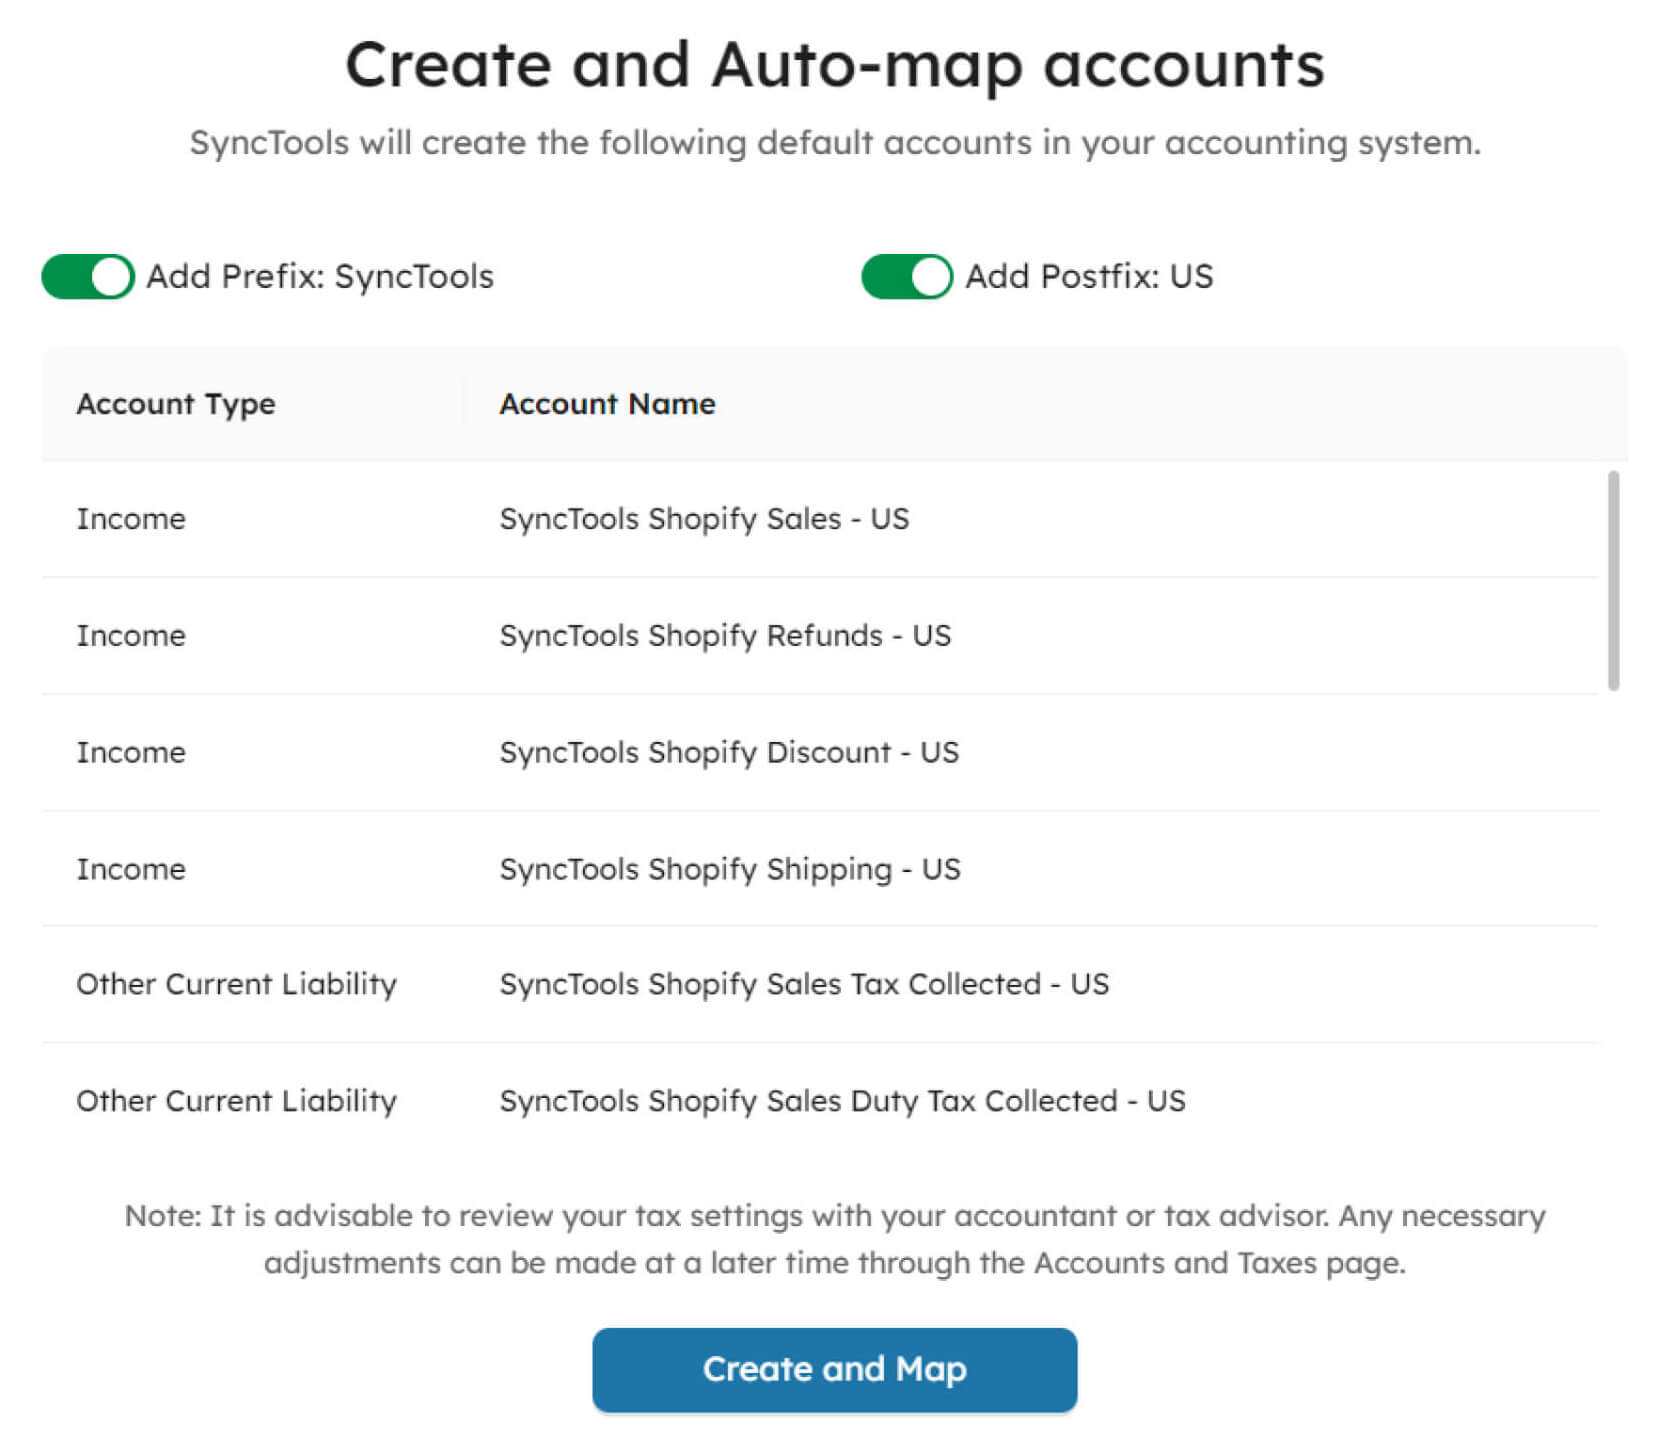
- By leveraging SyncTools’ automation capabilities, users can save time, reduce errors, and ensure accurate synchronization of financial data between QuickBooks and Shopify.
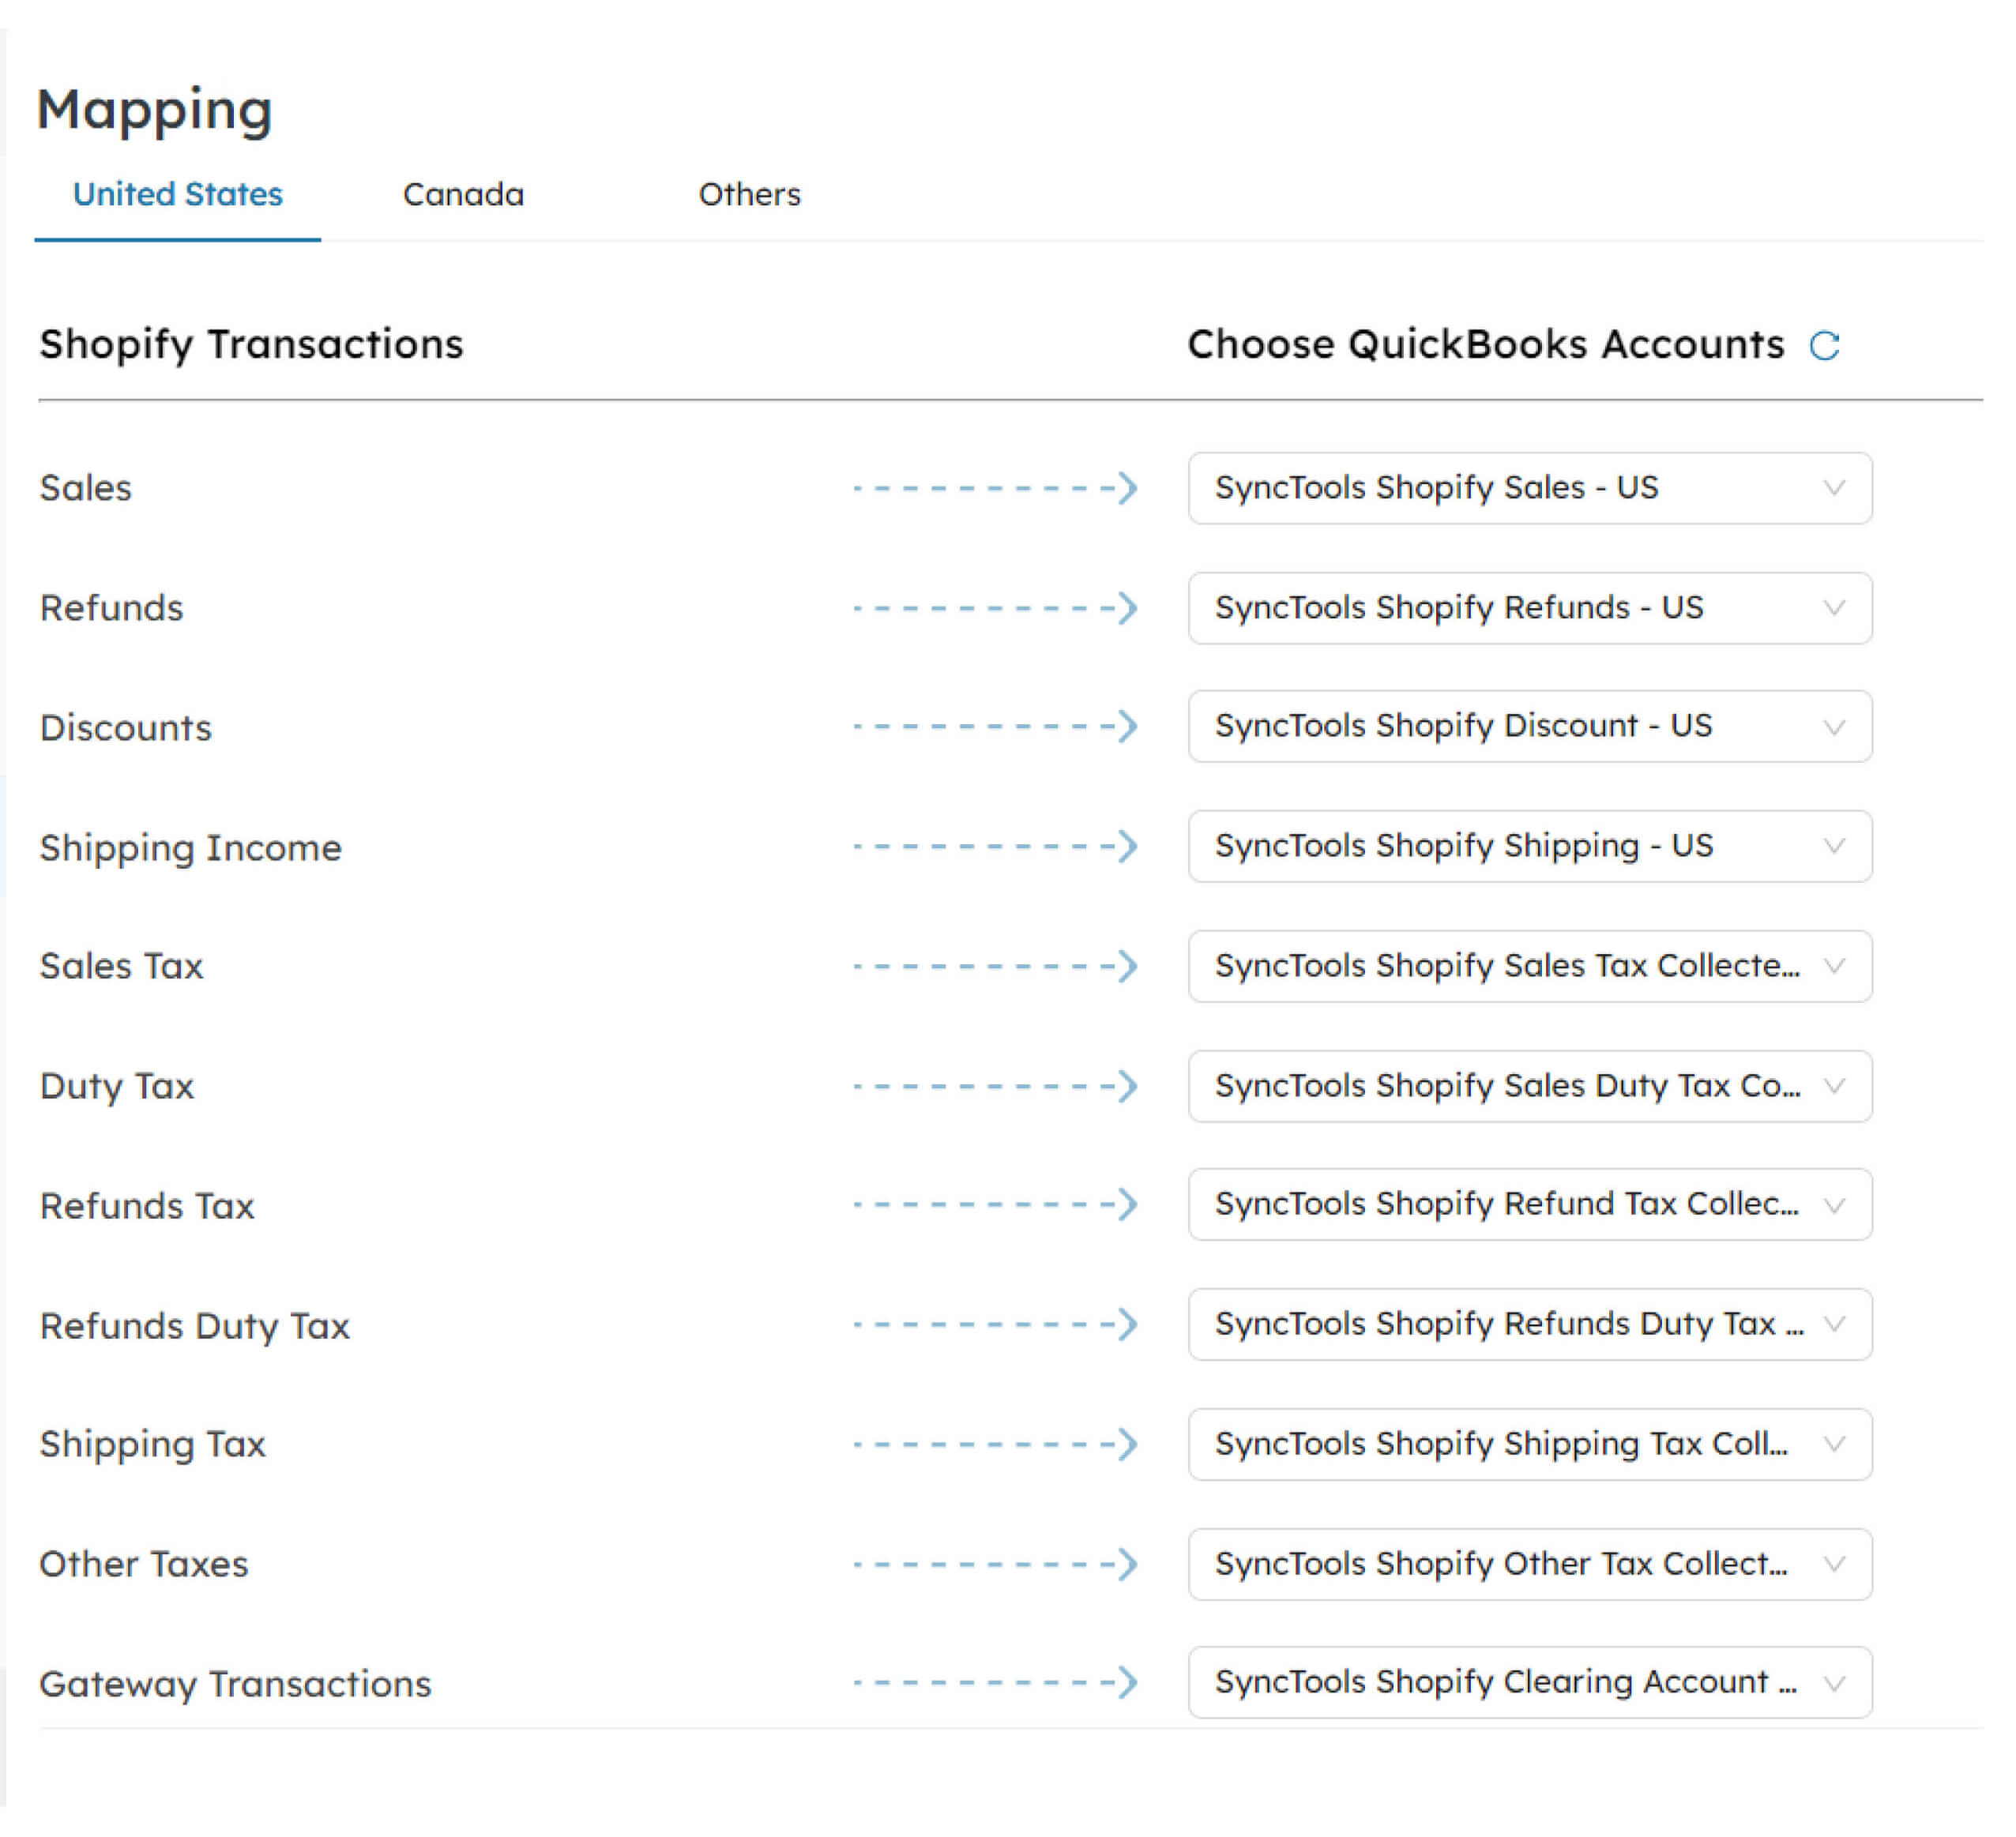
- Utilize the “Others” mapping tab in account configuration to manage transactions from other countries or orders with different shipping countries.
- This tab enables specific mappings for transactions outside primary mappings for individual countries.
- Configuring accounts in the “Others” mapping tab ensures accurate categorization and recording of diverse region transactions, maintaining consistency in financial reporting across different geographical regions and order scenarios.
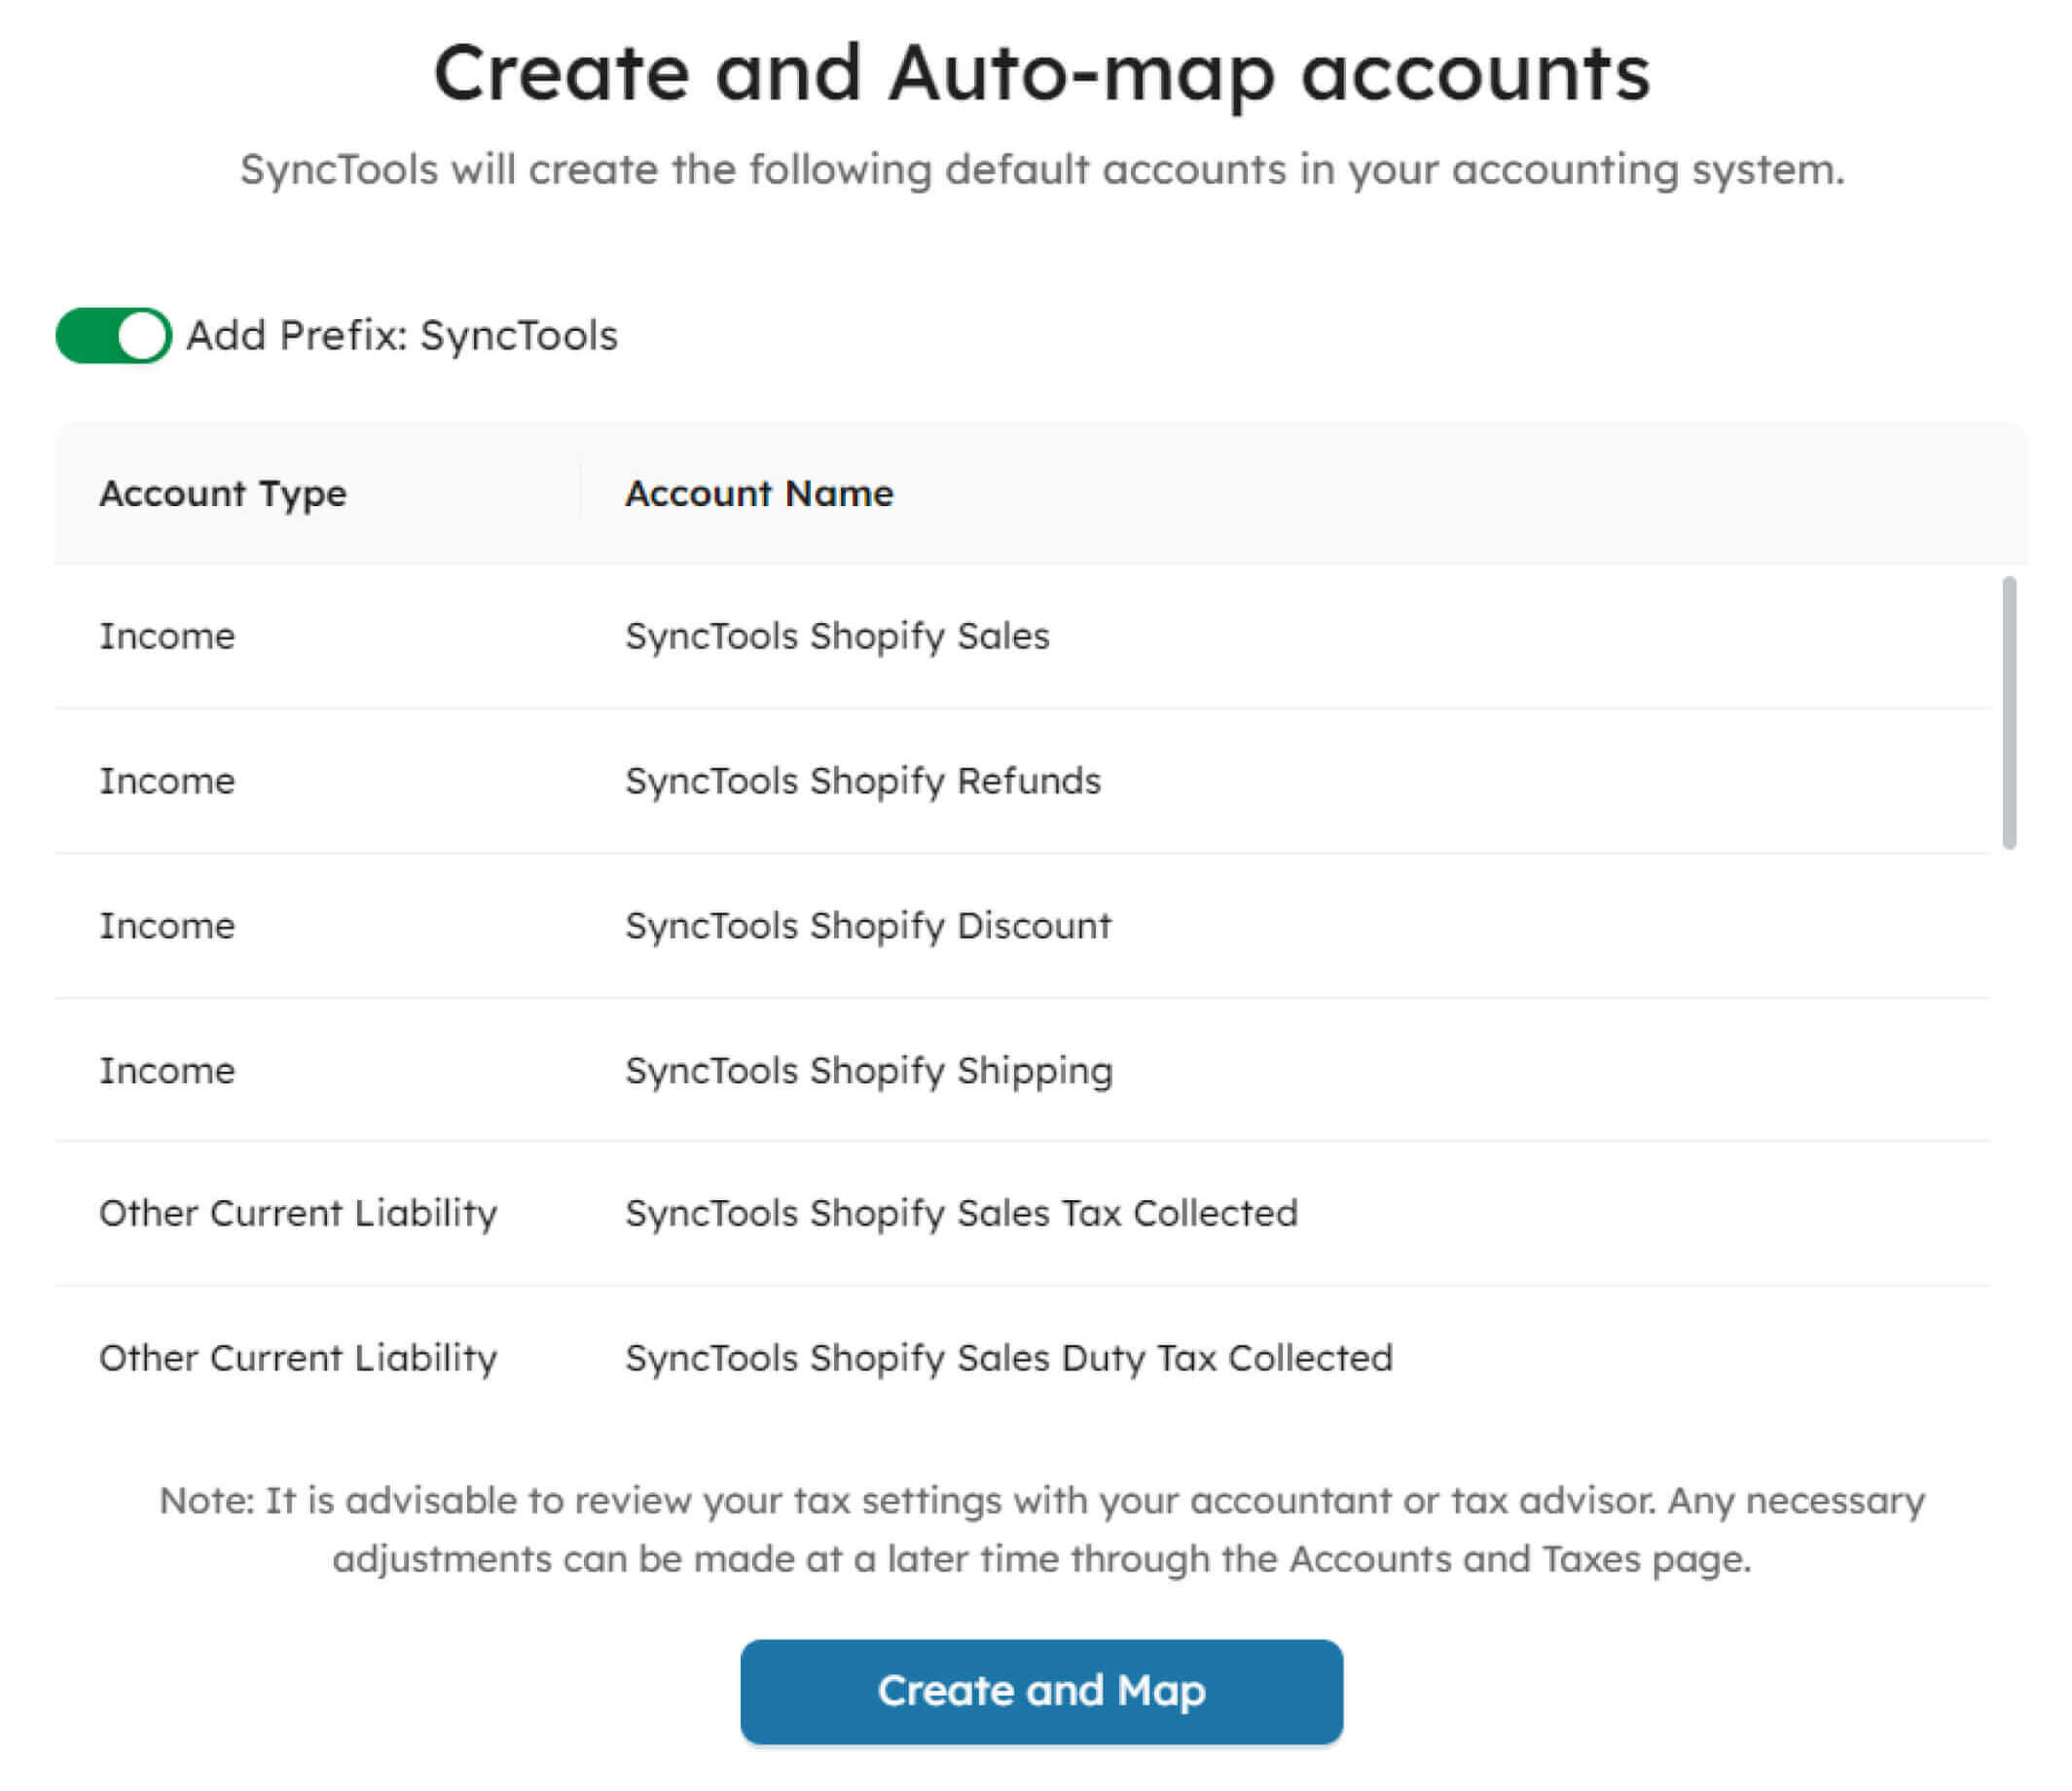
Enable Auto-Sync #
- After completing setup tasks such as mapping charts of accounts and configuring settings for different countries and scenarios, you can activate Auto Sync by opting for “Enable auto-sync”

- Auto Sync automates the process of posting Shopify payouts in QuickBooks at regular intervals.
- This automation saves time, reduces errors, and ensures up-to-date and accurate financial records by synchronizing data between Shopify and QuickBooks automatically, eliminating the need for manual intervention.
Bank Account Configuration #
Under this configuration, users can choose the bank account where all the Shopify deposits payout needs to be recorded and choose one account where any Shopify negative balance is to be recorded in QuickBooks as shown below:

Download Shopify orders in SyncTools #

- Begin by accessing the Shopify orders downloaded in SyncTools.
- Review the Shopify Payout details alongside a QuickBooks preview for the specific payout.
- Once satisfied with the accuracy, proceed to successfully post it into your QuickBooks account by clicking on Post to QuickBooks.And, it will turn the payout status as “Posted” in SyncTools.
Shopify Payout details: #
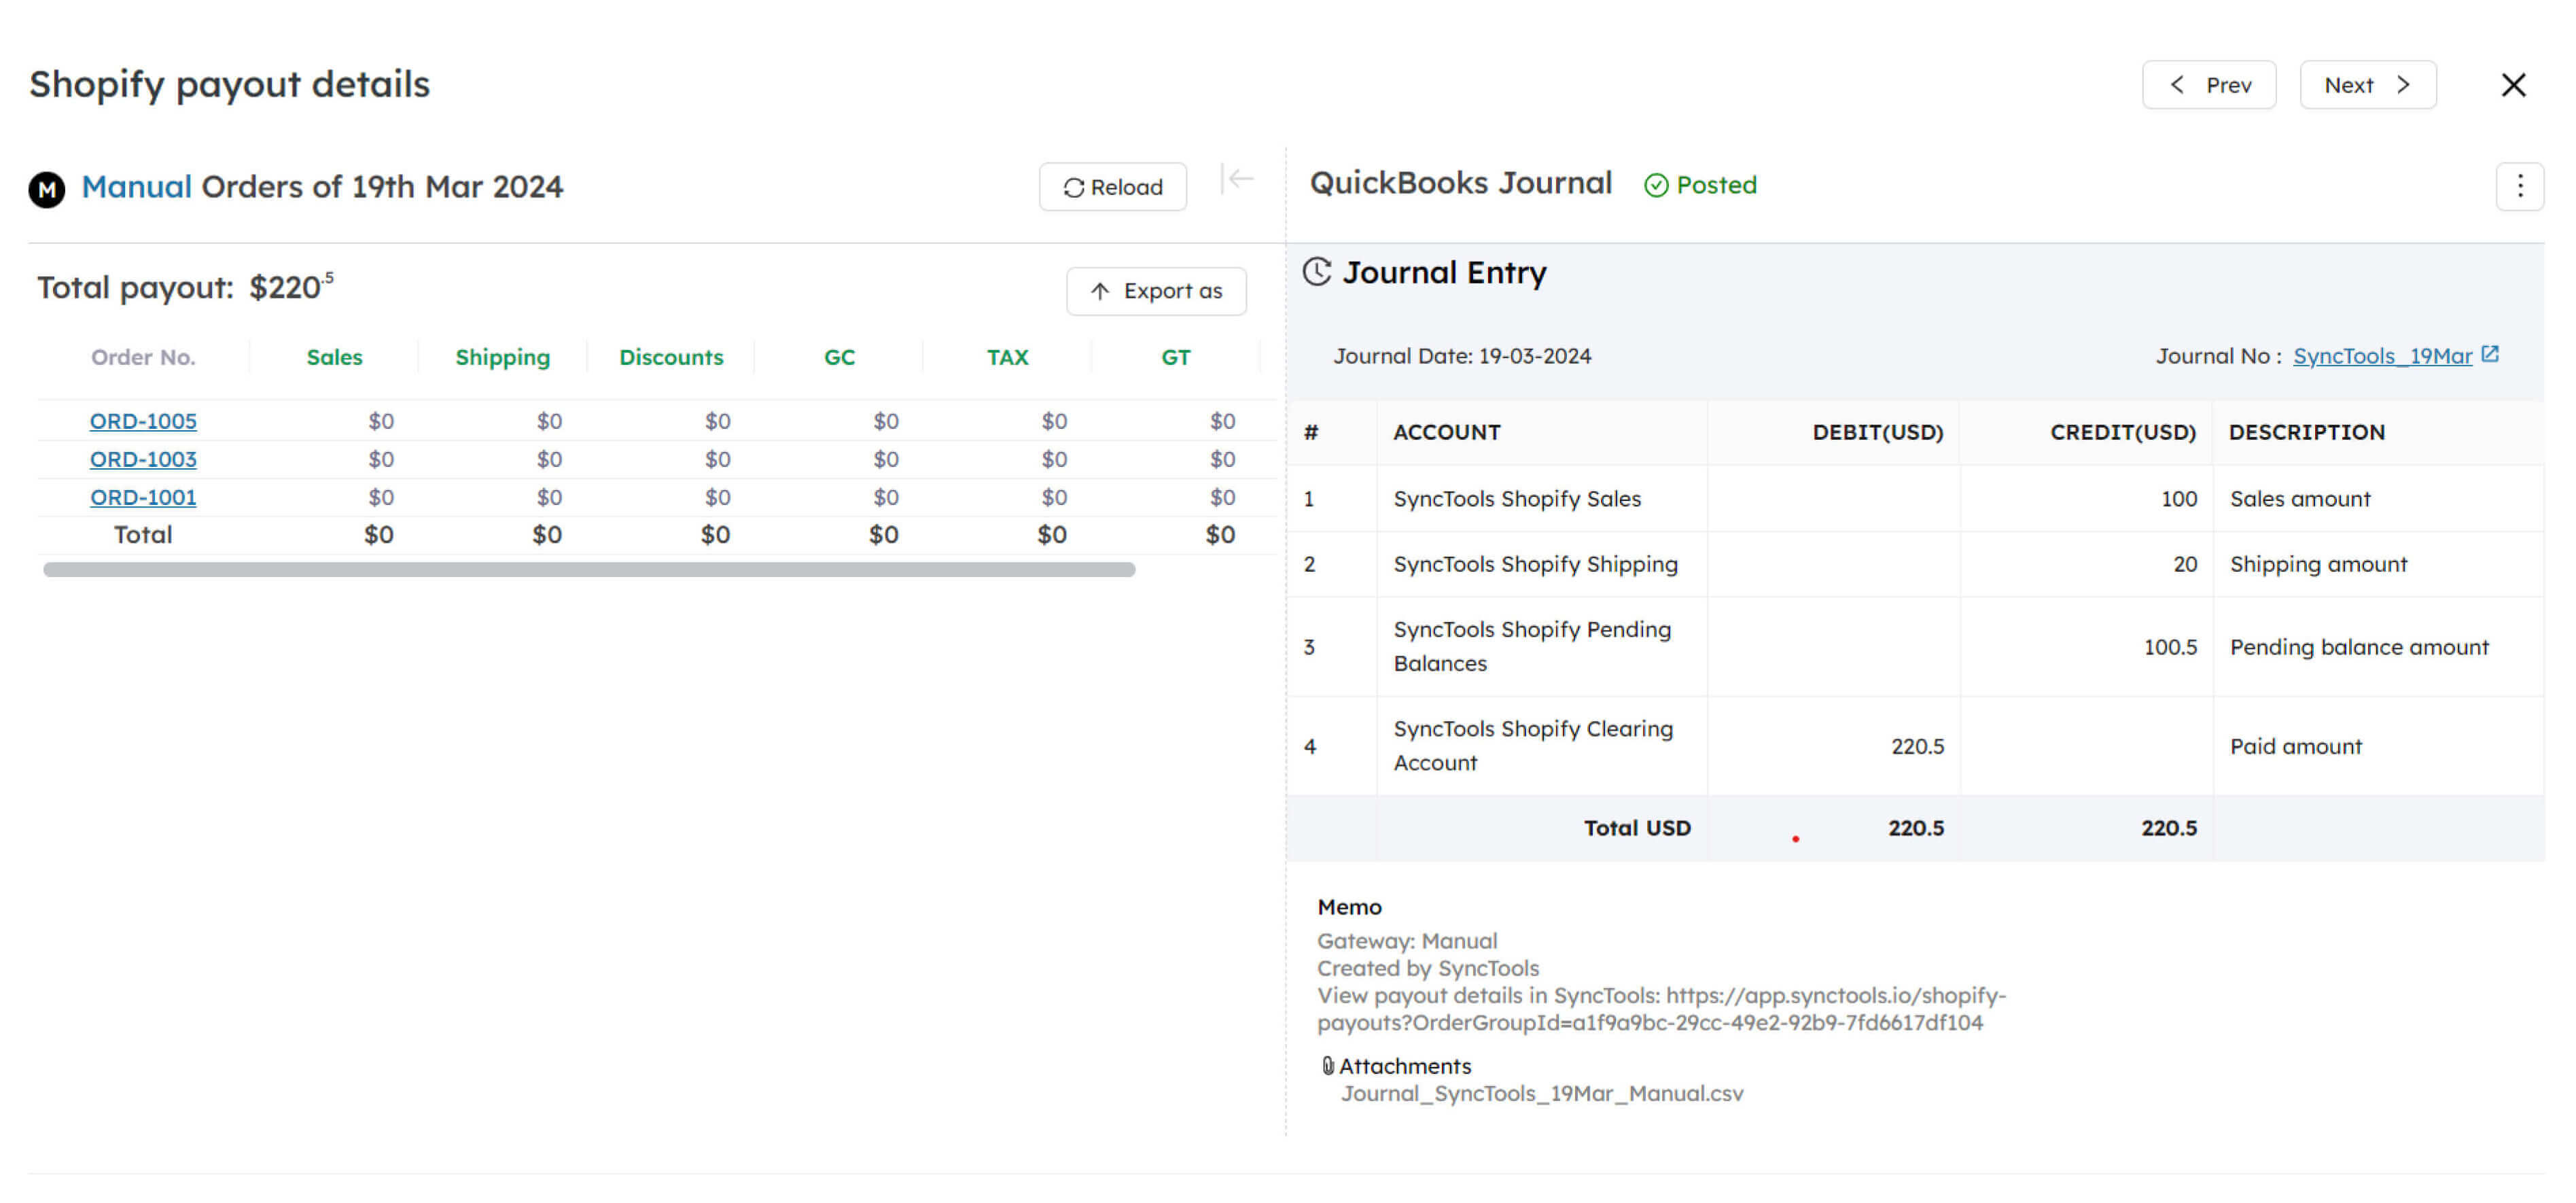
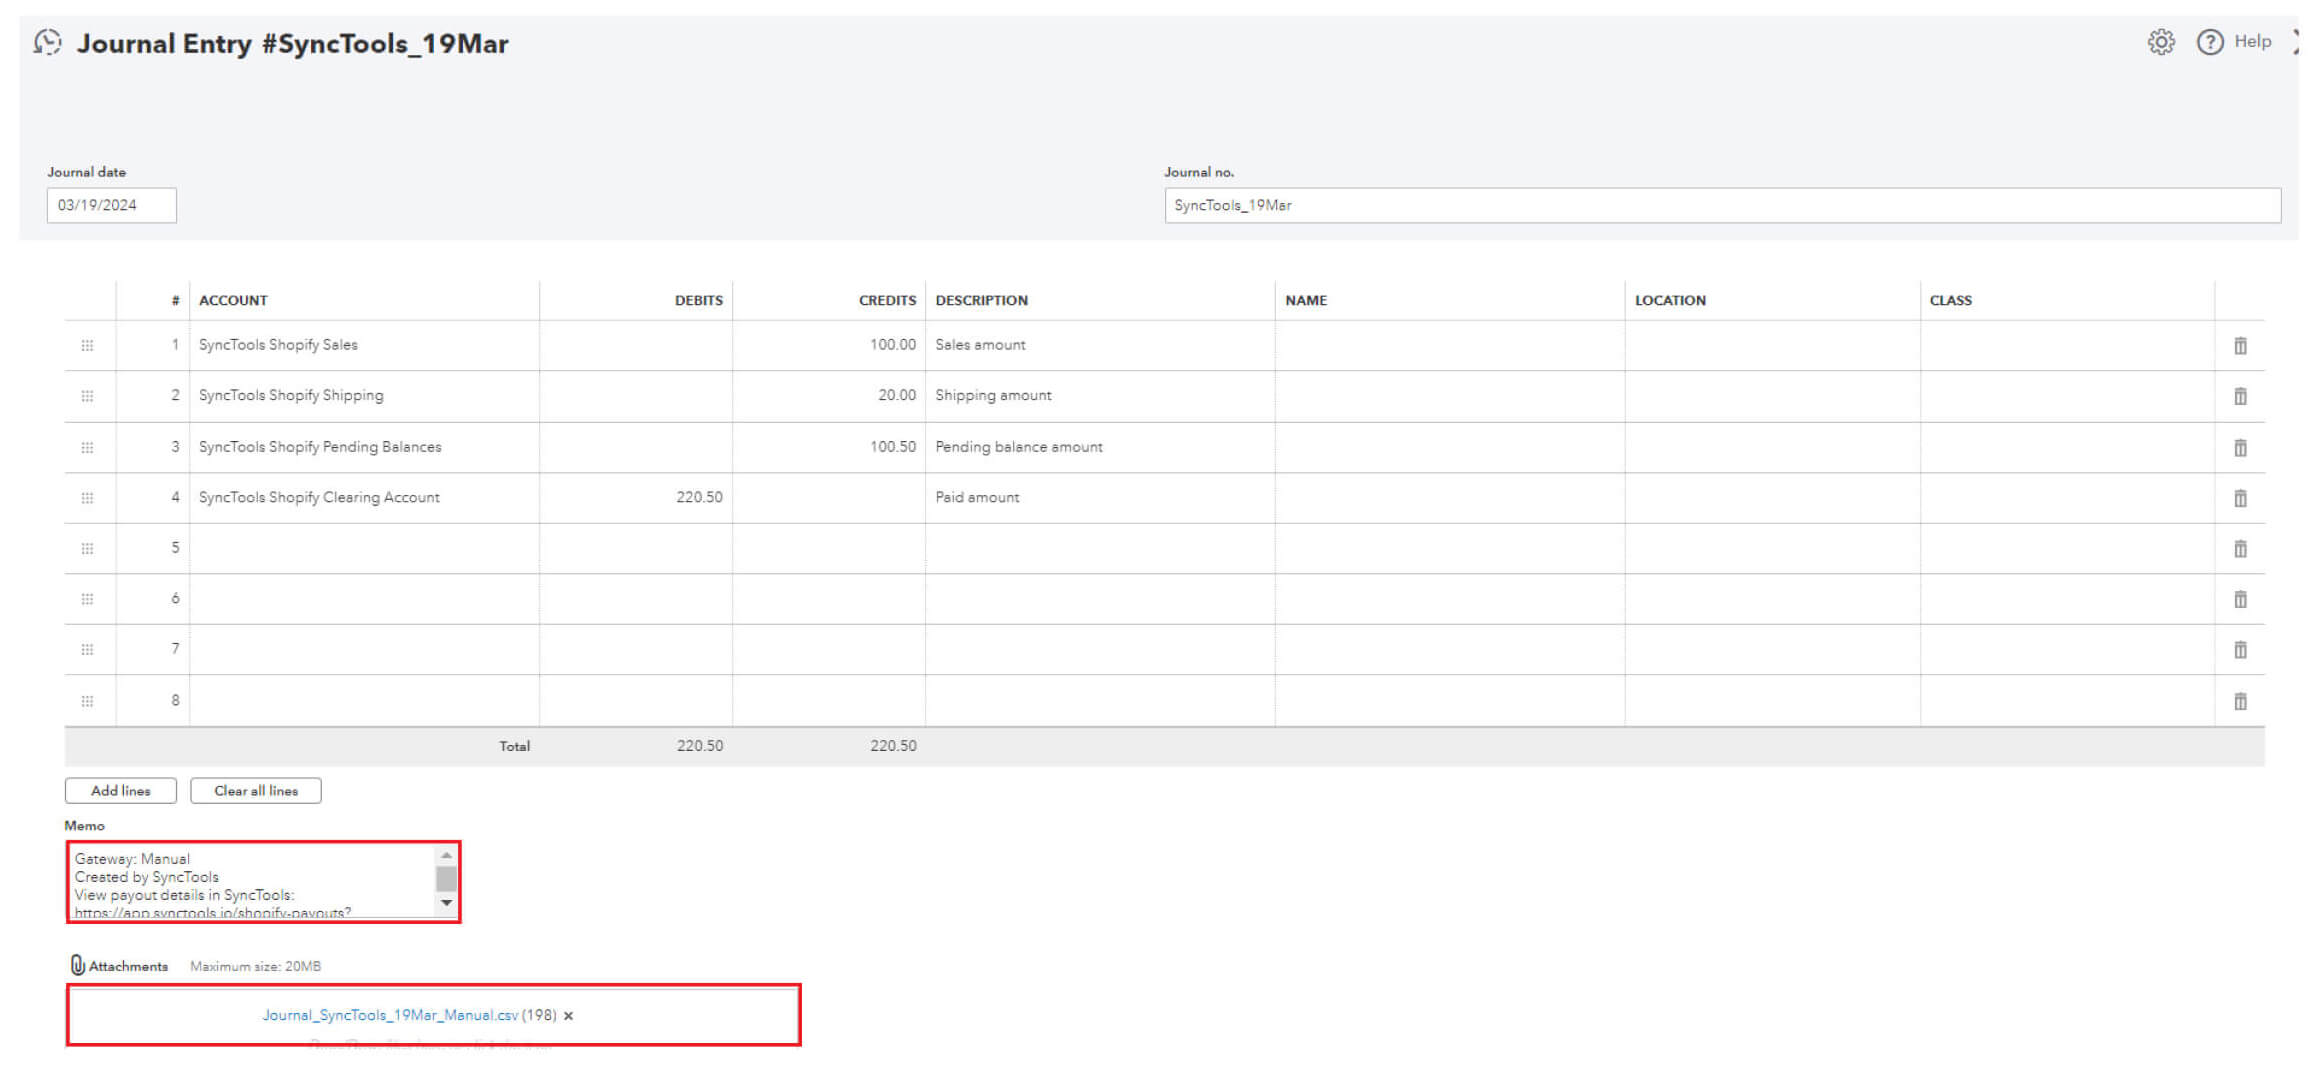
The posted Shopify Payout creates a Journal Entry in QuickBooks Online with details in the “Memo” field and CSV attachment of all the Shopify transactions posted in that particular Journal Entry.
Sync History #
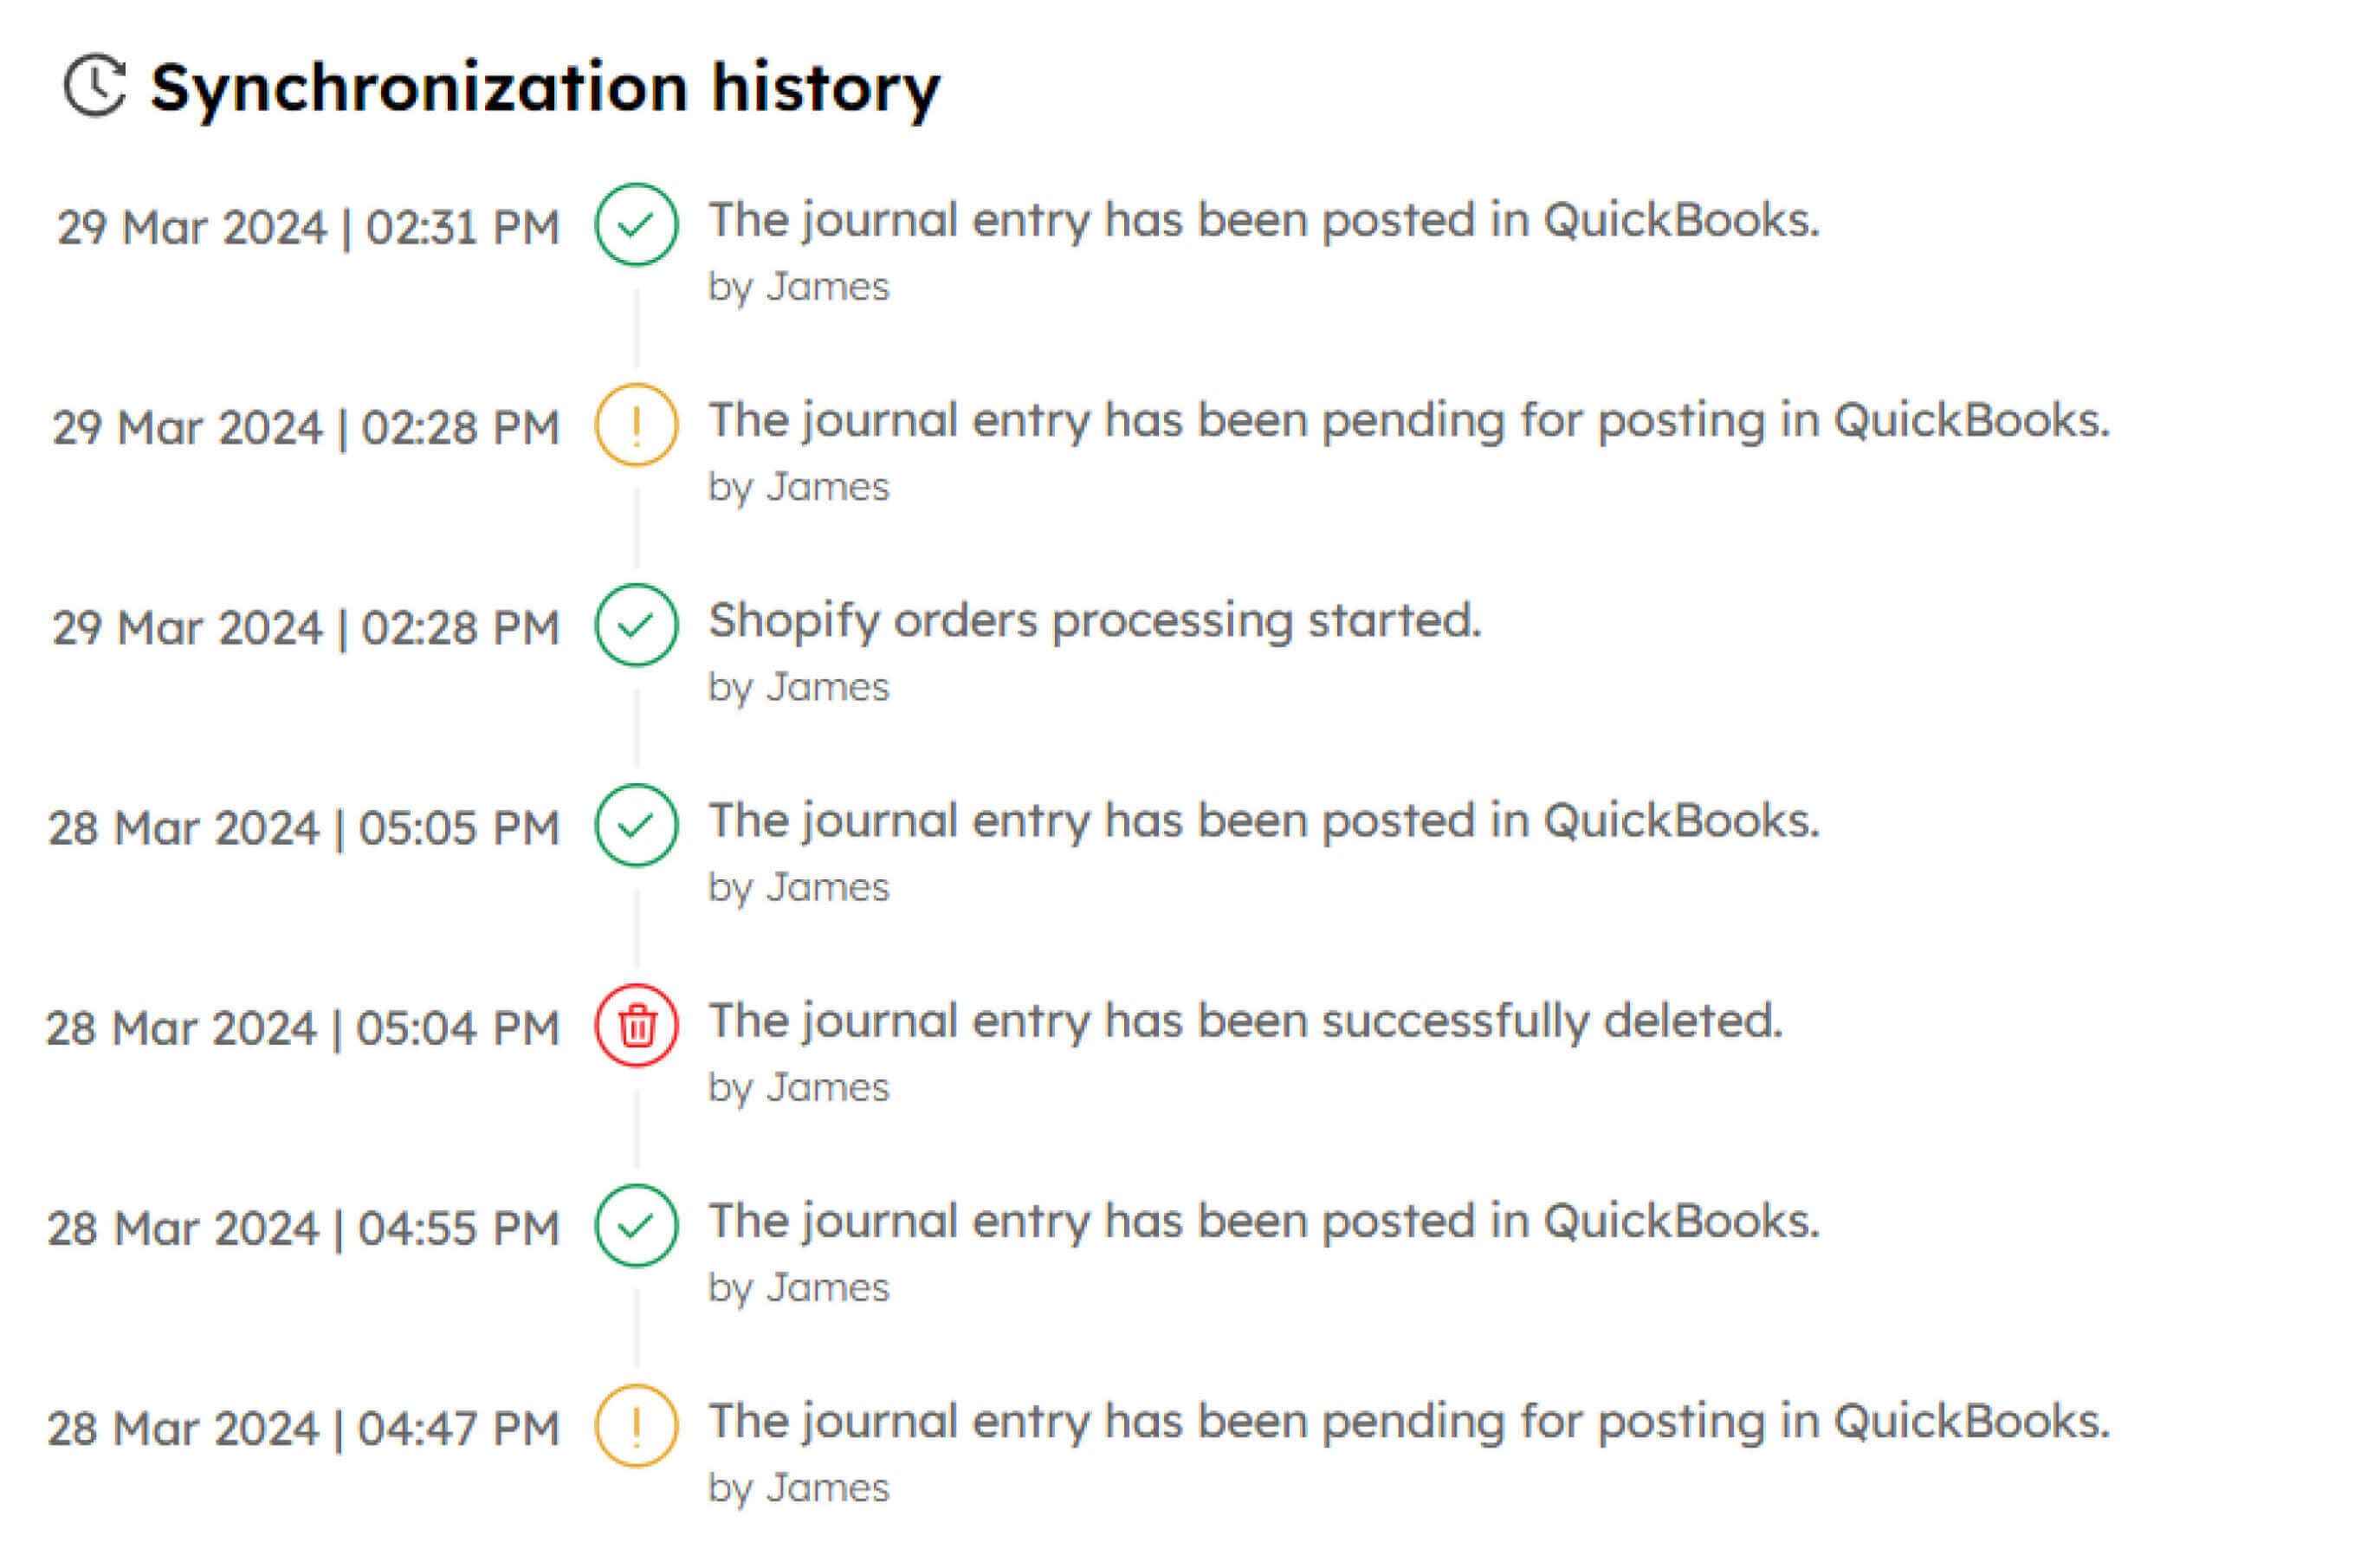
- Access to sync history is crucial for transparency and troubleshooting in managing Shopify payouts.
- Sync history enables tracking of synchronization processes over time.
- It includes details like sync dates, times, transaction statuses, encountered errors, and actions taken.
Contact to Support Team #
- Access to a dedicated support team is essential for assistance and queries related to setup and ongoing operation of synchronization processes.
- Support extends to clarifying setup instructions and offering general assistance to enhance the user experience.
- You can reach out to us at any time for any kind of support!
Feel free to contact us through the following channels in case of any queries or concerns:
Email:sales@synctools.io
Telephone +44 7380328797
USA number +1 323 672 3738


