Shopify + Quickbooks Online Configuration Guide for Summarized Journal #
Synctools acts as a bridge between your Shopify store and your QuickBooks Online accounting software. This guide walks you through the setup process so you can automatically sync your sales data and streamline your accounting.
Login to SyncTools #
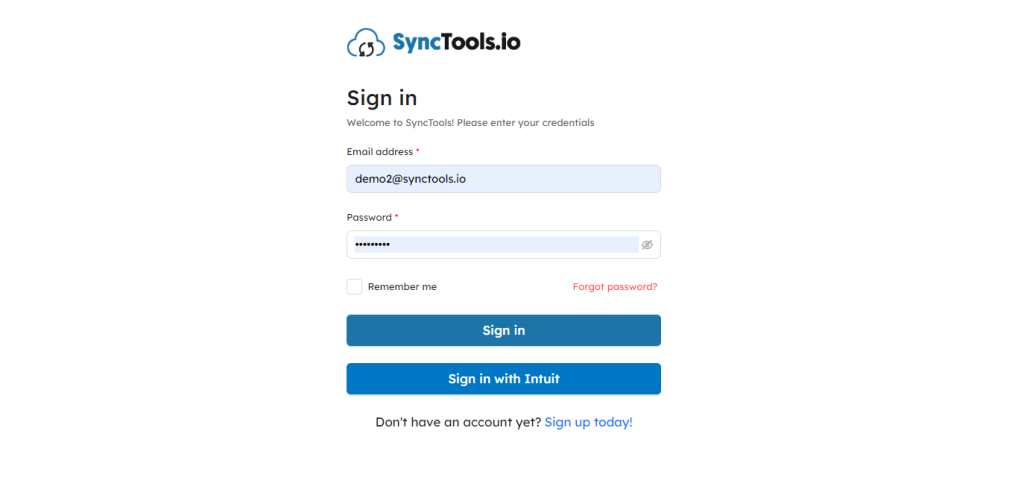
Welcome to SyncTools! Here’s how you can log in:
1️⃣ Enter the email you used during registration.
2️⃣ Provide the password you created. If you can’t remember it, click on Forgot Password? to reset it.
? Sign in with Intuit: Skip entering credentials and use your Intuit account to log in instantly!
? Note:Make sure you check the Remember Me option if you’re using your personal device to stay signed in.
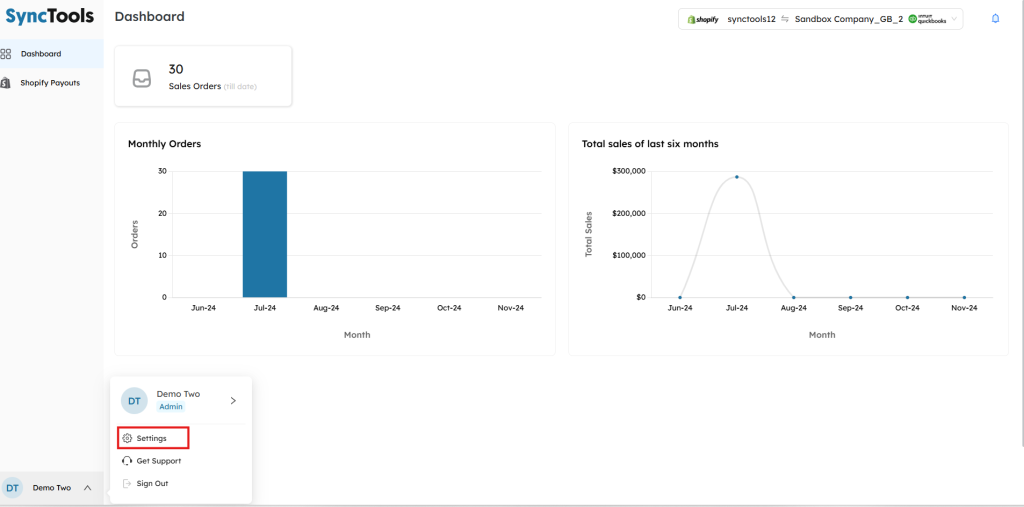
Once you sign in, you’ll land on the Dashboard, your control center for SyncTools! Here’s what you can do:
- View your sales orders count and graphs showing Monthly Orders and Total Sales of the Last Six Months. These visuals help you track your business performance at a glance!
Start by clicking Settings to configure the integration with Shopify and QuickBooks Online seamlessly. This step is essential for syncing your data! ?
Choosing How Your Sales Data Syncs #
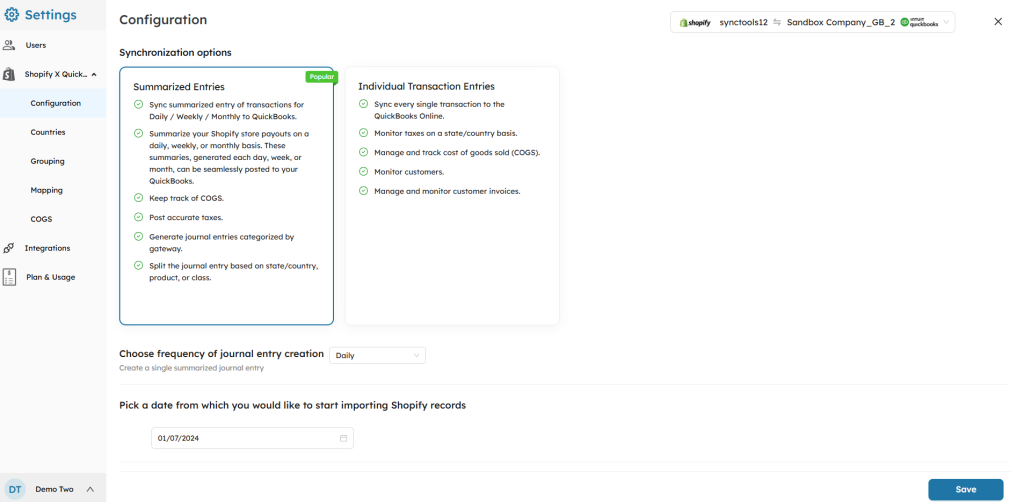
In the settings, you’ll find “Configuration” option where you’ll see two main choices for how your Shopify sales data gets sent to QuickBooks Online:
#
1. Synchronization Options #
You can choose how the data should be synced to QuickBooks Online based on your business needs:
- Summarized Entries (Recommended)
Data from Shopify is summarized (daily, weekly, or monthly) before syncing to QuickBooks Online.
Ideal for businesses managing high transaction volumes to reduce clutter in QuickBooks Online.
- Individual Transaction Entries
Every single Shopify transaction is synced to QuickBooks Online.
Best for businesses needing detailed visibility into individual orders, taxes, and invoices.
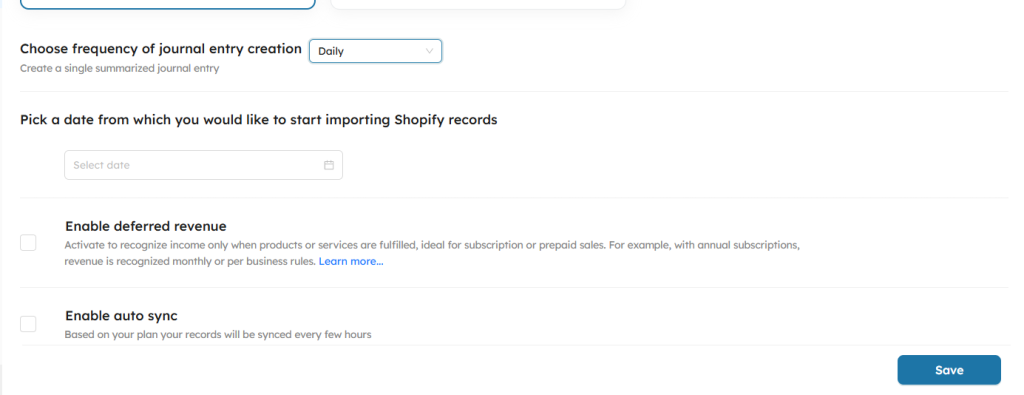
2. Frequency of Journal Entry Creation #
Choose the interval for syncing Shopify data to QuickBooks Online:
- Daily: Creates one journal entry per day.
Scenario: You run an online store that generates 10 orders per day in Shopify.
How it Works:
-
- All 10 orders from a single day are summarized into one journal entry.
- The journal entry includes the total sales, taxes, shipping income, fees, etc… for that day.
- Weekly: Consolidates data into one entry per week.
Scenario: You choose to sync data weekly to capture a broader view of transactions
How it Works:
-
- Orders from July 1 to July 7, 2024 are grouped into one journal entry.
- Shopify payouts, taxes, expenses, etc…for the week are summarized.
- Monthly: Summarizes all transactions for the month into a single entry.
Scenario: You prefer monthly summaries to match Shopify payouts with your bank reconciliation.
How it Works:
-
- Orders from July 1 to July 31, 2024 are grouped into one journal entry.
- Includes a complete summary of revenue, taxes, fees, and shipping income for the month.
3. Select Start Date #
Pick the date from which Shopify data should start syncing to QuickBooks Online.
- Example: If you choose 01/07/2024, all orders from this date onward will be included in the sync process.
4. Save Configuration #
Once all preferences are set, click Save to confirm your choices. The system will begin syncing Shopify data according to the specified settings.
? Note: Be sure to select the correct frequency and start date to ensure data accuracy and alignment with your QuickBooks Online setup.
Enabling Auto Sync #
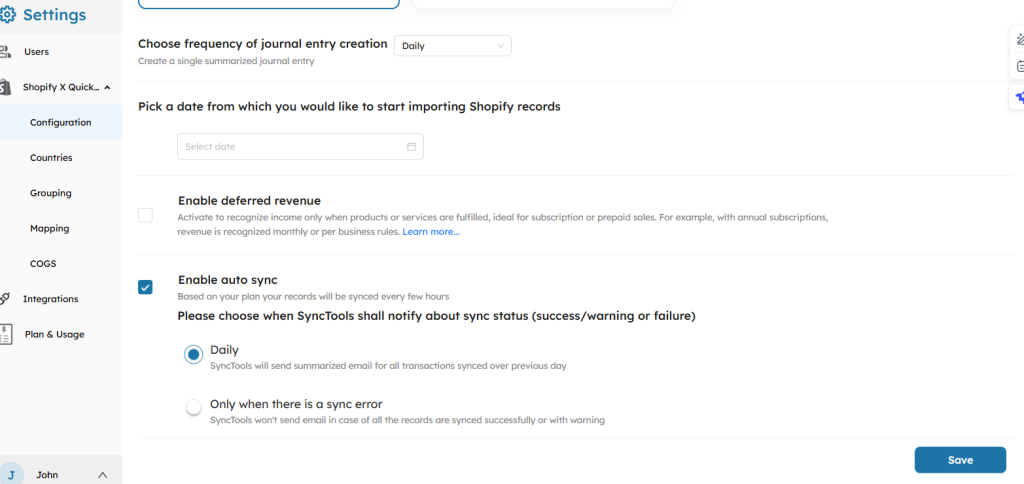
By checking the “Enable auto sync” box, Synctools automates the syncing process for your Shopify data with QuickBooks Online.
How It Works:
- Once enabled, Synctools will continuously sync data every few hours without requiring manual intervention.
- This ensures your QuickBooks Online stays up to date with Shopify transactions, saving time and reducing the chance of human error.
Benefit: You can focus on running your business while Synctools handles the data synchronization in the background.
Choose How You Get Updates
Pick how you’d like to stay informed about your data syncs:
- ? Daily Updates
- Get a daily email showing all transactions synced from the previous day.
- Example:
- “Synctools synced 100 orders yesterday without any issues.”
- ⚠️ Only When There’s an Error
- Synctools will notify you only if something goes wrong during the sync.
- Example:
- “Sync error: Missing chart of accounts for Product B. Please check your settings.”
? Note: For a detailed guide on how the Enable Auto Sync feature works, check out our documentation here.
Enable Deferred revenue #
By activating this option, you configure SyncTools to recognize revenue only when specific conditions are met, aligning with revenue recognition principles. This prevents premature income recognition and ensures compliance with accounting standards like GAAP or IFRS.
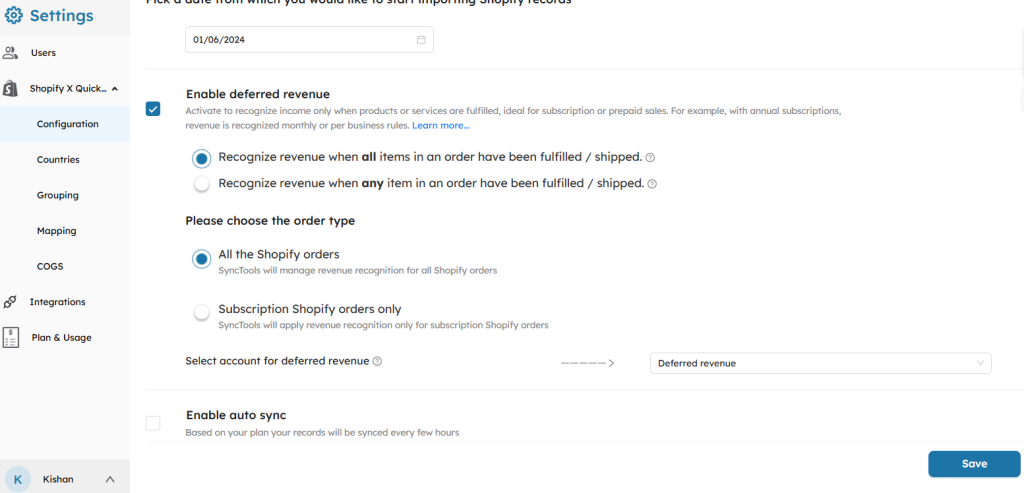
Revenue Recognition Rules #
You have two options to decide when revenue is recognized:
- Recognize revenue when all items in an order have been fulfilled/shipped:
-
- Use this option if your revenue should be recognized only after every item in the order has been delivered.
-
- Suitable for bulk or complete-order-based businesses.
Scenario:
A customer places an order for 3 items (e.g., a t-shirt, a mug, and a notebook).
- The t-shirt and the mug are shipped immediately, but the notebook is on backorder and shipped a week later.
Accounting Impact:
- Revenue recognition will not occur until all 3 items in the order have been shipped.
- Shopify records show the order as “partially fulfilled” until the last item is shipped.
- Once all items are fulfilled, SyncTools will sync the order as revenue earned in QuickBooks Online, debiting Deferred revenue and crediting Revenue.
Shopify-to-QuickBooks Online Process:
- Until the notebook is shipped, revenue remains in the Deferred Revenue account in QuickBooks Online.
- When the notebook is shipped, the entire order value is moved to Revenue in QuickBooks Online.
- Recognize revenue when any item in an order has been fulfilled/shipped:
-
- Select this if revenue can be recognized partially, as items are fulfilled.
- Ideal for businesses that ship items individually and recognize revenue incrementally.
Scenario:
A customer orders the same 3 items (t-shirt, mug, notebook).
- The t-shirt and mug are shipped immediately, while the notebook is on backorder.
Accounting Impact:
- Revenue is recognized for the items that are shipped.
- For example:
- T-shirt: Recognized immediately when shipped.
- Mug: Recognized immediately when shipped.
- Notebook: Deferred until it ships.
- The total revenue for the order is recorded incrementally over time.
Shopify-to-QuickBooks Online Process:
- T-shirt and mug amounts are synced to Revenue in QuickBooks Online upon fulfillment.
- The notebook amount stays in the Deferred Revenue account until shipped, at which point it is moved to Revenue.
- Choose the Order Type
- All the Shopify Orders:
-
- SyncTools will manage revenue recognition for all orders, ensuring a comprehensive and automated process.
- Use this option if deferred revenue is applicable across your entire Shopify catalog.
Scenario:
You sell a combination of subscription products (e.g., monthly coffee subscriptions) and regular products (e.g., mugs, t-shirts).
- Example Order 1: A customer buys a subscription coffee plan (billed monthly) and a one-time purchase of a mug.
- Example Order 2: Another customer buys a single t-shirt.
- Subscription Shopify Orders Only:
-
- Revenue recognition will apply only to subscription-based orders.
- Perfect for businesses with recurring billing models, like subscription boxes or memberships.
Scenario:
You sell only subscription-based products, such as a monthly skincare kit or a magazine subscription.
- Example Order: A customer subscribes to a skincare kit, billed annually, but kits are delivered monthly.
- Select Account for Deferred Revenue
-
- Assign the appropriate Deferred Revenue account in your Chart of Accounts.
- This account temporarily holds the revenue until it’s ready to be recognized.
- Why it’s important:
-
- Deferred revenue accounts are liabilities until the service or product is delivered.
- Correctly allocating this ensures compliance with accounting rules and an accurate representation of financial metrics.
? Note: For a detailed step-by-step explanation of the Enable Deferred Revenue feature, including examples and advanced configurations, refer to our comprehensive guide here.
Related Resources ? #
For the information on the configuration of Automapping feature, check out the following guide:
Shopify + Quickbooks Online Transaction Categorization using Auto Mapping


