


Welcome to the SyncTools integration setup guide. In this article, you will learn how to easily connect your Shopify store to Xero using SyncTools. This guide will walk you through each step to get your accounting automation up and running quickly.
Step 1: Start your Free Trial #
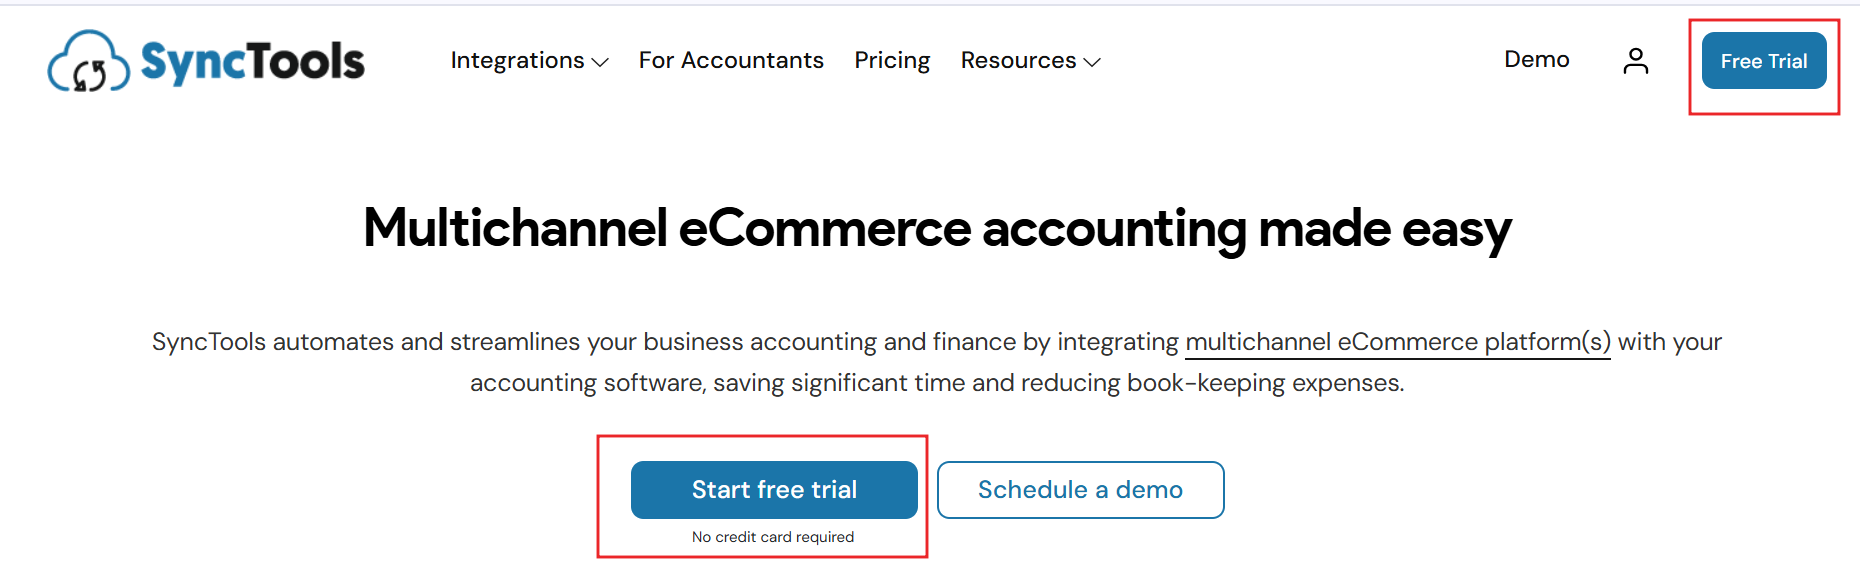
- Begin by visiting the Synctools website. On the homepage, locate the “Free Trial” button to start the process. Click on the button to initiate the signup process.
Tip : Starting your trial gives you full access to the integration features without any obligation.
Step 2: Choose Your Platform #
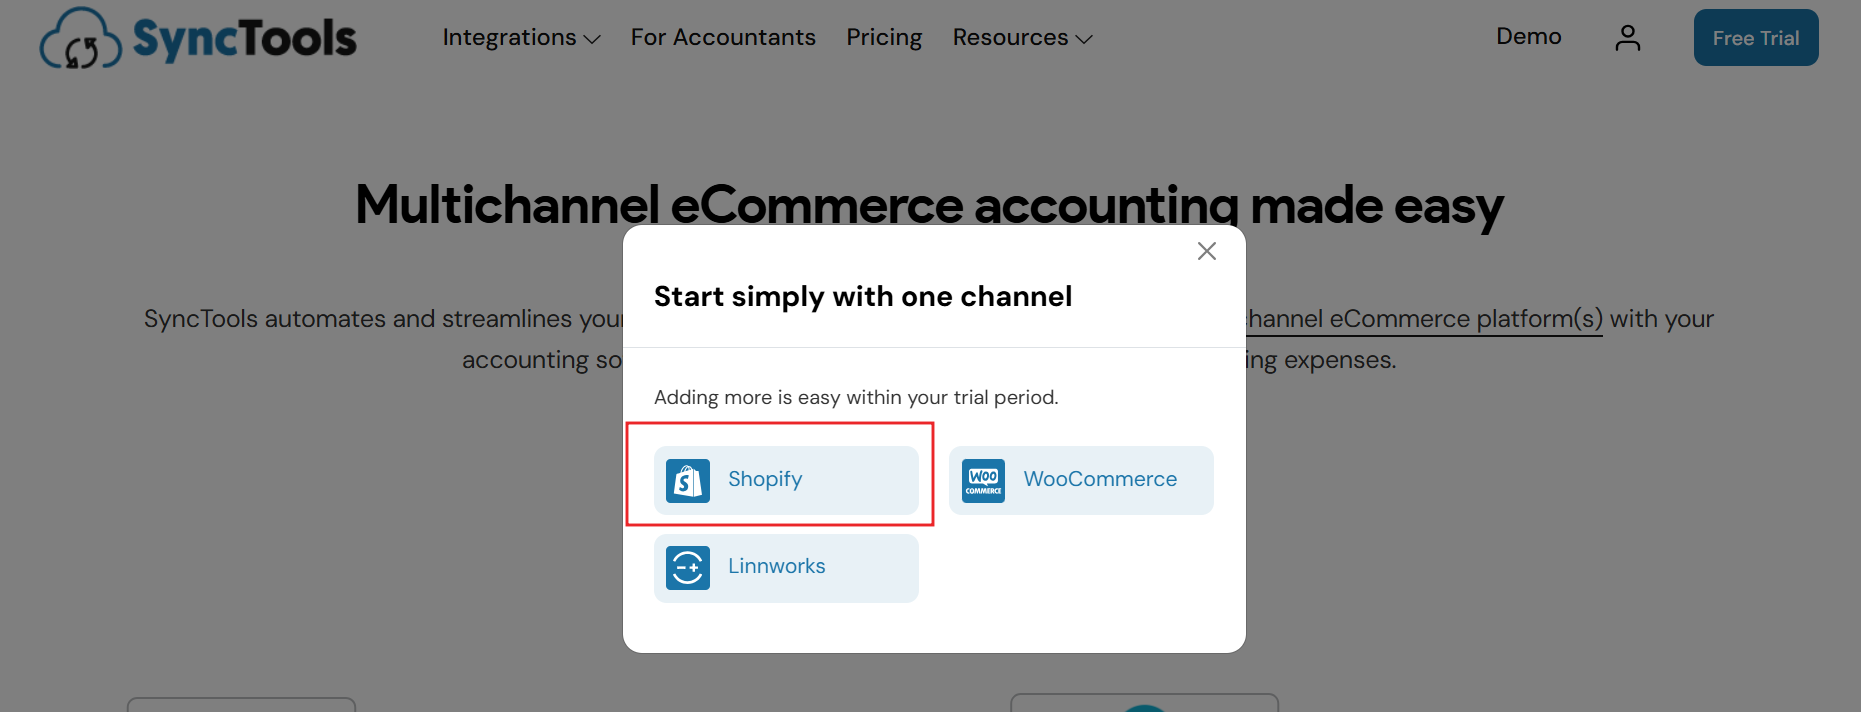
- After signing up, you’ll be prompted to choose your eCommerce platform. Select Shopify from the list of available platforms.
- This will enable SyncTools to connect directly with your Shopify store.
Tip : Make sure you have admin access to your Shopify store before proceeding with the integration.
Step 3: Enter your email address #
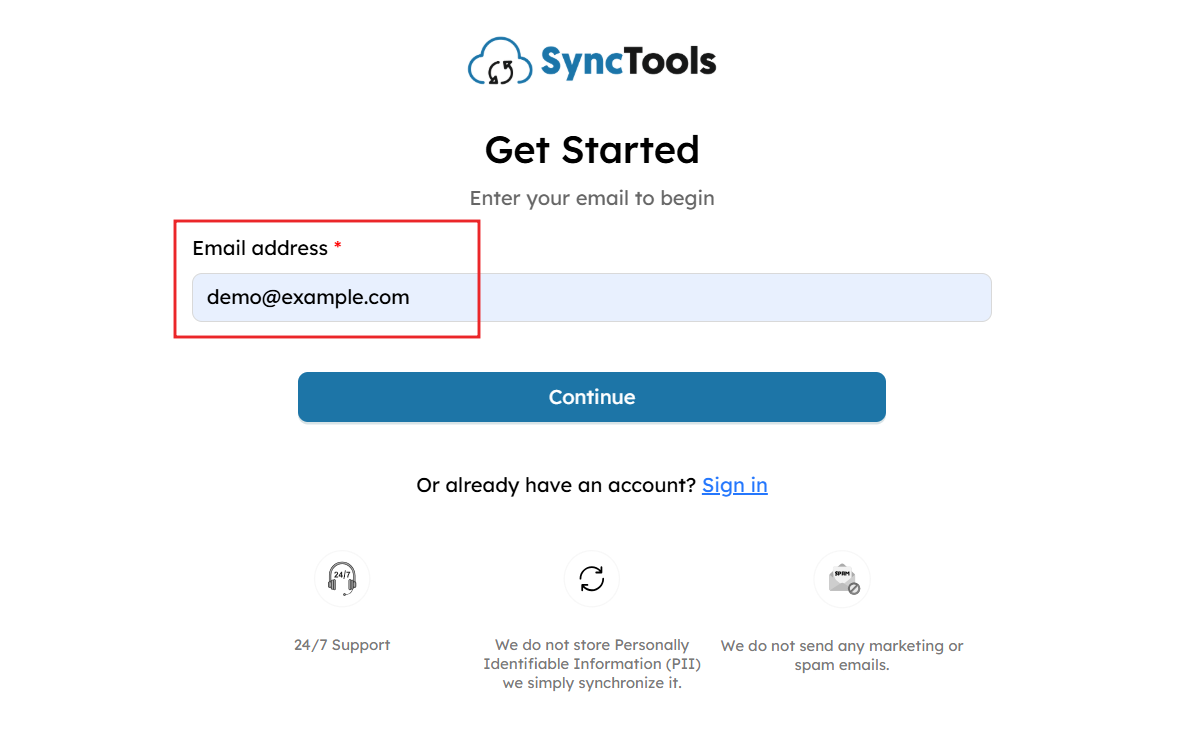
- After selecting Shopify, you will be redirected to the Synctools Sign Up page.
- Enter your email address to begin the sign-up process.
- After entering your email, click Continue.
- If you already have an account, click on “Sign in.”
Step 4: Verify the email address #
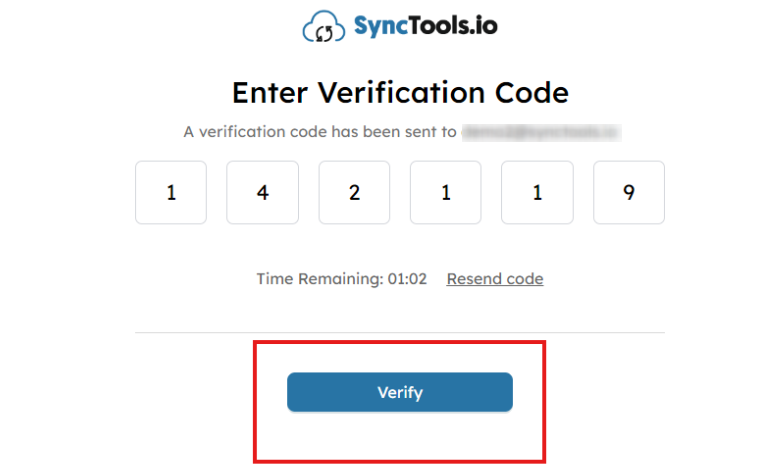
- SyncTools will send a verification code to the email you provided.
- Enter the code on the SyncTools website to verify your email address and proceed with the setup.
Tip: Check your spam folder if you don’t see the email in your inbox.
Step 5: Select Your Role #
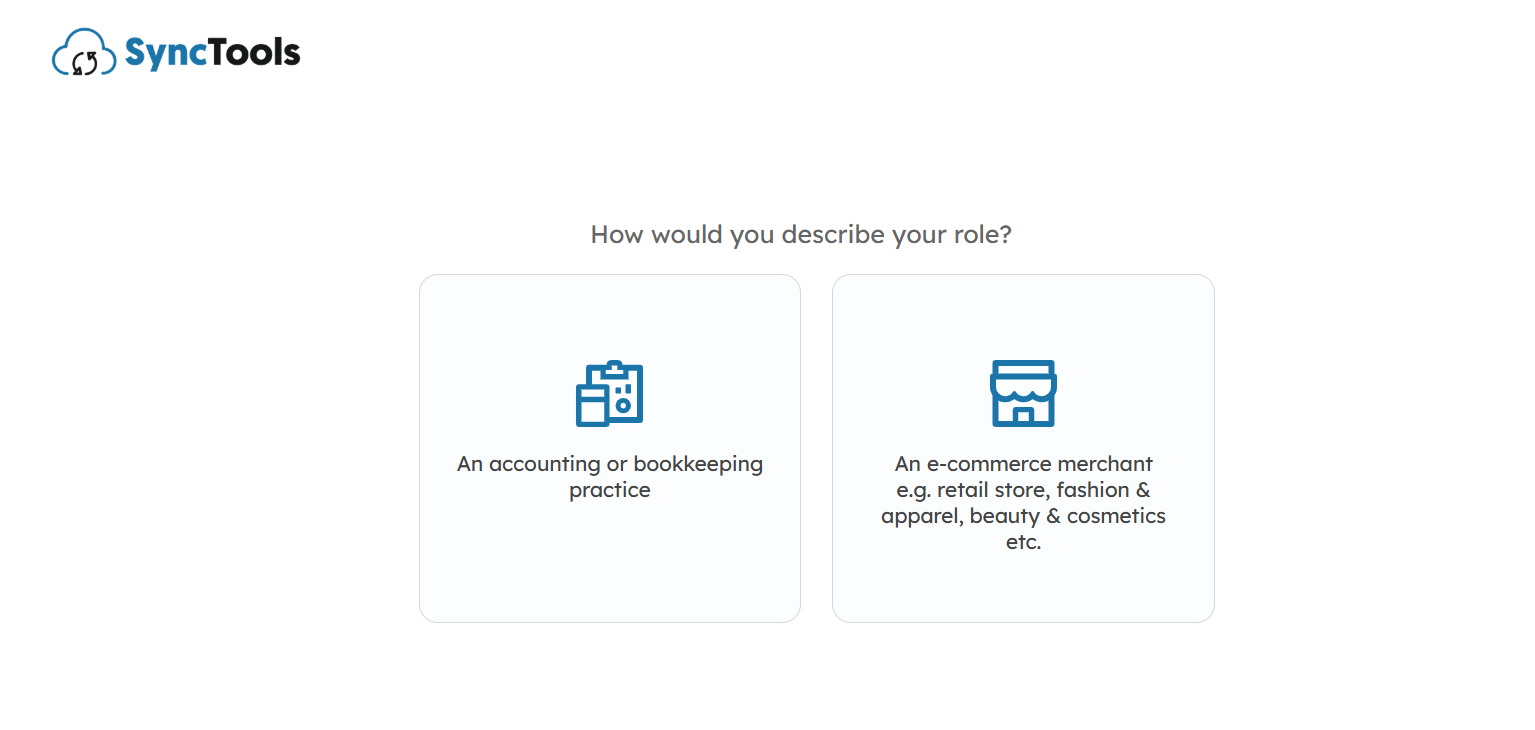
- SyncTools will ask you to select your role. Choose E-commerce Merchant if you own a Shopify store or Accountant/Bookkeeper if you’re handling multiple clients or businesses.
- This helps SyncTools tailor the integration process for your needs.
Note: If you’re an accountant or bookkeeper, you can manage multiple businesses under one SyncTools account.
Step 6: Complete Your Registration #
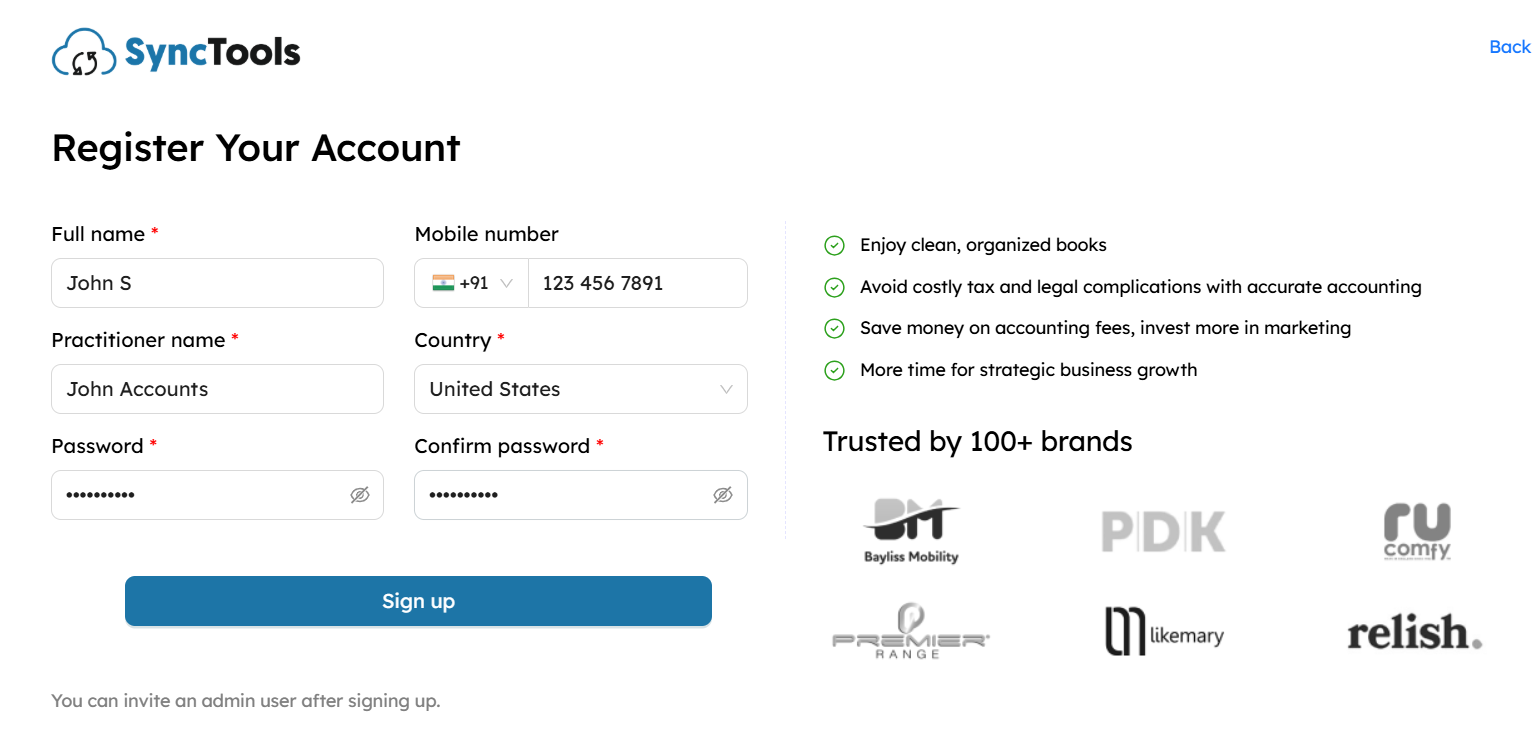
- Provide your personal details, including your name and a password for your account.
- Once completed, click Sign Up to finalize your registration.
Step 7: Invite an Admin (Optional) #
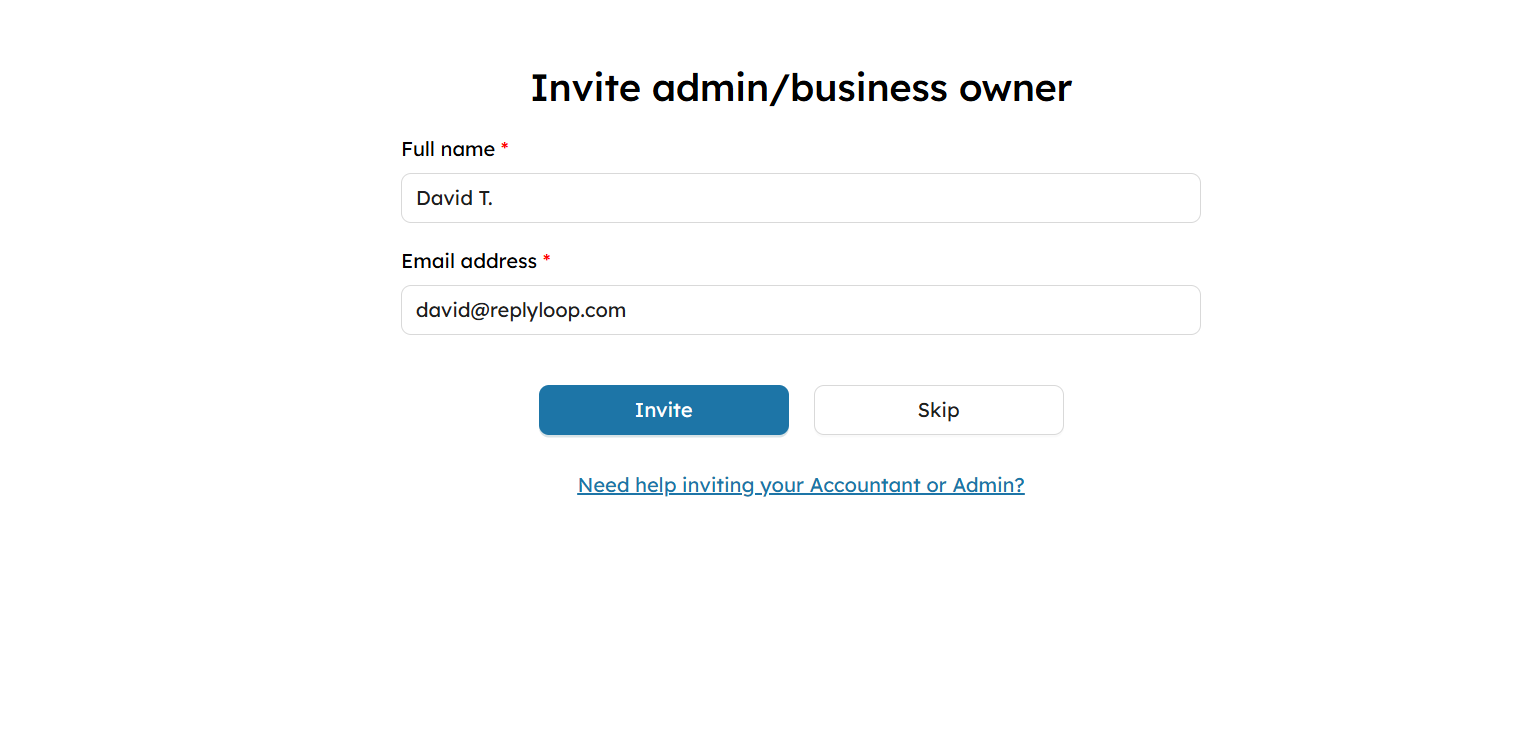
- If you’re working with a team or another business owner, you can invite them to manage the integration by entering their email address.
- If you’re the sole user, you can skip this step.
Step 8: Welcome to SyncTools! #
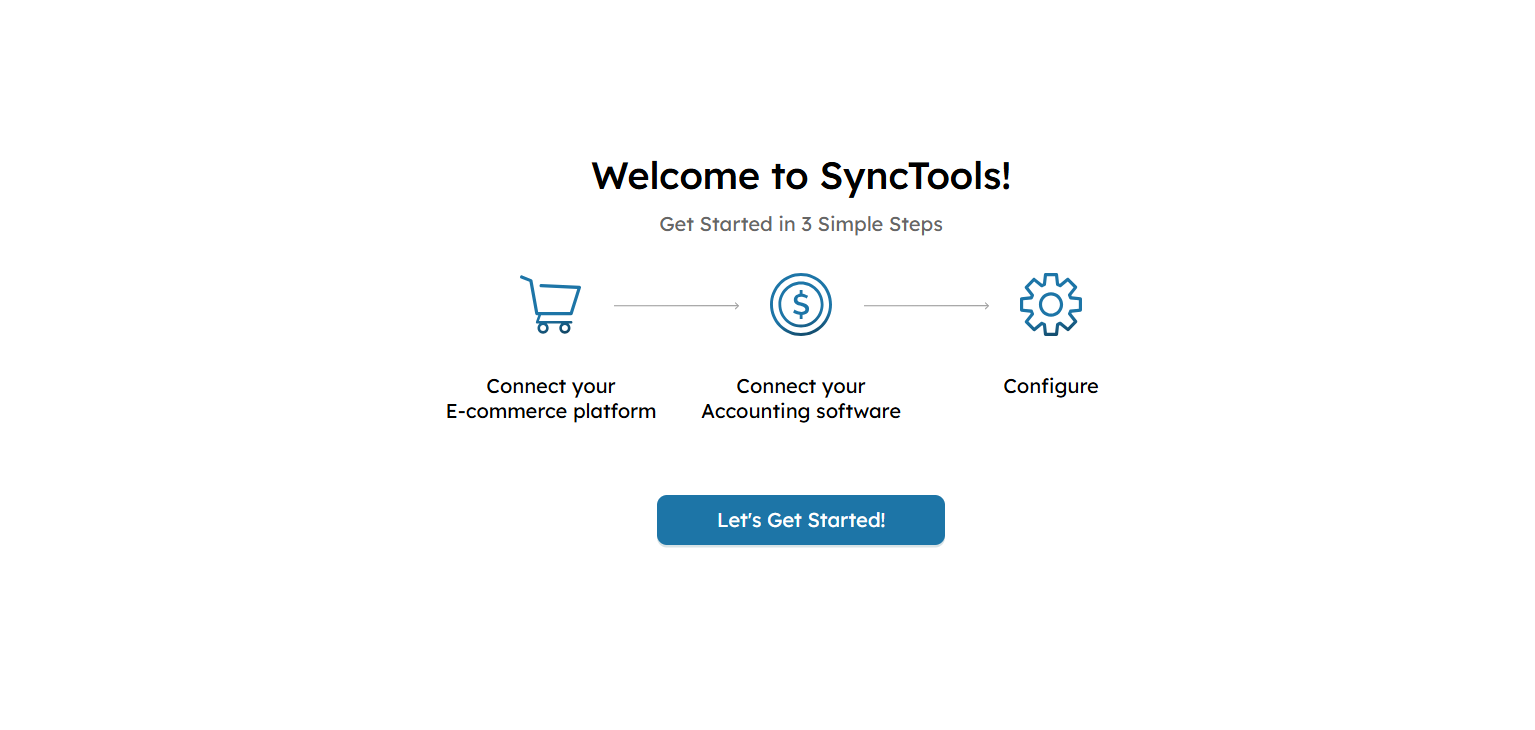
You’re Almost There!
- Now that your account is set up, you’ll be guided through the next steps:
- Connect your Shopify store
- Link your Xero account
- Configure SyncTools for seamless transaction syncing
- Click on Let’s Get Started to move on.
Step 9: Connect Shopify and Xero to SyncTools #
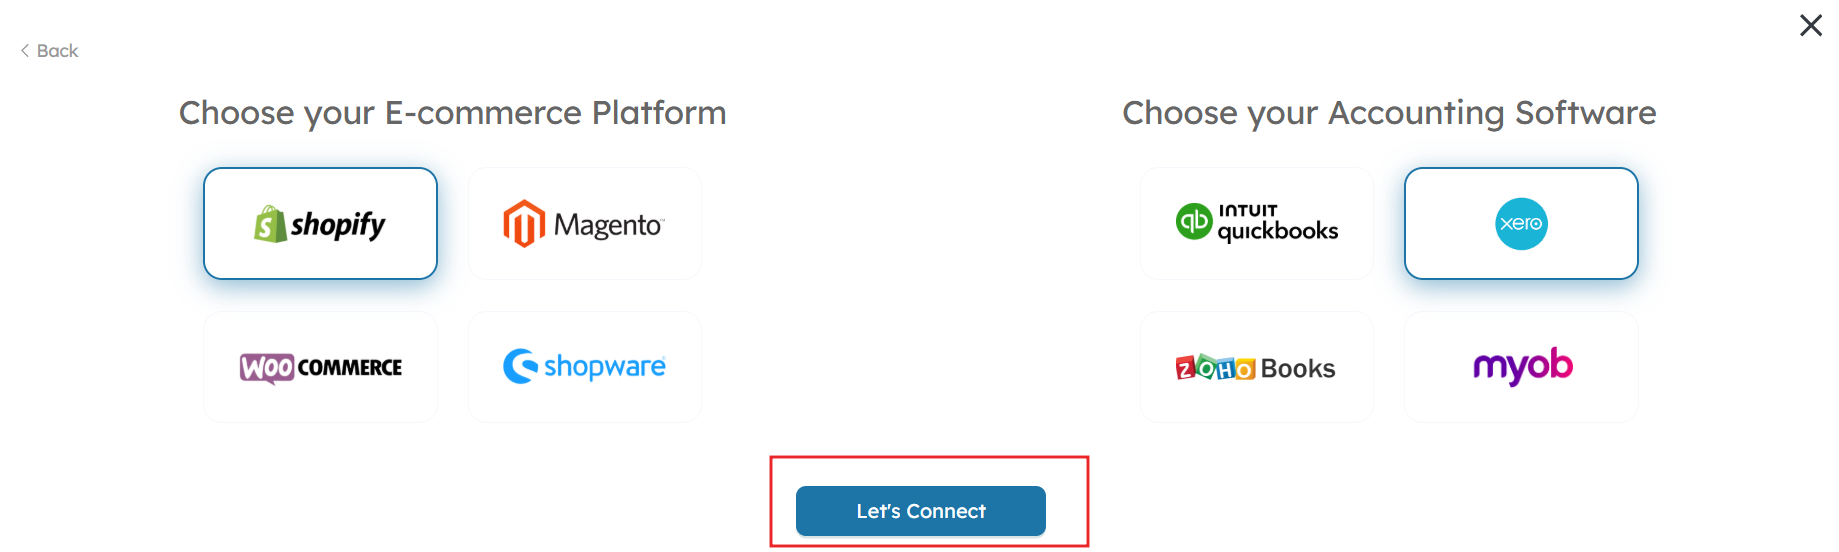
- On the integration page, select Shopify as your eCommerce platform and Xero as your accounting software.
- Click Let’s Connect to finalize the integration. SyncTools will automatically sync your Shopify sales data to Xero based on the configuration, simplifying your accounting.

- In the Connect to Shopify section, enter your Shopify store URL (e.g., https://yourstore.myshopify.com).
- Click Connect once you’ve entered the correct URL to establish the connection between Shopify and SyncTools.
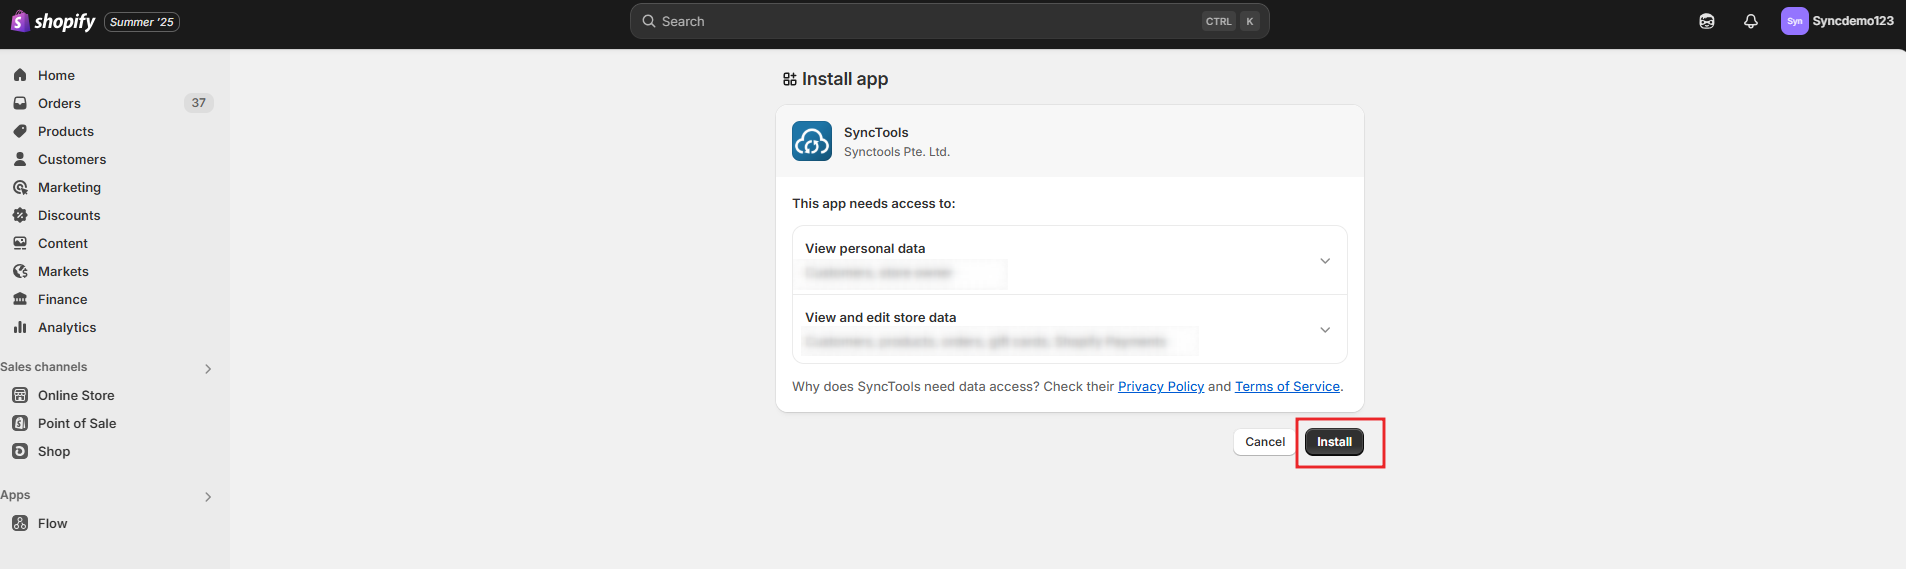
- You will be redirected to Shopify’s app page to install SyncTools.
- Click Install to grant SyncTools the necessary permissions to access your Shopify store data.
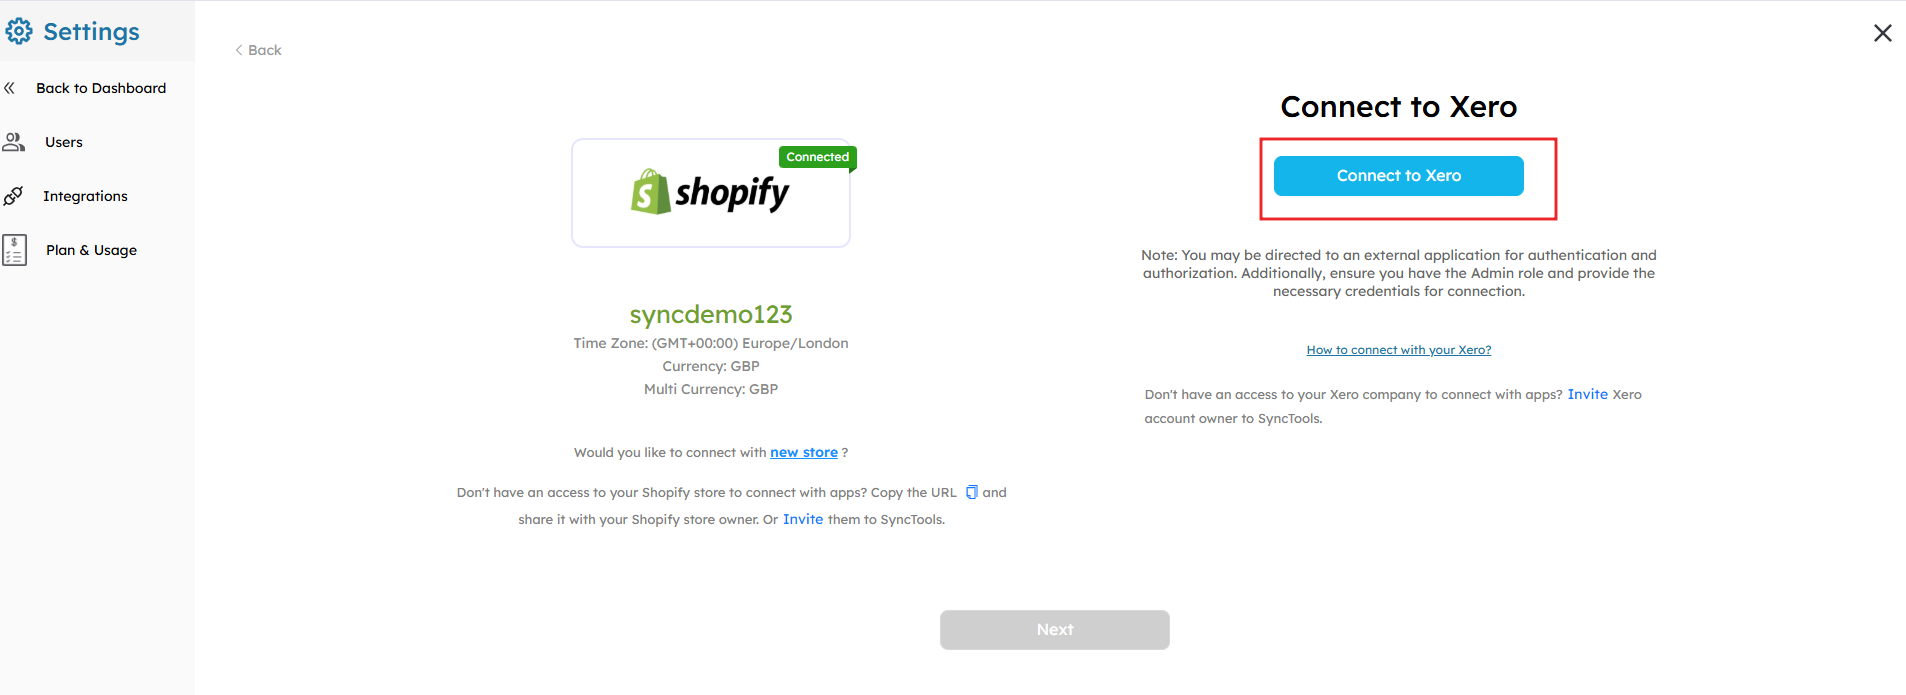
- After connecting to Shopify, you’ll be prompted to connect to Xero.
- Click Connect to Xero and log in to your Xero account if prompted. You will need to select the Xero organization to sync with.
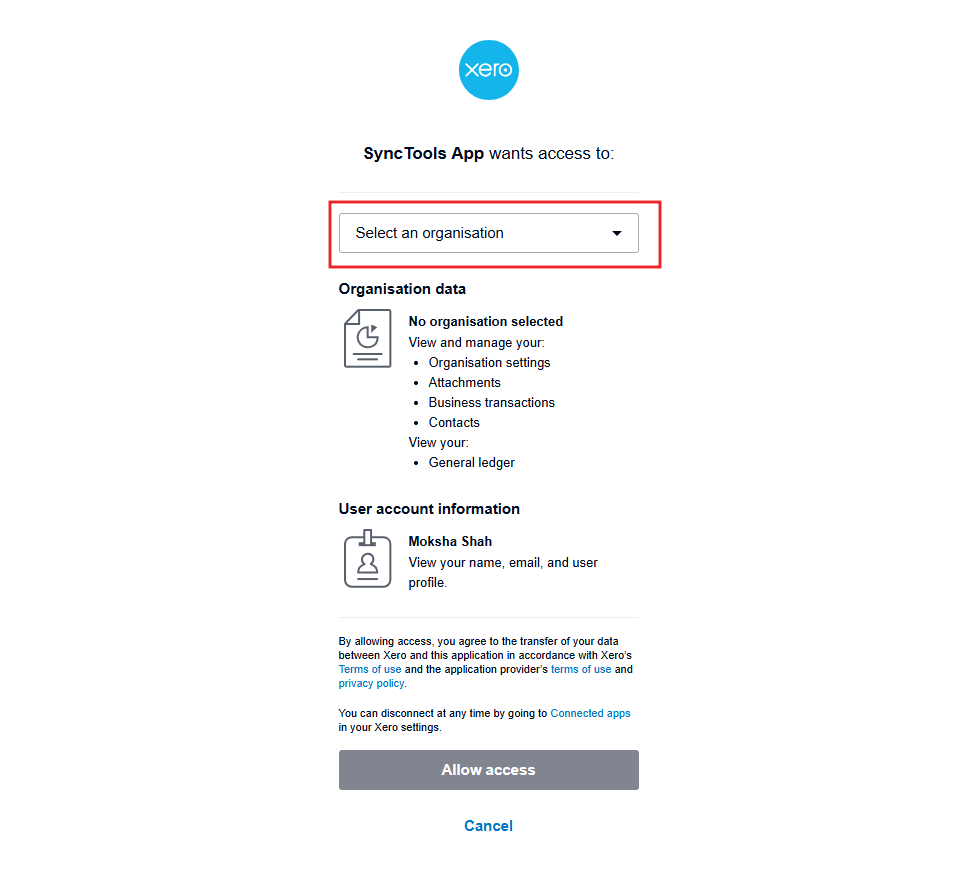
- Once you select the organization, grant SyncTools access to your Xero account by clicking Allow Access.
- This allows SyncTools to sync your financial data from Shopify directly into Xero.
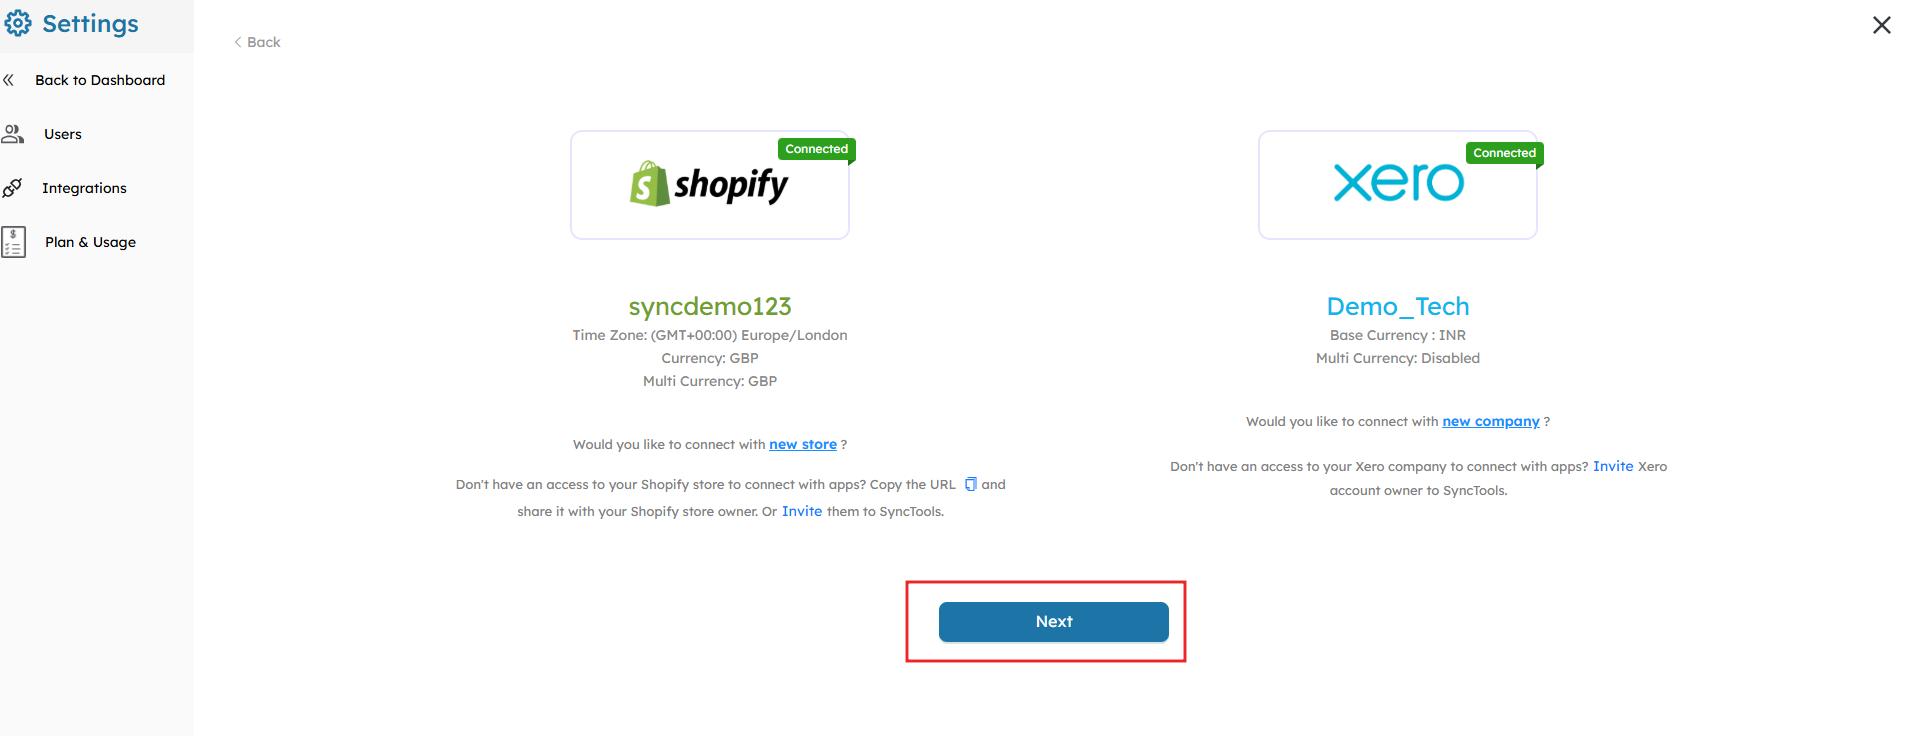
- After completing the Xero connection, SyncTools will show a confirmation page that both Shopify and Xero are now connected.
- Click Next to move forward and begin with configuration.
Note : You can connect multiple Shopify stores or Xero companies if needed.
Related Resources 📘
For the information on the , check out the following guide:
SyncTools Shopify to Xero Integration Guide: Configuring Summarized Sync


